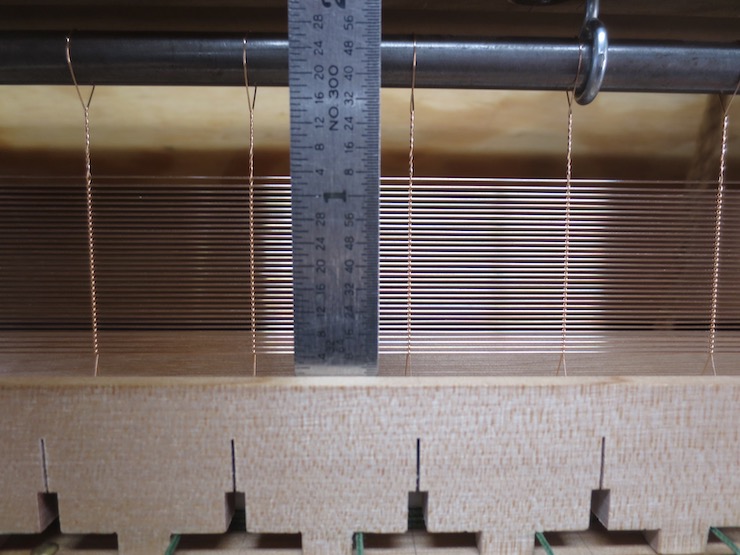
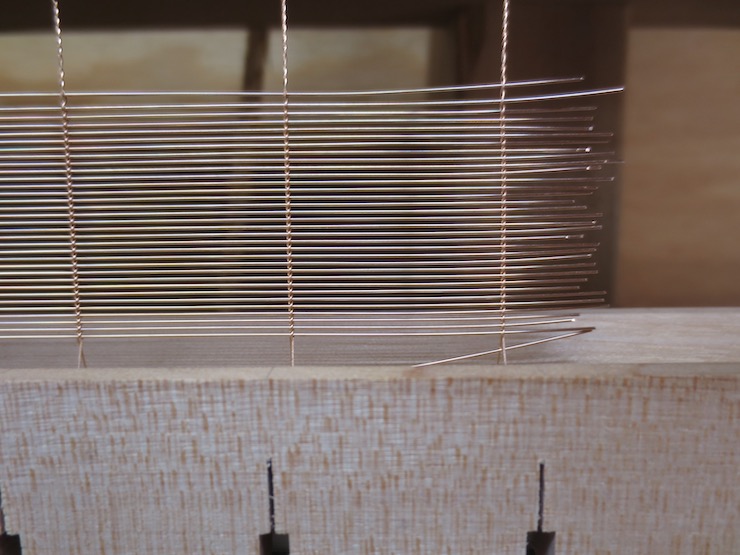
At 30 wires per inch this is the finest facing I’ve ever made. After running tests to see what size chain wire to use I set out to make a facing for a 12″ x 18″ mould. The laid wires are .0144″ diameter 3/4 hard phosphor bronze and the chain wire is .0102″ diameter annealed phosphor bronze.
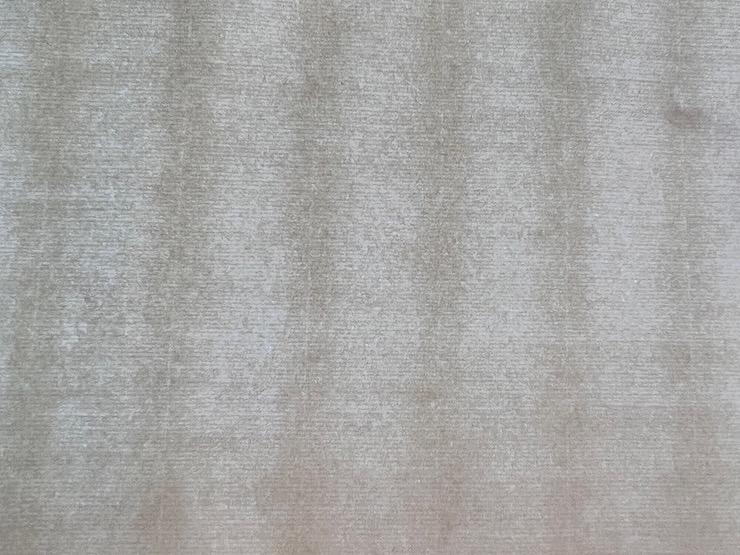
A customer expressed interest in this paper produced in Amalfi, Italy in the 1960s. It is ‘antique laid’ paper made on a single faced laid mould (as all European paper was before the mid 1700s). Note the distinctive ‘shadow zones’ along the chain lines created by uneven drainage from the mould structure. The paper shows a laid wire spacing of about 30 wires per inch. I am told that close wire spacing was typical of a lot of 17th century papers. In those times the wires would have been copper or brass. It’s not clear whether these wires would have been put together on a loom or by hand. It would have required a great deal of skill to make a laid facing like this by hand.
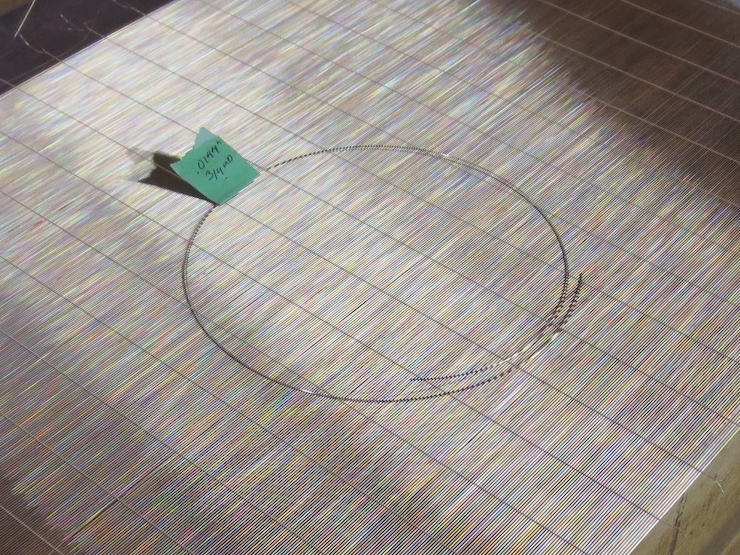
I welcomed the challenge of trying out a very fine facing on my loom! First the laid wire needed to be straightened (and this wire started out very curved). Here is a loop of the new wire placed on the finished facing. The wire came with a very tight cast of about 5-1/2″ diameter.

At first it was difficult to straighten it well. It’s never perfectly straight. Most of the wire ended up like the larger pile on the right. Very near the end I had a breakthrough of sorts that allowed me to pull wires that looked like those on the left.
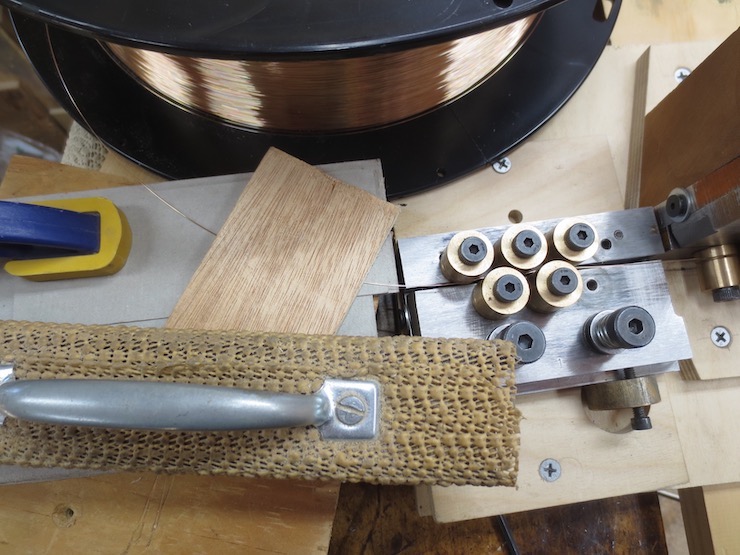
What helped was drawing the wire between pads to control the orientation of the wire as it entered the first set of rollers, thereby improving consistency in the final, straightened wire. Small adjustments to the rollers (to take out either cast or helix) now seemed to give understandable and more predictable results. Before this the wires would cycle back and forth from nearly straight to fairly curved making it difficult to determine what adjustments to make. The pads were built up (from scraps around the shop) to hold the wire at the same level as the grooves in the rollers. In this first, somewhat random attempt, the layer just below the wire is cardboard and a small piece of plywood is held on top with a weight. Layers of paper shim (these are hidden under the weight) are used to create a space for the wire to travel through without much drag. The purpose is to hold the curve (cast) of the wire firmly horizontal as it enters the grooves in the first (horizontal) bank of rollers. Next time I’ll make a more permanent version to bring the pad even closer to the first roller. I’m pretty sure this will help and look forward to trying it out next time.
I have now added a permanent version which can be viewed at the bottom of post #19, “Straightening Laid Wires”.
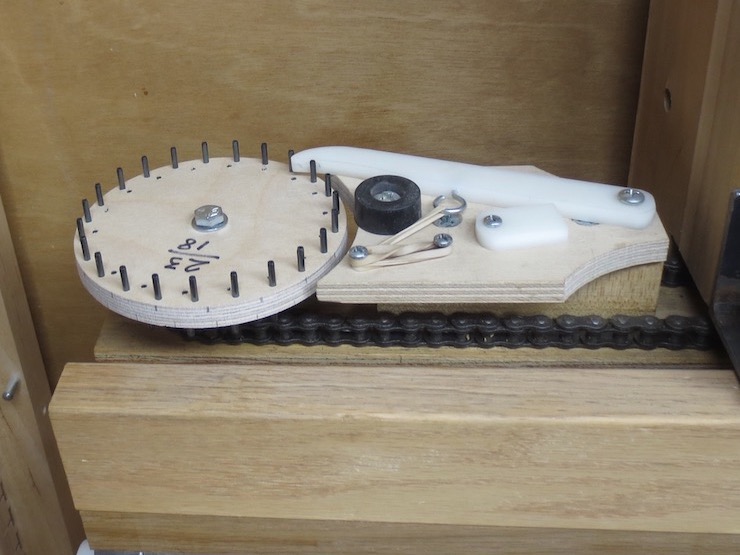
Counting 10 clicks using this 23 pin ‘counting wheel’ yields an interval of 29.9 wires per inch. After the wire weights were removed from the finished facing it shrank just a bit and ended up even closer to 30 wires per inch.

The two sizes of wire worked beautifully together though the curvy wires were a little difficult to feed into the trough.
The excessive curve left the ends a bit wild. After being stitched to the mould the usual process of smoothing out wires along the ends will be more difficult.

The partly finished laid facing.
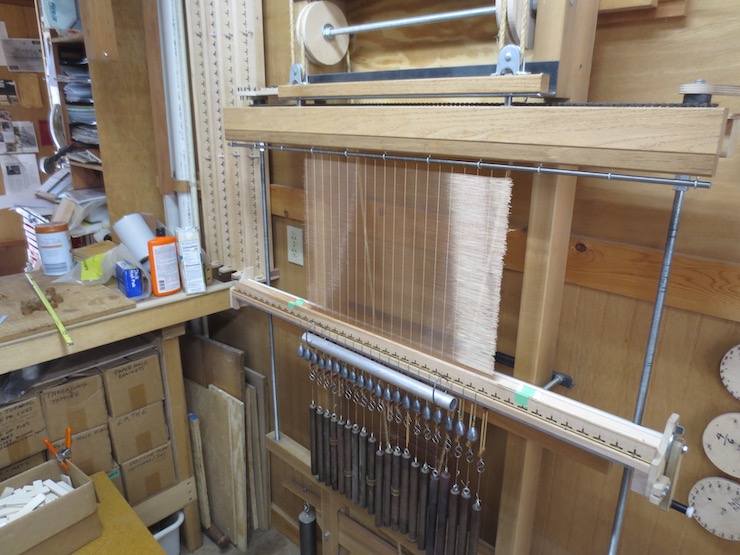
Many old papers were made on moulds with closely spaced, very fine laid wires. This facing will be made into an ‘antique laid’ (single faced laid) mould. In the hands of a skilled papermaker this should allow some of the qualities of these old papers to be reproduced.
