I’ve long been intrigued with the challenge of making bookbinding ploughs. A problem has been finding a source of knives. (Please let me know if you have any suggestions). The knife used in this post is high quality but it is small and not suitable for trimming thick books. This post details a method of using this knife in a different way to overcome this limitation.

These ploughs were designed to be adapted to fit different presses and knives by screwing appropriate blocks to the bottom. For this experiment I shaped and added red oak blocks to try out a different way of mounting the knife. The knife is fastened to the bottom of a beam. This allows it to traverse a long way without being limited by the length of the knife.
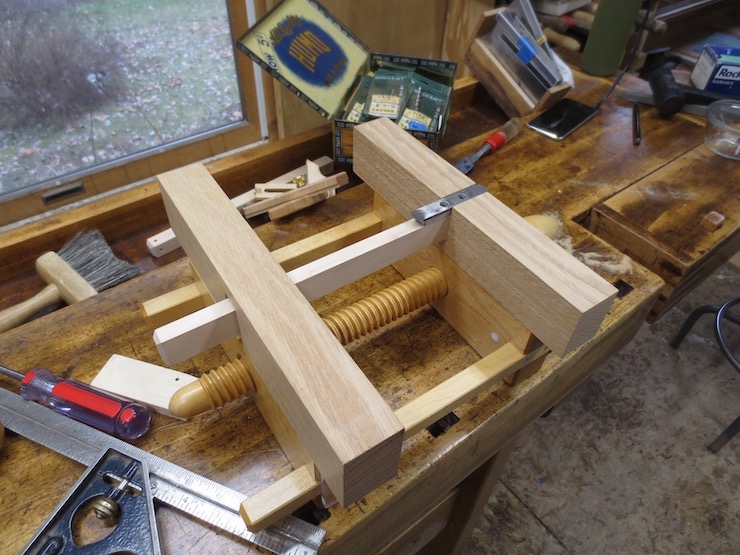
I used a spare guide bar for the beam from an earlier version that I no longer use. (Two of the newer version are installed on this plough.)
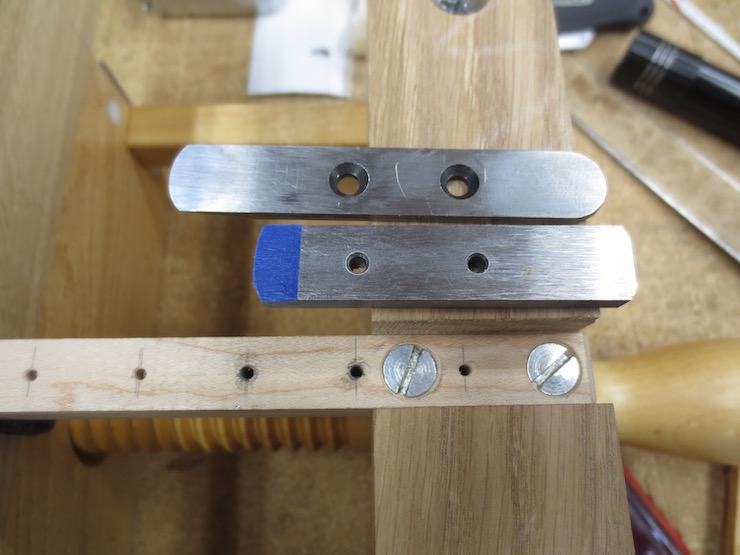
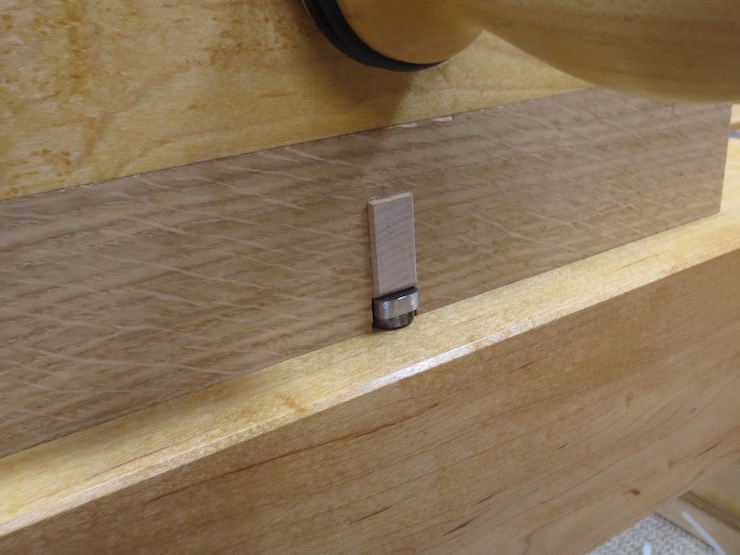
One end of the beam is screwed firmly into a slot at the bottom of the handle side of the plough. A row of holes allows the knife to be positioned at various places along the beam for trimming various thicknesses. A small piece of tape has been placed on one end of this steel spacer block. When the screws are tightened down this springs the knife; pushing the tip out so that only the cutting edge will contact the paper being trimmed.
The spacer block sandwiched between the knife and beam adds cutting depth. The knife is 1/8″ thick and the block 3/16″ thus limiting the depth of cut to 5/16″.
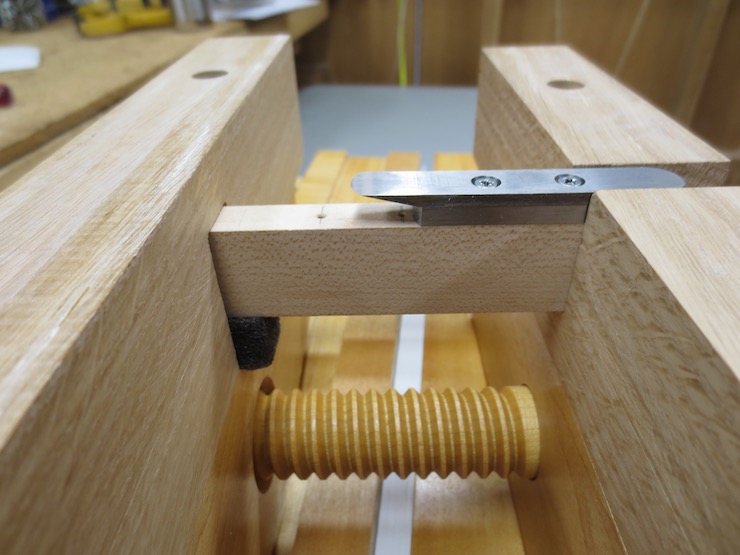
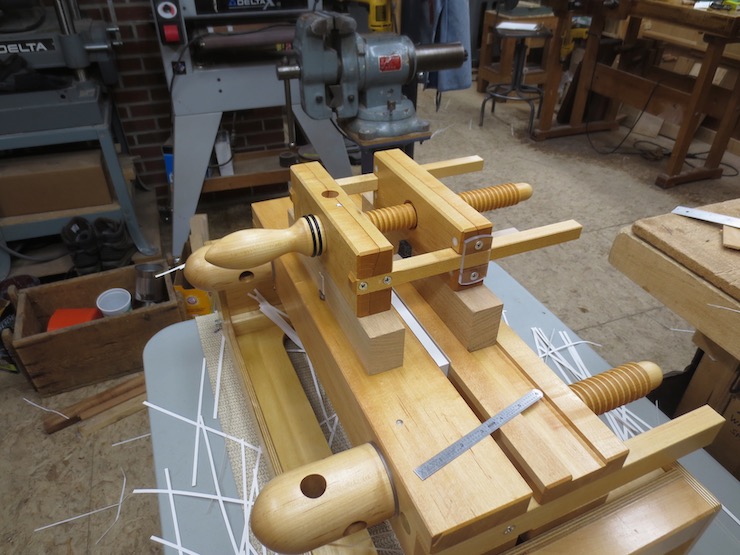
A view from the far end – opposite from where one would normally stand. The handle side of the plough is on the left. The knife is elevated about 1mm above the surface of the press. The bottom surface of the knife never touches the press.
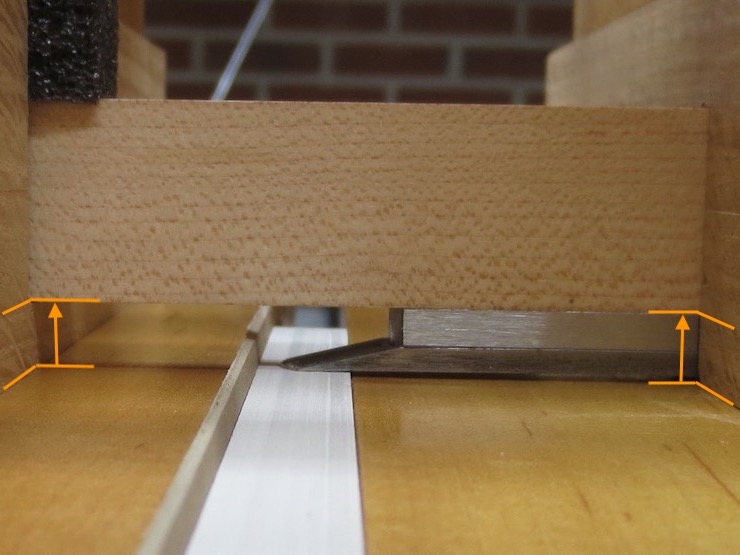
I have flipped the same photo and zoomed in to show how things would look from the operator’s point of view. The plough is constructed to hold the bottom of the beam exactly the same distance above the press at both ends (orange lines and arrows). This means that the plane of trim is established by the upper surfaces of both halves of the press. The knife is equally supported at all phases of its cut. The piece of black plastic foam at top left presses the sliding end of the beam against the bottom of the groove that it slides in. Next time I will use a steel bar instead of a wooden beam. The weight of the bar alone should eliminate the need for this packing. The holes for attaching the knife would be tapped to receive machine screws. The relatively small knife would be united with a hefty piece of steel to add rigidity.
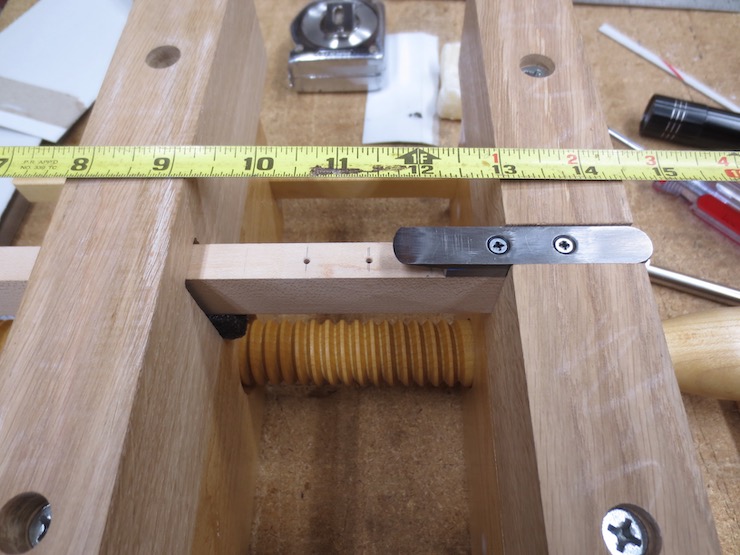
Here the knife is screwed down in its shortest position.

If screwed down here the plough could theoretically trim 3-1/2″ of width even though the knife is short. However the cut is also limited by the width of the jaws of the press and the design of the plough. The screw of this plough isn’t long enough and the press isn’t wide enough to trim more than 2-3/4″.
Different sizes and shapes of knife could be substituted as long as they have countersunk holes for attachment to the beam. A circular plough knife could likely be made to work as could various sizes of rectangular bar-shaped knives.
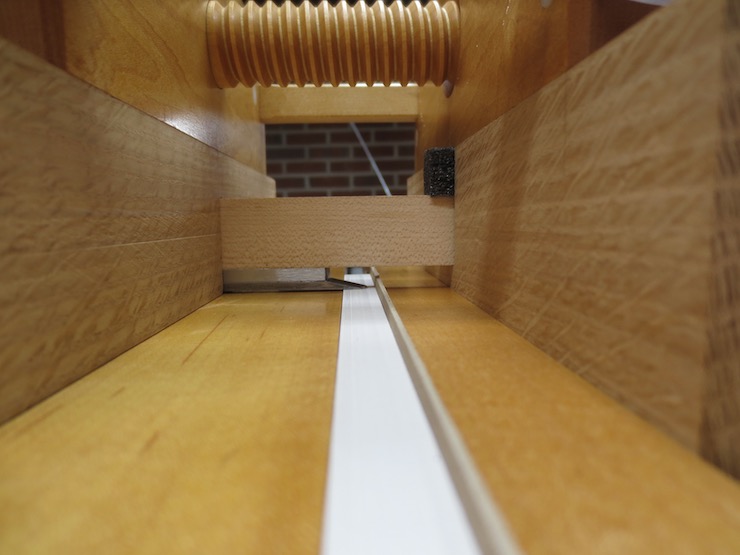
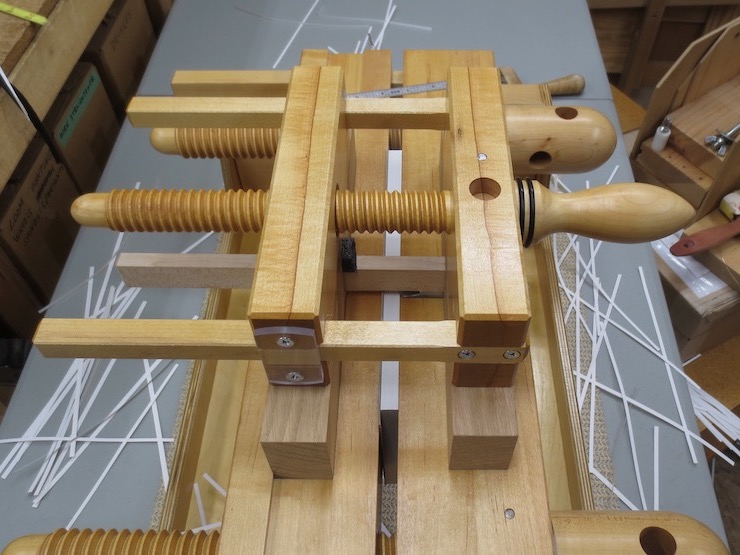
This end of the knife beam is rigidly attached to the handle side of the plough. The handle side of the plow body along with the beam form a rigid T shape so the knife can’t tip sideways as it slices.

The other end of the beam rests on the bottom of a wide notch to hold it a precise distance above the press. This keeps the cutting edge traversing in a plane exactly level with the top surfaces of the press as the knife is advanced by turning the wooden screw.
A view from the operator’s end.
This was an experiment to see if this would work and I think it worked very well. Along with a steel beam, version #2 likely won’t be as tall and may have longer screw and guide bars.

Hi Tim,
The challenge is trimming the book square in all dimensions. I am using German saddles with the foredge trim prior to rounding and the two remaining trims after. (image to follow)
LikeLike
Hi Tim
You asked about finding good knives. I might suggest contacting Jeff Peachey
<
div>of Peachytools.com. I actually found you through a blog of his
LikeLike
Hi Tim, I used flat steel 80CrV2 for the knife, because it was easier to temper and then to sharpen manually. I tried two types of knife, namely with a rounded edge, as you did, and with a V-shaped edge, like a marking knife. I got better results with the rounded blade, although it is harder to sharpen. I didn’t understand exactly why you left 1 mm distance from the press to the knife.
LikeLike
I haven’t had any luck heat treating and tempering. I would need to take some lessons. The curved edge gives a long shearing cut right at the tip where the cutting happens. The traditional plough has the knife riding along the surface of the press to keep it cutting in a plane. This knife doesn’t need to rub on the press top because the plane of cut is established by the beam. An experiment that seemed to work well, doesn’t require a long knife, and would possibly be better for trimming extra thick books. Thank you for your comments and suggestions!
LikeLiked by 1 person
I bought the steel from dictum at com and it came with tempering instructions. The traditional plough, that I have seen, do not come into contact with the press because they are attached with a dovetail system that tightens on the body of the plough. To adjust the knife to be parallel to the base, adjust the edges of the plough with a file.
LikeLike
I’ve found round leather skiving blades that I plan to attach, with an extended guard as well since they’re longer than my plough
LikeLike
Can you direct me to the specific brand of skivng blade? I am curious how you plan to attach it to the bottom of the plough.
LikeLike