I am no longer offering these.
Feel free to adapt the design for your own purposes.
Instructions for use are at the bottom of this page.
Model #5 Signature Punch
A new simple, lower cost design that offers easy set-up and consistent results.
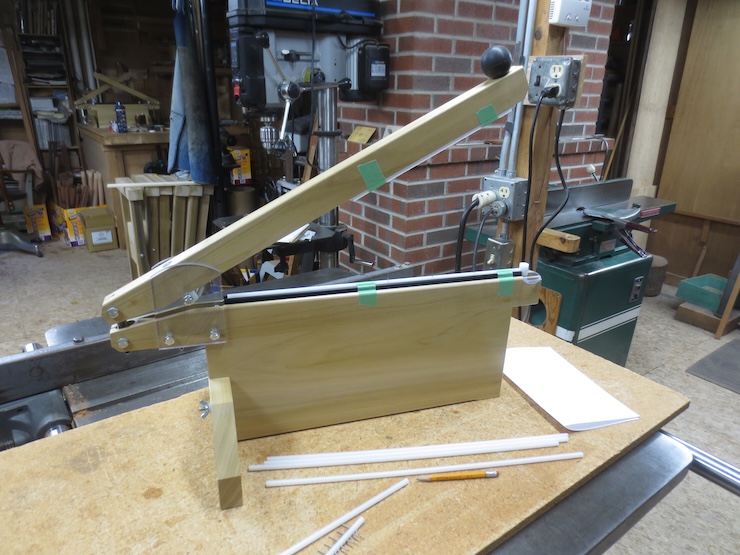
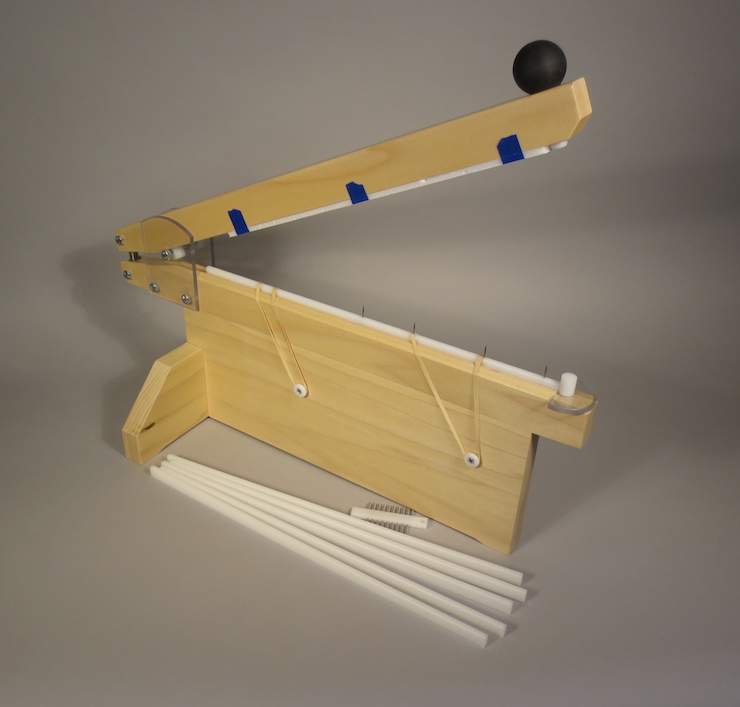
This is my new Signature Punch. I’ve been making these for decades. This is the fifth version, designed to be easier for me to make while keeping all of the capabilities of the previous models. The tool comes with 24 sharpened stainless steel pins and a set of six pin strips with precisely drilled holes in different spacings to give a great deal of choice when designing book structures. Nicely made of Tulip Poplar finished with acrylic varnish.
This tool pre-punches sewing holes one signature at a time. Set up is easy and the sewing holes will be uniform throughout the edition. Both the spacing of the holes and the depth of the punch are adjustable. Maximum fold/spine length is 16″.
These last sold for $300.00. Extra pins $35.00 per set. Extra pin strips (when available) $60.00 per set.

Instructions for using the Signature Punch
First, choose one of the six pin strips and insert pins in the preferred locations. I find it easier to insert the pins point down while first arranging them. It is easier to move them around this way. When you are pleased with the spacing turn the pins over with the points facing up.
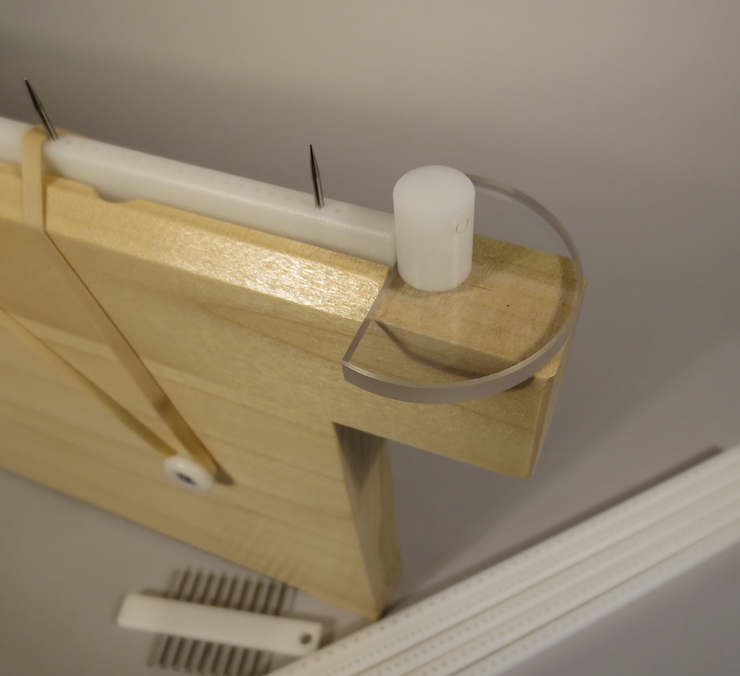
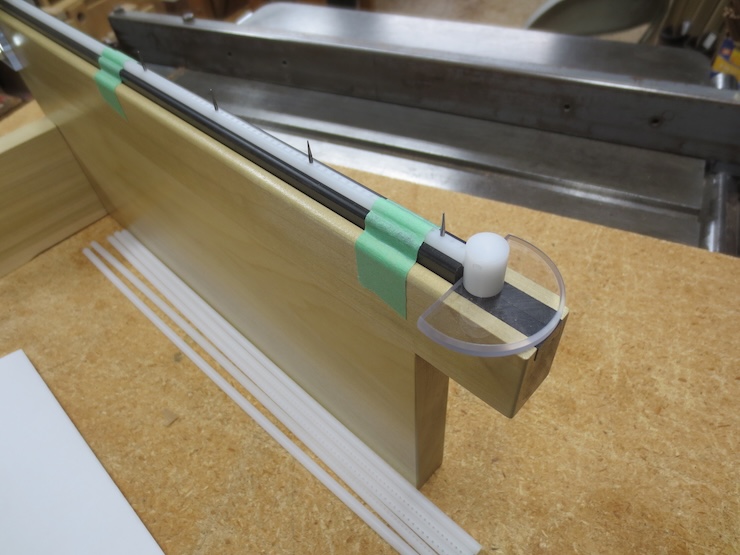
Drop the pin strip into the slot. Keep in mind that the pages will register against the clear plastic stop located on the right.

Stretch rubber bands over the pin strip and over the button cleats on the sides. Notice that the rubber bands are stretched so that they will pull the pin strip firmly against the stop at the front of the tool. This is important to keep the hole locations consistent. An extra pin has been placed near the back to enable the rubber band to exert pressure here, too.
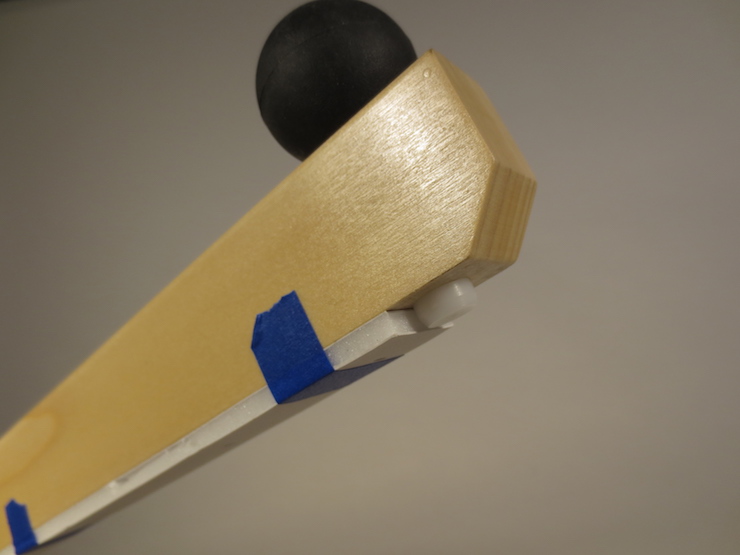
A strip of 3/16″ (5mm) foam board is fastened to the underside of the arm with low tack tape. The foam board strip should be 1″ wide and at least as long as the fold of the signatures to be punched. Place a test signature over the pins and register it against the stop. Settle the pages over the pins and push the black knob down with a quick ‘chop’. The top and bottom white plastic depth stops will bang together. That’s OK, this plastic (acetal) is very impact resistant.

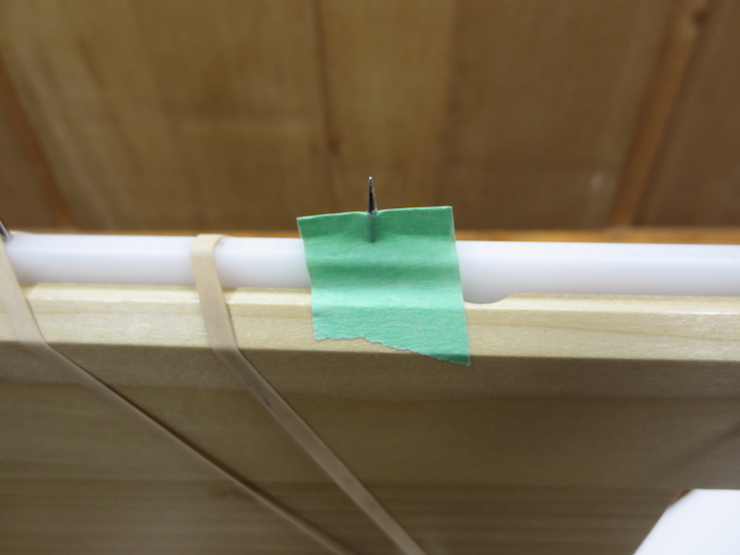
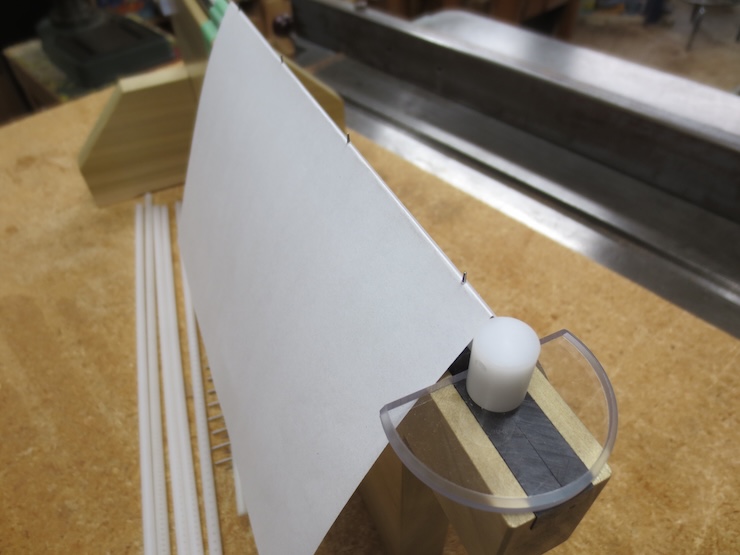
Here a test signature has been punched. You can see the tops of the pins sticking up. There is a reason that I find it best to punch the holes with a quick chopping action. If you press slowly it is possible that you will see the front of the signature rise slightly. Then the pins may punch out of the side instead of right in the fold. The pins are slightly rounded on their sharp ends. This allows them to slide into the fold without catching on the surface of the paper. The pressure of the foam board causes them to burst through.

Here you can see one of the holes punched through the fold. If you wish the hole to be larger simply add a layer of thin board between the foam board and the arm. Or you can add layers of tape at each pin/hole location to gradually increase the hole size. If you like a smaller hole I will send you a kit of shims and instructions to lift the arm slightly higher. You may come to prefer one brand of foam board as the thickness can vary slightly.
The holes in the pin strip are carefully sized to allow the pins to be inserted fairly easily but without wobble. In the unlikely event that the pins tend to pull up as signatures are being punched there is a simple remedy. Just pull a piece of low tack tape over the pin and tape the pin down. The crease should be oriented front to back so it doesn’t interfere with the pages settling over the pins.
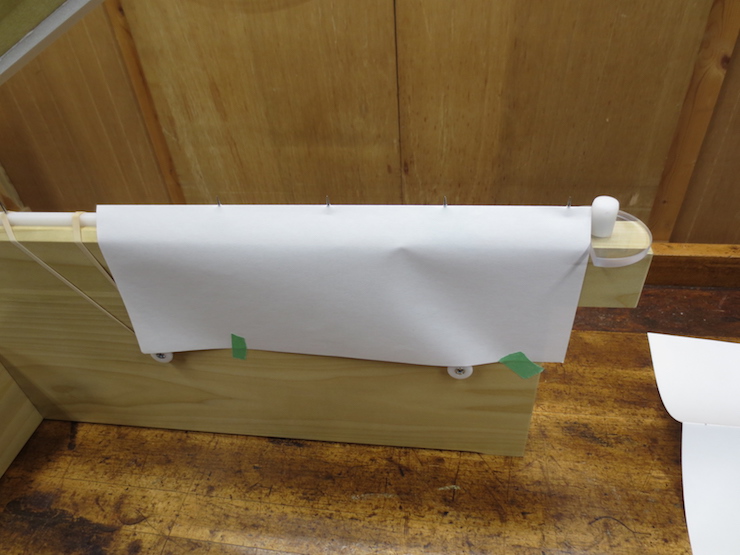
To keep the pages clean and to prevent them contacting the rubber bands place a protective sheet over the pins and tape it to the sides of the tool. Push the pins all of the way through so the points are well above the sheet.
Hole Spacing
Here are the six spacings of holes; one for each plastic pin strip.
#1: 7/64″ on center
#2: 1/8″ on center (8/64″)
#3: 9/64″ on center
#4: 5/32″ on center (10/64″)
#5: 11/64″ on center
#6: 13/64″ on center
Doubling the spacings will add more options.
The original idea was to enable the holes to closely match any tape or cord that might be used as well as providing a lot of choice for esthetic or practical purposes.
Maintenance

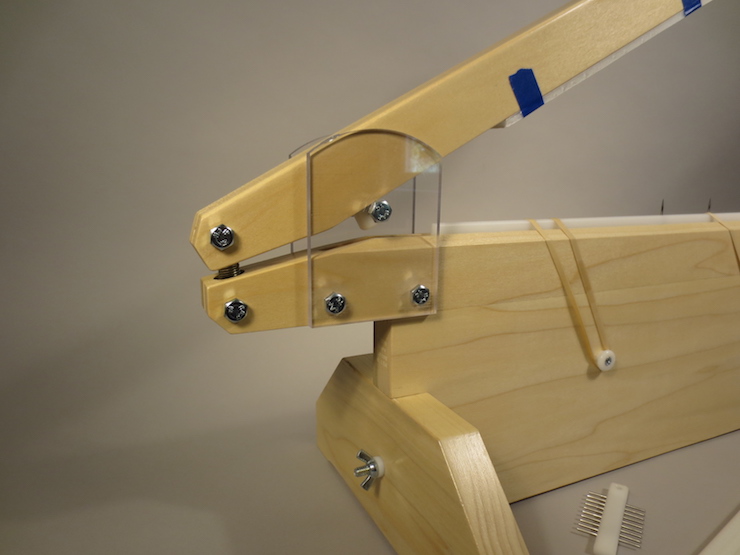
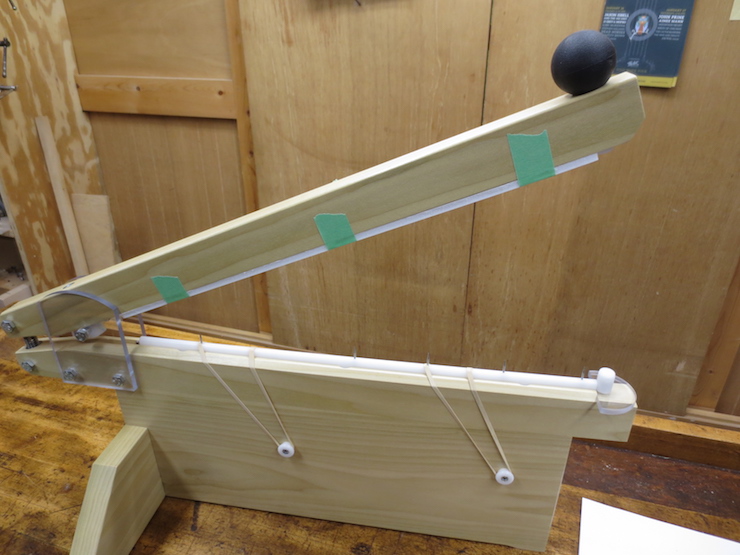
There is not much in the way of maintenance for this tool. In general all of the fasteners should be kept tight except for the arm pivot (indicated by the arrow at the left side of the photo). This can be adjusted with two wrenches to allow the arm to move freely. The lower depth stop (indicated by the arrow on the right side) may work loose. It is tightened by inserting a nail through the cross-wise hole while the screw is tightened from the bottom with a Phillips screwdriver. The upper depth stop is tightened by screwing the black plastic knob clockwise.
Adjusting the punch depth
I am not including shims with the signature punches when I ship. Some, perhaps most folks will like the standard setting. I am happy to send a shim kit free of charge upon request.
This is the selection of shims. There is a large diameter shim and a small diameter shim of each thickness, two of each for the thin ones.
Here is a page punched with the standard setting (no shims). The punched hole is about 1mm diameter.
Here the two thick shims have been installed; the small diameter one to raise the knob end of the arm and the large diameter one to raise the pivot end. You can see that the size of the punched hole has been reduced. Since the shims are not easy to change you will want to set your shims to punch your preferred smallest hole. You can cut a small assortment of 1″ x 16″ pieces of scrap board and save them with the tool. Just put one or two of these home-made shims between the arm and the foam board to cause a heavier punch.
You can see here how much the thick shim reduces the punch of the pin.
Ditto for the medium shim…
…and for the thinnest shim. You can double the shims if you like, keeping the adjustment the same front and back.
Here a thick shim is being installed at the knob end. First unscrew the knob and push the depth stop out. Put the shim(s) over the threaded rod and then put it all back together.
The pivot end is a little more work. First remove the pivot bolt with two wrenches.

Loosen the flat head screw and remove the plastic pivot bearing.

Drop the shim(s) into the hole where the pivot bearing sits and then re-assemble. First loosely tighten the flat head screw. Then replace the pivot bolt. Then tighten the flat head screw firmly and adjust the pivot bolt and jam nut so that the arm swings freely.
Model #6 Signature Punch Description and Instructions

Model #6 Signature Punch. This is much like model #5 and the instructions above mostly apply.
The Signature Punch could not be made without the use of plastic. No other material is as forgiving and at the same time tough to allow all of the pin strip holes to be drilled so easily. With this model I tried to simplify the design of the tool to make it easier to make and use, and to reduce the use of plastic a little bit.
Unlike all previous models the pin strips are made from 1/4″ diameter acetal rods. These come in 48″ lengths so each rod can make three 16″ pin strips with very little waste. Previously bar-shaped pin strips were cut from a large sheet which created a lot of waste from sawing and surfacing the strips.
I’ve also eliminated the little buttons which were machined from plastic rods, also making a lot of waste. It turns out tape works very well to hold the pin strip in place.
This model is a little harder to make in one way though, since I have to machine the somewhat fussy pin strip cradle from black acetal plastic.
Instructions

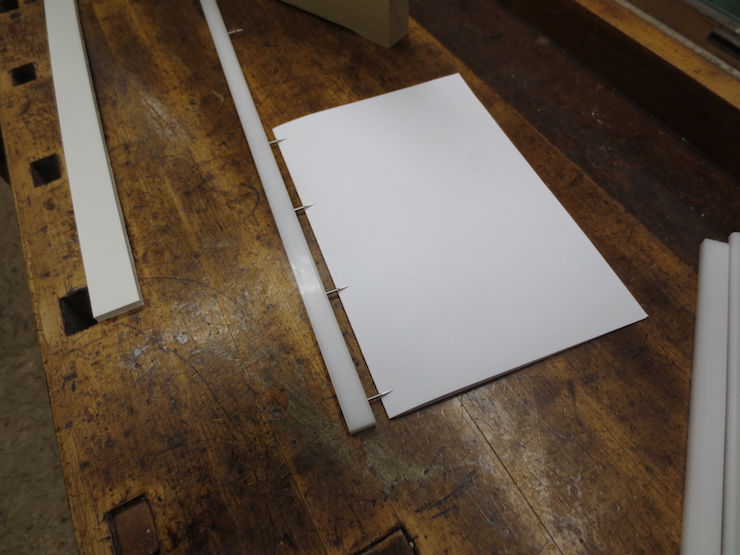
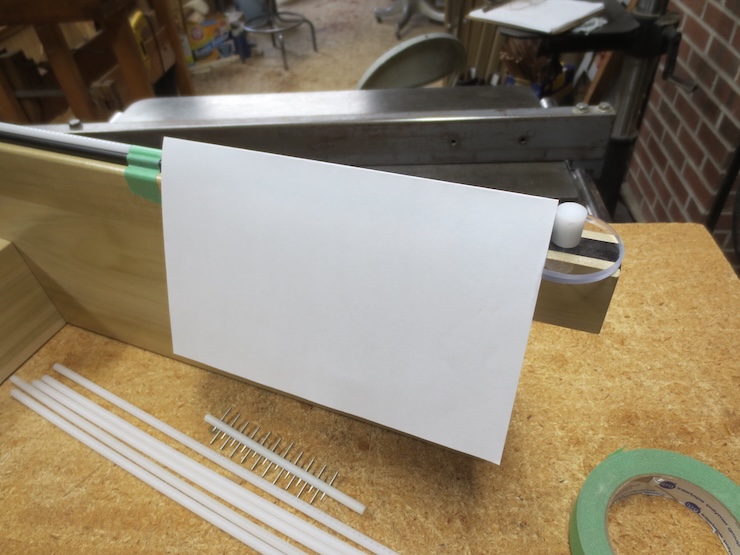
Shown are some of the six pins strips and a mock signature; just a folded piece of 8-1/2″ x 11″ printer paper.

The first step is to cut a piece of foam board 1″ wide and at least as long as the fold of the signature.

Add a couple pieces of tape.

Stick the foam board strip to the underside of the punching arm.

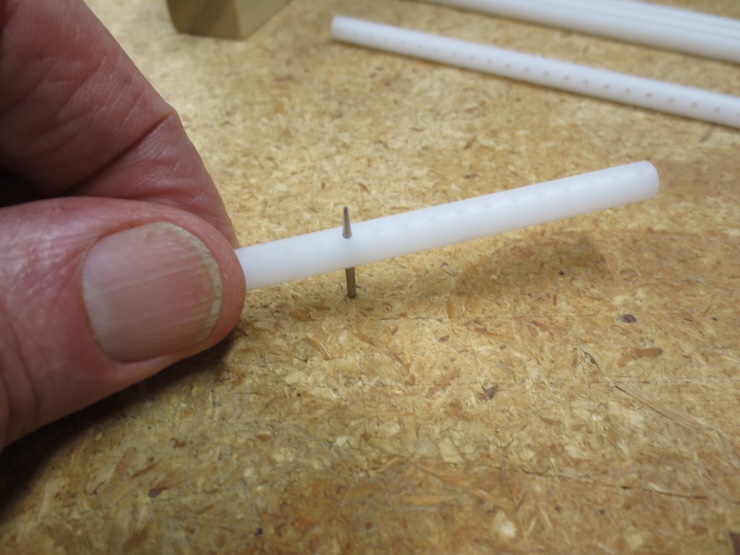
Next select a pin strip and start the pins. Just push the points a little bit into the holes.
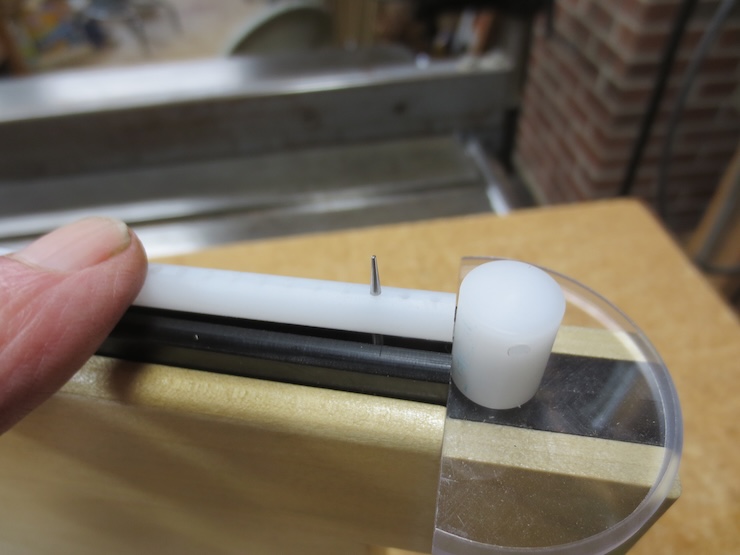
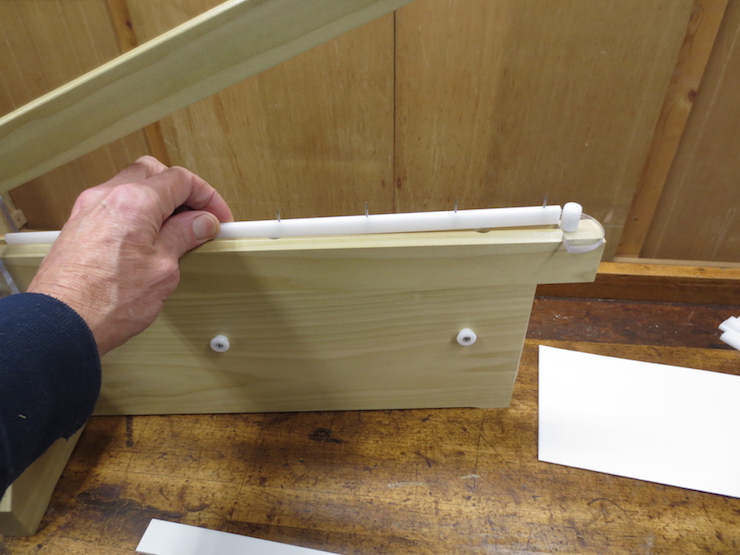
Move the strip to the plastic pin strip cradle. The pin strip is not yet fully seated in the cradle.
Push the pin strip down all along its length. This will push the pins down to the bottom of the slot and seat the white plastic rod in its groove. This aligns all of the points to the same height.
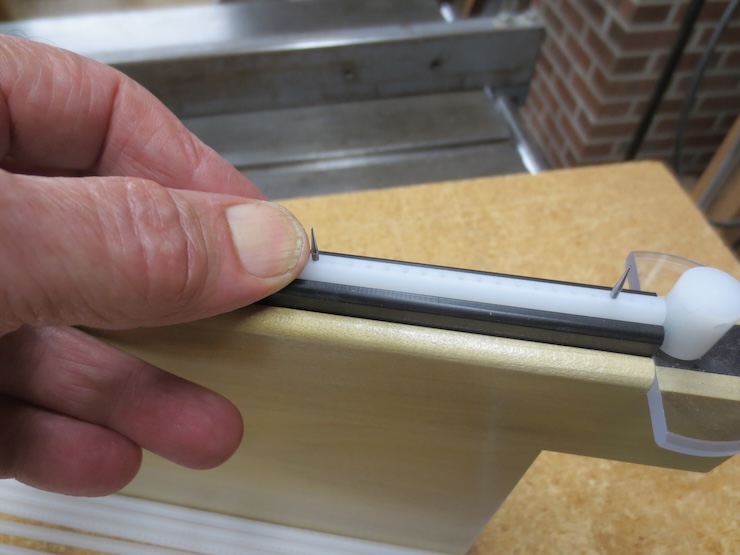
Tape the pin strip so it can’t move.
Place the signature over the points and against the front stop.
A quick chop of the arm punches all of the holes at once.

The best way to start the pins is into the flat side of the strip. This is the side that the drill entered to make the hole.
It’s easy to push the pins in a little further with a wooden block or surface.

The pins can easily be pushed out the same way. One of the nice features of this design is that the pins never have to be pulled, only pushed to place or remove them. This makes it easier to set up and take down. Previously pulling the pins could be difficult and could require twisting them out with pliers. Now no tools are needed.

A pencil works to push a pin out too.