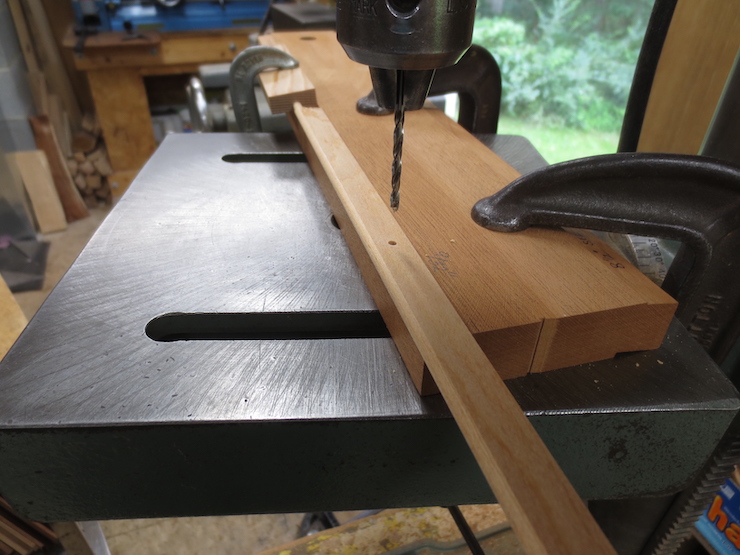
The ribs have been shaped, cut to length and have had pegs formed on their ends. Now each must be drilled for a brace rod and then for sewing holes. The brace rod keeps the ribs lined up and helps them work together for added strength. A row of very small evenly spaced sewing holes are made along the thin upper edge of each rib. These sewing holes must be drilled ahead before a mould is assembled. Later, a single sewing wire will follow a spiral path through all the holes in each rib. Between each pair of sewing holes it will pass up and over the chain wires to attach the wire facing to the mould.
The ribs are all marked on one end. While they are being drilled and later assembled in the mould they must be kept in this orientation with (in this case) the mark always being on the right.
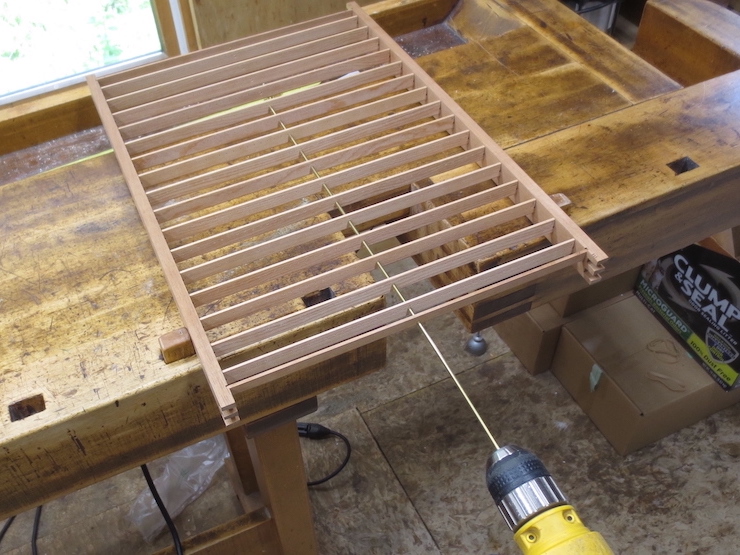
Skipping ahead a few steps shows why this is important. Using care to orient the ribs and holding them against fixed stops while drilling insures that the brace holes line up. In this photo the holes are already there; the drill is the best way I’ve found to insert the brass brace rod.

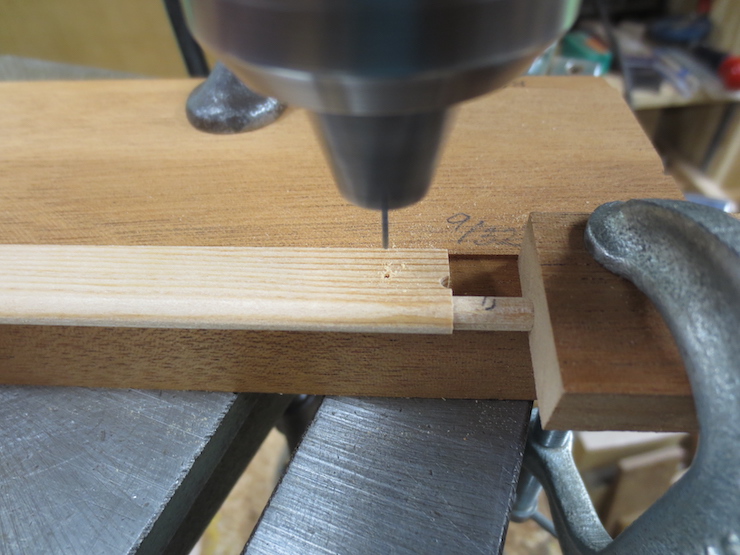
This base has slanted faces so the ribs will stand up straight in the mould after assembly. At the top of the slanted surface is an edge that the ribs are pushed up against; a ‘fence’ that spaces the hole a precise distance from the top edge of the rib.

A stop is fixed at the left to push the ribs against while an 1/8″ brace hole is drilled in the middle of each. Larger moulds often have two brace rods.
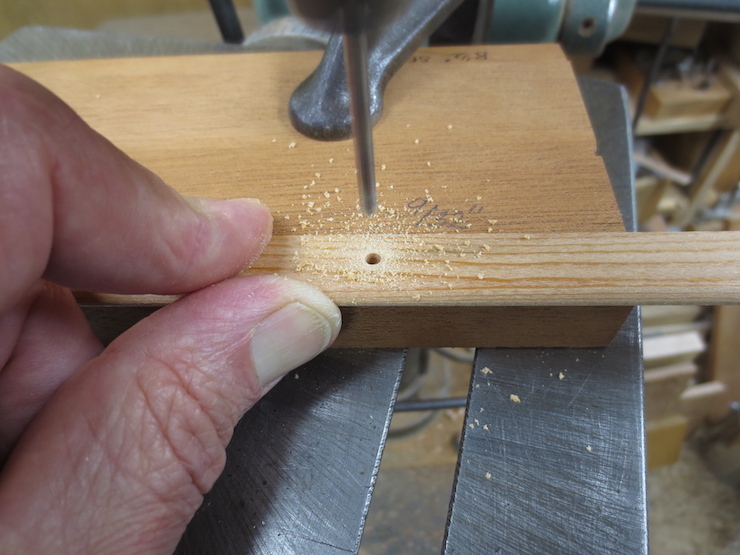
Each rib is held in place on the slanted surface of the base and against the stop while a clean hole is made with a brad point drill.
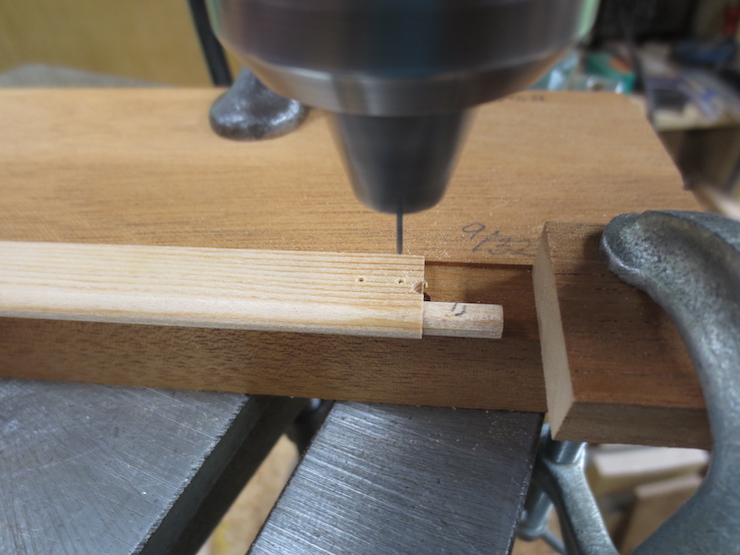
Another view of the drilling set-up.
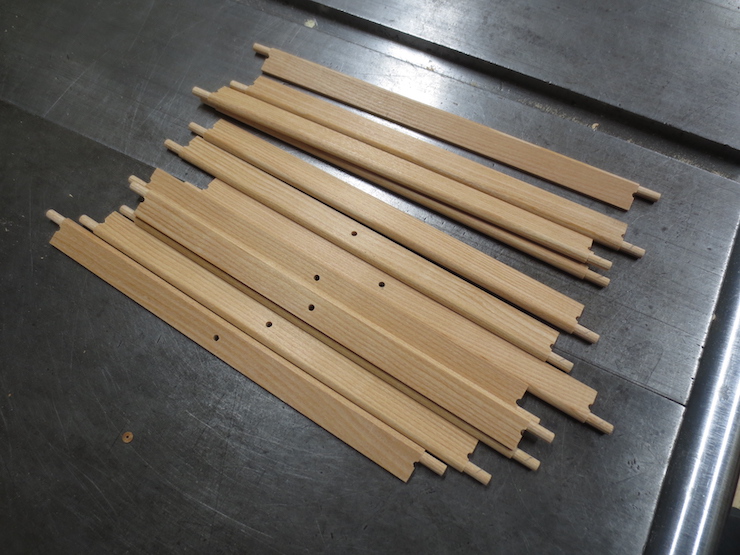
Ribs for a mould. A few still need to be drilled for the brace rod.
Sewing holes are drilled next.
A #60 twist drill is used. The largest wire that I use for sewing is .013″ diameter (for sewing down wove backing) and these .040″ diameter (1mm) holes have proved to be plenty large.
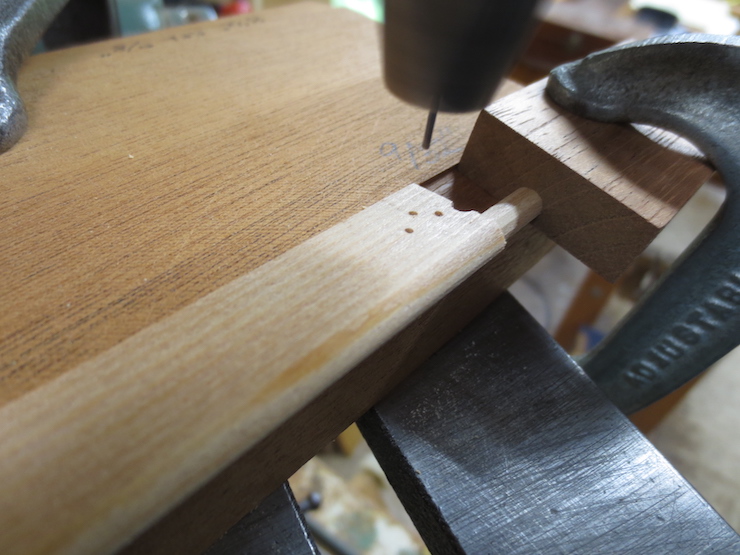
The ribs are given an identical cluster of three holes at both ends. Stitches at the ends of the ribs will be closely spaced; a stitch every other space followed by one each for the last three spaces.
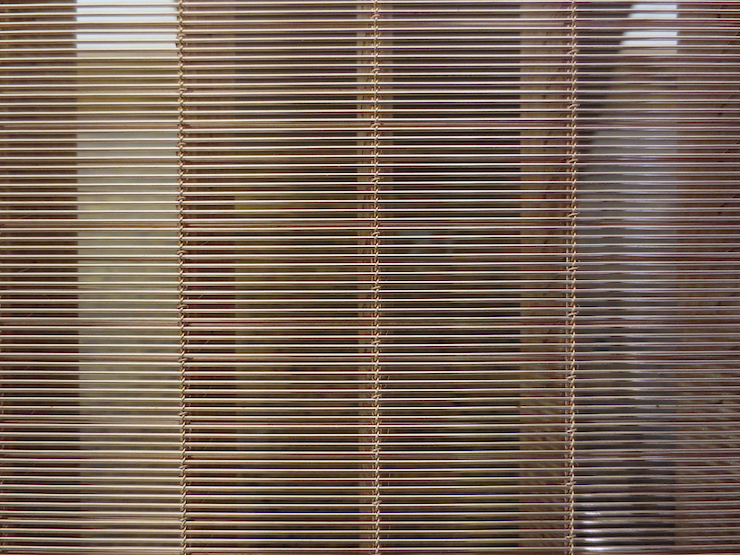
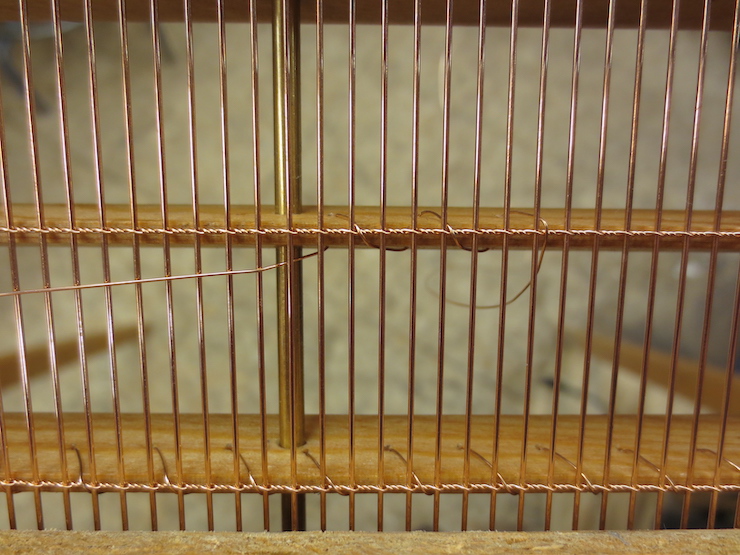
Holes drilled in the ribs of this laid mould have regulated the spacing of the stitches. Along a rib stitches fall between every pair of sewing holes, crossing over a pair of chain wires and between a pair of laid wires. From rib to rib the stitches are staggered so they won’t line up along the laid wires. Both features are pre-determined by the way the holes were drilled in the ribs before assembly. If you look closely you can see where the sewing wires pass through the holes in the ribs, about halfway between stitches.

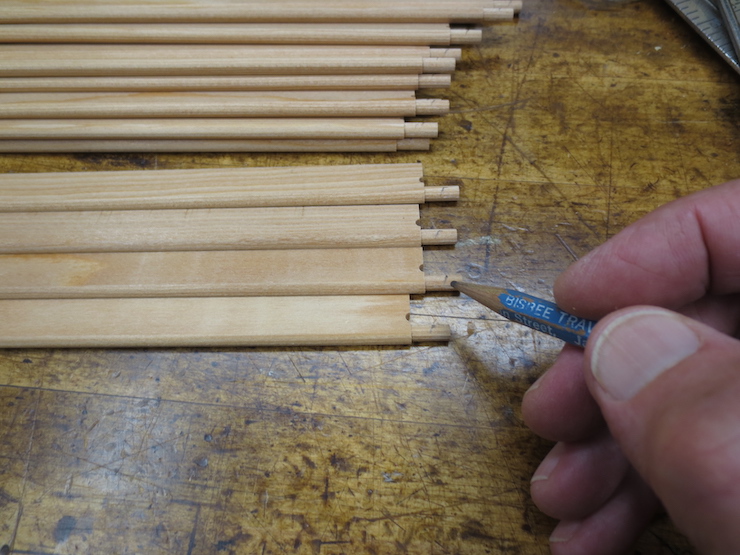
I space the sewing holes for laid moulds at a stitch for every six laid wires. A serrated rack is made for each configuration of laid facing. Above, preparing to cut teeth on a strip of inexpensive, easy to work Sintra plastic. To get the proper spacing a completed laid facing is laid on top and marks are drawn by pushing the pen point down between the wires, every sixth space.
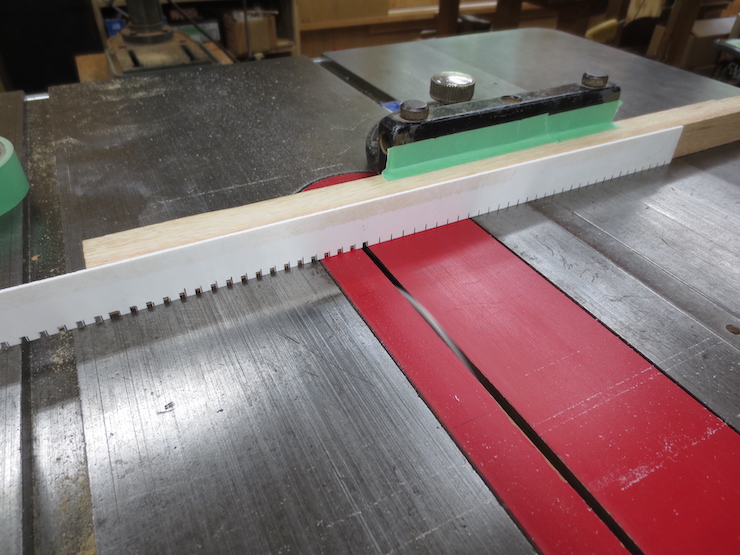
Notches are cut on the tablesaw with the hollow ground blade.

One side of each notch is chiseled away to make teeth, like saw teeth. Once it is finished a strip can be used to make any number of laid moulds that share the same wire spacing.
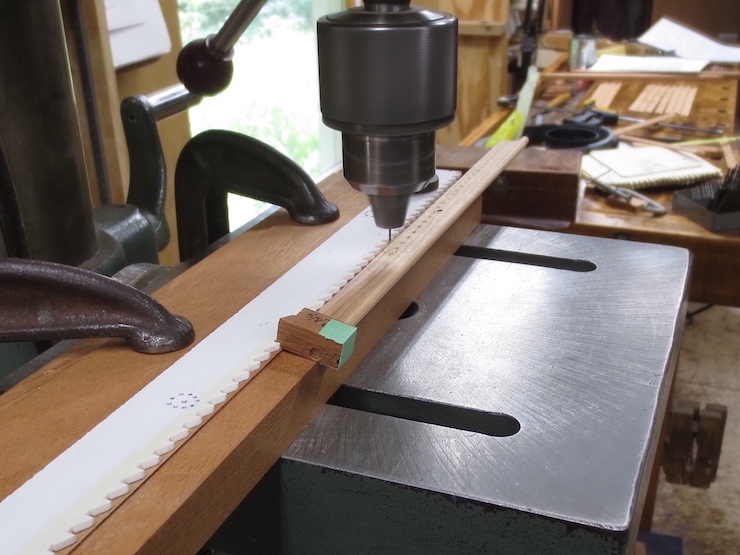
The serrated strip is clamped on top of the base block. A little block (a ‘pawl’) fits over the rib peg to engage the strip. The pawl has a slanted face that clicks in and out of the spaces between the teeth. The rib can be rapidly re-positioned, moving from left to right as sewing holes are drilled at the proper spacing. Holes should be close to the top edge of the ribs so the sewing wire won’t need to be excessively long.
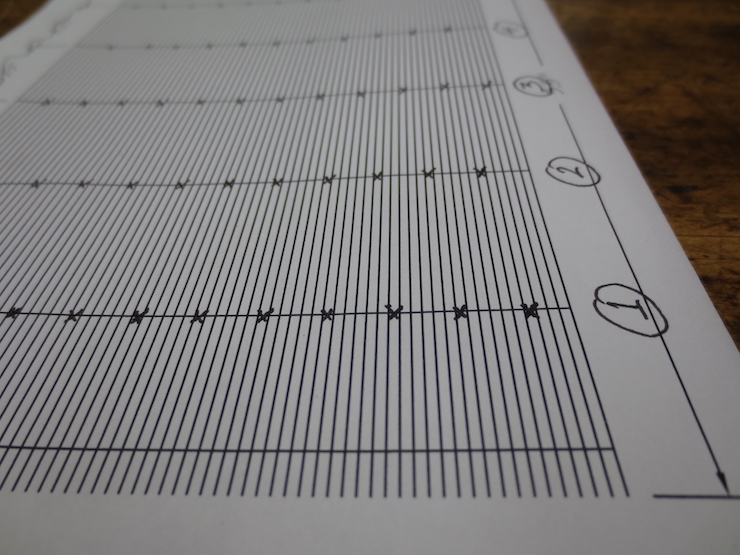
The holes must not be made in the same position on all of the ribs. If stitches pass between the same two laid wires on adjacent ribs it can create a depressed channel in the wires that may show in the paper. This drawing shows a system that helps the stitches skip around without creating an obvious pattern. This random-seeming pattern repeats and every fourth rib is drilled the same.

This laid mould has 14 ribs. I have separated them into four piles and numbered them #1,#2,#3 and #4. All ribs in each pile are drilled the same according to the pattern.
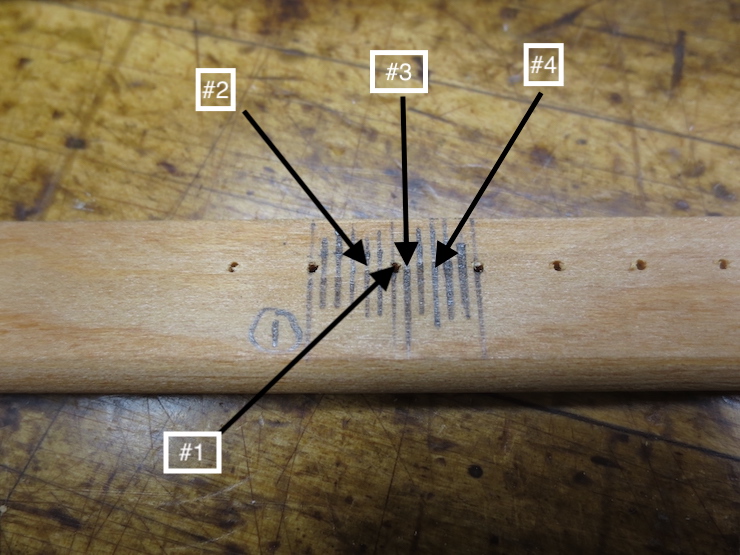
To do this, I drill a test rib (using the pawl and serrated fence) and label it #1. Lines are drawn to divide the spaces between holes into sixths. Each of the #1 ribs is now drilled using this first set-up, creating a row of evenly spaced holes along its entire length . (I’m making four moulds with the same laid wire spacing so all of the #1 ribs for all of these moulds are drilled at the same time, in this case about 16 ribs). Before drilling the #2 ribs the serrated strip is shifted slightly. Using this test rib as a gauge the drill will be set at the mark indicated by the #2 arrow, two increments to the left of the #1 hole. Then all the #2 ribs are drilled, each along its full length between the three-hole cluster at each end. Still following the pattern shown in the drawing the serrated strip is shifted three spaces to the right before drilling all of the #3 ribs. Finally, the strip is shifted two more spaces to the right before drilling the #4 ribs. I don’t know if mould makers would have done this in the past. Perhaps they would just drill (or pierce) the sewing holes by eye to an approximate spacing.
For a different approach see “Post #60 An Alternate Sewing Method.”
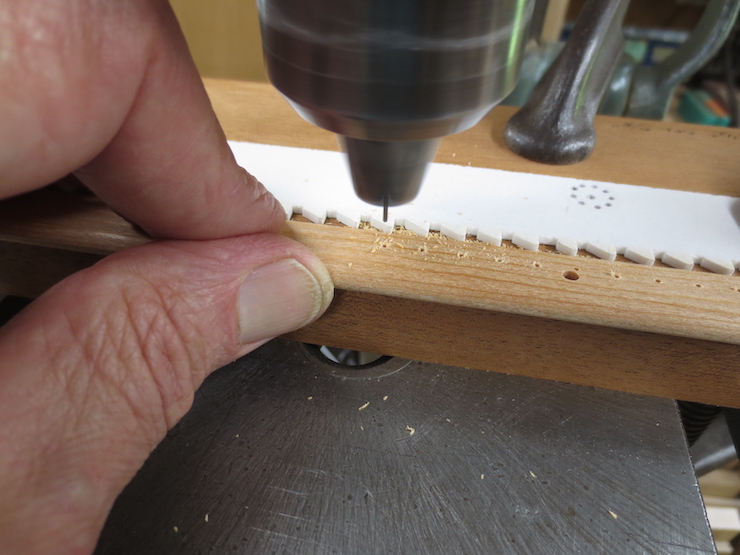
The slanted teeth allow the pawl to climb out and away from one tooth and click back against the next tooth as the rib is pushed along. After each incremental re-positioning with the left hand the right hand advances the feed lever of the drill press to make one hole. Each cycle takes about one second. The drill press is set to spin the drill at a high speed so the chuck and drill can be jammed down quickly after each advance of the rib.

One of each ( #1 through #4) ribs showing the variation in hole spacing. The ribs are placed in the mould in order; 1,2,3,4,1,2,3,4,…
Sewing Holes for Wove Moulds
The sewing holes for my wove moulds follow a simple 1,2,3 diagonal pattern and are spaced to put a stitch between each third pair of laid backing wires. This can be seen in the photo where a wove backing is in the process of being stitched to the ribs. The backing wires will provide a support for the fine wire cloth that will be sewn down in another step. I use the same spacing of laid backing wires for all wove moulds, so one serrated rack is sufficient for all.
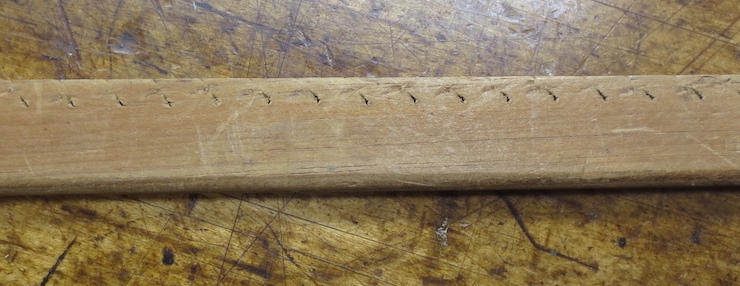
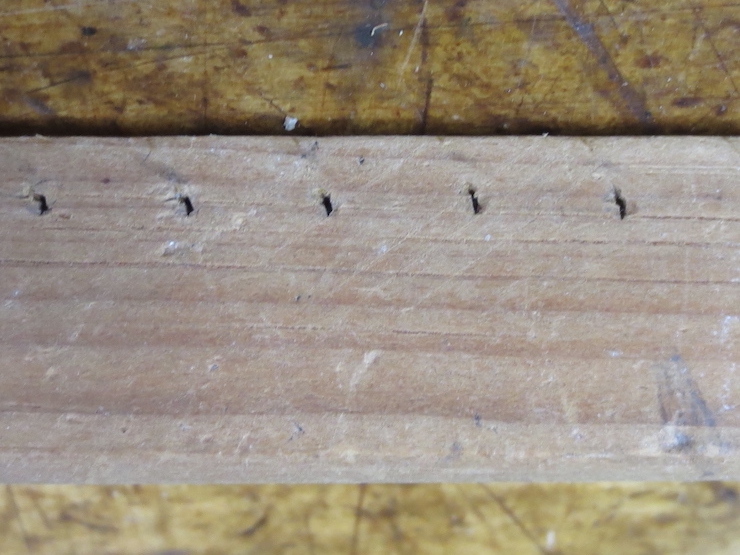
Many old moulds show evidence that the sewing holes were pierced rather than drilled. This may have been done with a device which was squeezed by hand to push a steel pin with a wedge shaped end through the wood. The oblong slots are made across the grain of the wood, presumably so as not to split it. These ribs are from old (probably early 20th century) British moulds. I have not tried this.