Two Wires Instead of One for Very Fine and Single Faced Laid Moulds
Very fine laid moulds and single faced laid moulds can benefit from having closely stitched laid facings. Shortening the distance between stitches gives the delicate chain wires more protection from being stretched or bent. Especially in the case of single faced laid moulds it also helps the wire facing to lay smoothly on the ribs. A problem with this type of mould is that the laid wire facing is likely to bulge a little between stitches because the wires are fastened directly to the wooden ribs. The wood is somewhat soft and tight stitches can press chain wires down into it, creating humps between stitches that cause uneven formation. Closer stitching reduces this effect.

But when stitches are close a longer sewing wire is needed and this makes it more difficult and time consuming to sew. The wire is put through more steps since for each stitch taken the entire length of wire must be pulled through the wires in the facing (twice; once up and once down) and through the next hole in the rib. The small diameter sewing wire starts out strong and flexible but tends to stiffen and weaken a bit as it is ‘worked’. It should be handled carefully in order to keep it as fresh as possible but wires do break, especially if they have been allowed to kink (which stresses the wire severely at that point).
For these reasons I’d be inclined to use the following method for large, fine laid moulds, single or double faced. Each rib can be sewn with two wires instead of one. Each length of wire must pass through only half as many holes, can be shorter and stays fresher. As a side benefit drilling fewer holes in the ribs should leave them a little stronger, too.
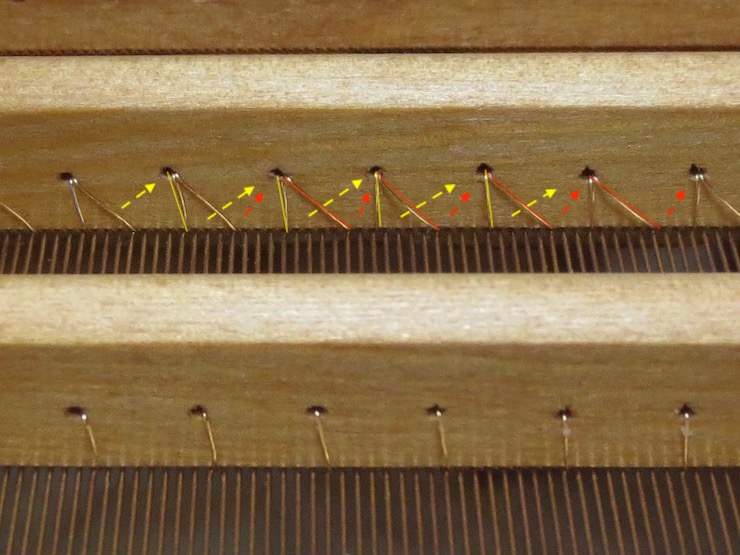
The front rib has been sewn once, following the rib hole spacing (which has been drilled to fit the wire count) to leave a stitch about every eight wires. The stitches are not symmetrical; each falls about two wires away from one hole and must cross about six more wires at a shallower angle to reach the next hole. These angles are reversed for the second wire.
A second sewing wire has been added to the back rib, reducing the average to a stitch for every four laid wires. The dashed arrows show the direction that each wire takes on the back side of the rib. One wire is marked with yellow and the other with red to show how both wires share the same sewing holes but bind the wire facing to the rib at different spots along the chain wire.

The stitches of a sewing wire are intentionally made much closer at the end of the rib. But since in this case a second wire will be added, the first wire needs only a couple of stitches before it is given a simple twist to secure the end. The second wire will take the normal amount of stitches and will cross over the first wire, binding it firmly in place.

The same pattern is followed at the other end of the rib.

This is how it looks with one sewing wire completed .
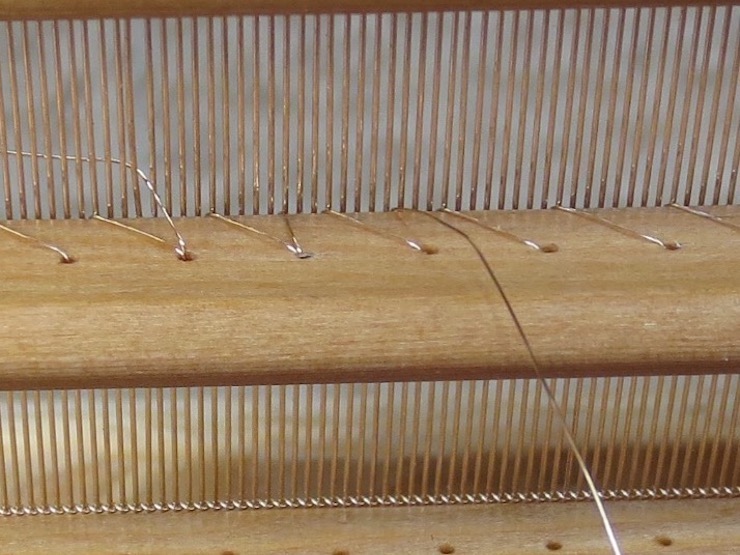
Now the second sewing wire is started on the same rib, passing through the same holes but adding new stitches about halfway between the ones made by the first wire.
When this second wire reaches the end of a rib the usual pattern of many closely spaced stitches is followed. In this photo the second wire still has a few more stitches to go before it is tied off.

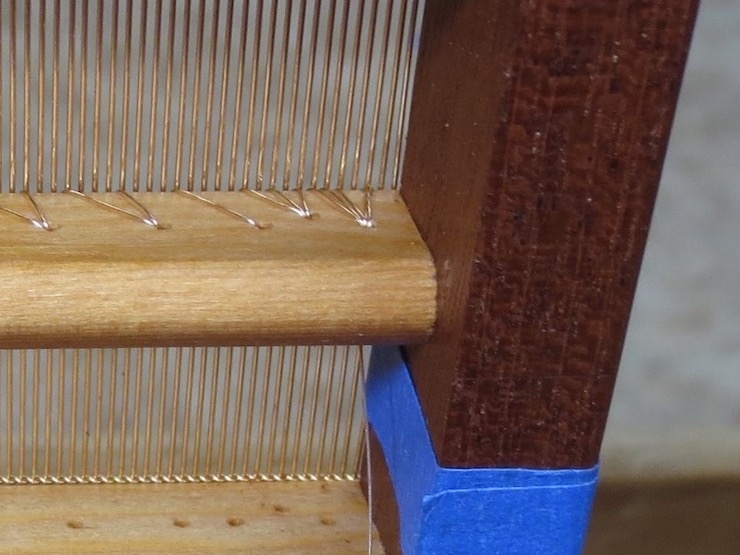
Here the other end is being finished off, twisting around itself after the last stitch so it won’t slip back.

When the sewing is complete the stitches will average every four wires throughout the area where paper will actually be formed. Along the edges of this mould there is one stitch for each of the last eight laid wires. This is a little excessive; this was my first attempt at sewing with two wires and I hadn’t gotten the best pattern figured out. Only the last three or four stitches need to be placed this closely.

I haven’t made a large, very fine laid mould using this method yet but I would be inclined to try it. It may be worth taking the extra time and trouble to get close stitching without wearing out the sewing wire as much. And the shorter wires would be easier to sew.

You mention how the sewing wire work hardens and becomes brittle the more it’s worked. When I first wetted an old Wookey Hole mould for the first time after who knows how many years of being dry, the sewing wires started breaking, presumably because the ribs swelled as they absorbed water. I didn’t realize what happened until I examined the dry paper which had numerous short lengths of sewing wire embedded in the sheet. Not all the sewing wire broke and I could still use the mould but I need to repair it one day.
LikeLike
Many years ago I was asked to put a new wove facing on an old mould. To my surprise the sewing wires and chain wires crumbled into small pieces when disturbed. The wires in this case were brass. Perhaps phosphor bronze is quite a bit better. It would be interesting to know what causes the wires to get brittle. Continual flexing of the wires in use? Corrosive chemicals having been used to clean the mould? Does some metal simply get brittle with age? Many questions but no answers that I know.
LikeLike