The wooden structure of the mould is complete; now the tops of the ribs are scraped level in preparation for sewing down the wire facing.

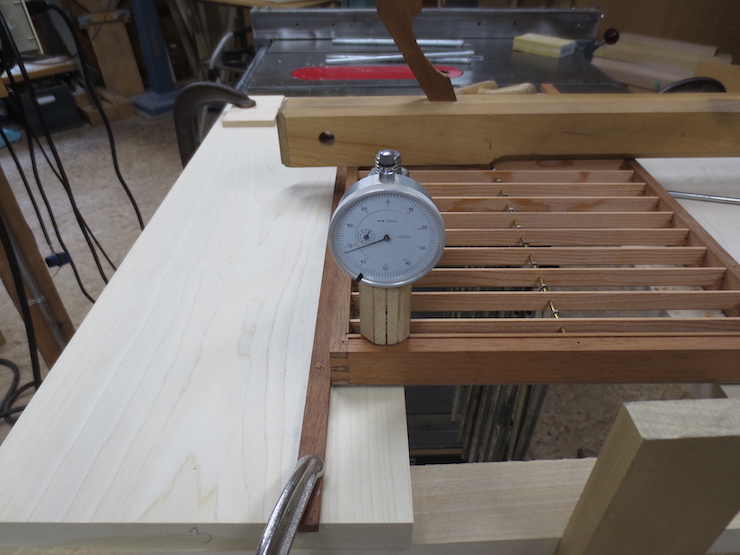
I like to pre-load the mould with weights before leveling the ribs. This gives the mould a very subtle camber; an extremely shallow arch in all directions. The forces of forming sheets and couching push against the ribs. By its nature a mould is weaker and less well supported in the middle. Leveling a mould under weights gives this part a little lift to compensate. It is surely better for the top of a mould to be slightly domed than either flat or hollow.
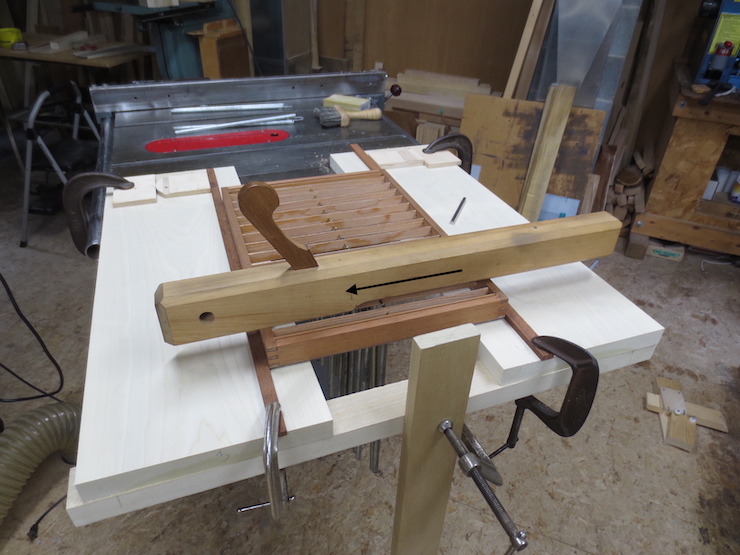
The photos above and below show one way to support the long sides of the mould while allowing weights to be hung on the single brace rod that supports the ribs.
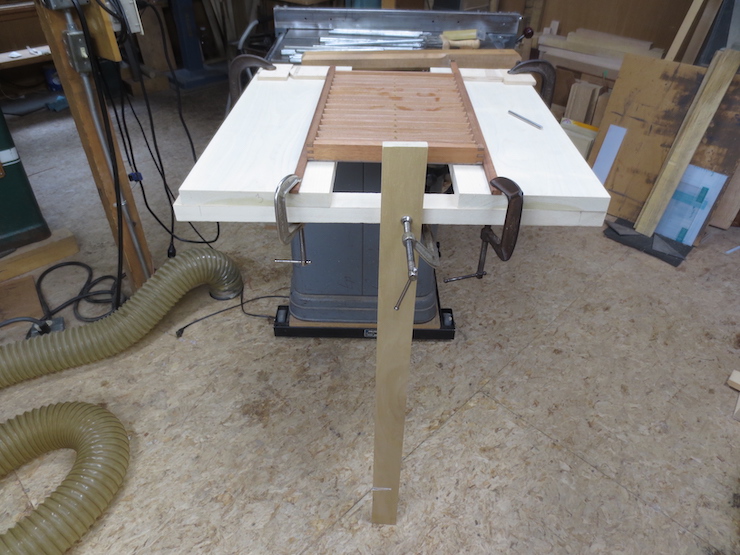
I cobbled together this structure by clamping some planks to my table saw. I will likely try to come up with something more convenient in the future.
This method of hanging the weights is fairly new to me; earlier on two brace rods and deeper ribs allowed the 12″ x 3/8″ diameter steel weights to be simply laid in place between the ribs. As shown below, a mould could be placed on any flat surface while leveling the ribs. The smaller mould shown above uses 5/8″ ribs and there isn’t enough space above the brace rod for the weights (even if there were two brace rods). The weights must be hung from the single brace rod to pull down on the ribs.
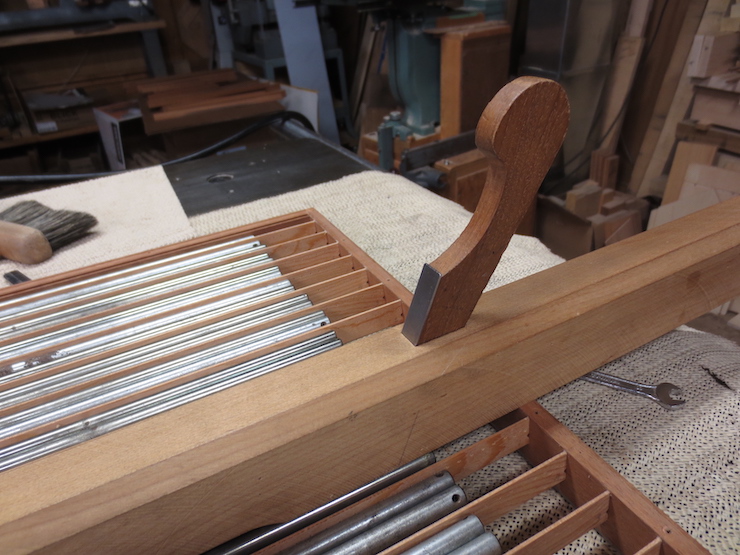
This larger mould had 3/4″ deep ribs and two brace rods passing through the ribs. Two rods allowed the weights to lie horizontally between the ribs and below the surfaces to be scraped.
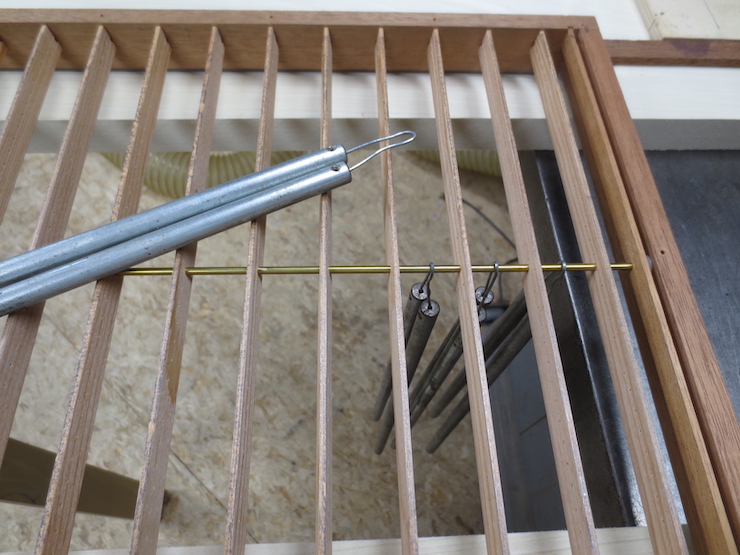
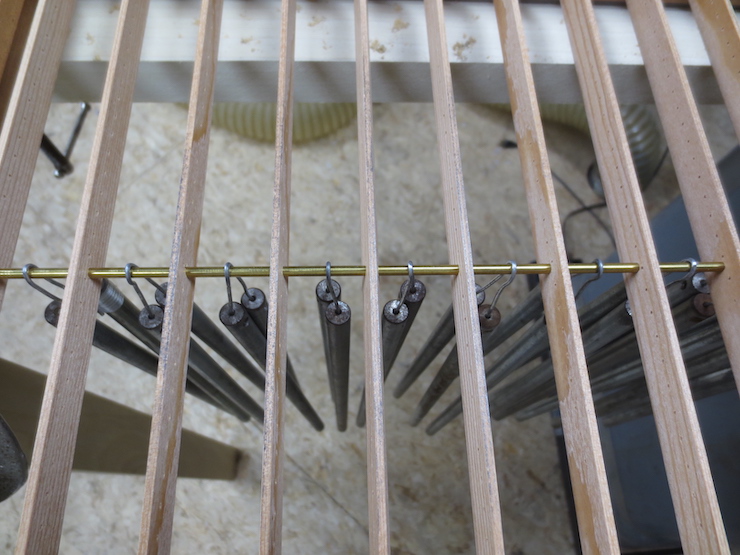
The weights are hung in pairs from the single brace rod. These are leftovers from an unrelated project. Some have set screws which make it easy to attach the wires. A simple hole or even tape would also work.
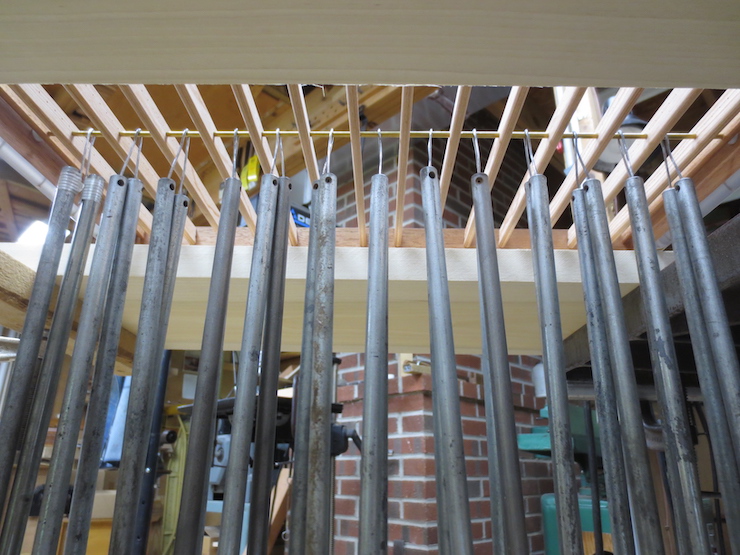
Here’s what they look like from below. The two weights on the left have been attached to the wire with strapping tape.
The blade for this scraper plane is a narrow strip hacksawed from a woodworker’s card scraper, sometimes called a cabinet scraper. The arrow shows the direction that the plane is pushed. It may seem backwards when looking at the angle of the blade. This is because a sharp, forward facing burr has been formed on the backwards facing blade.
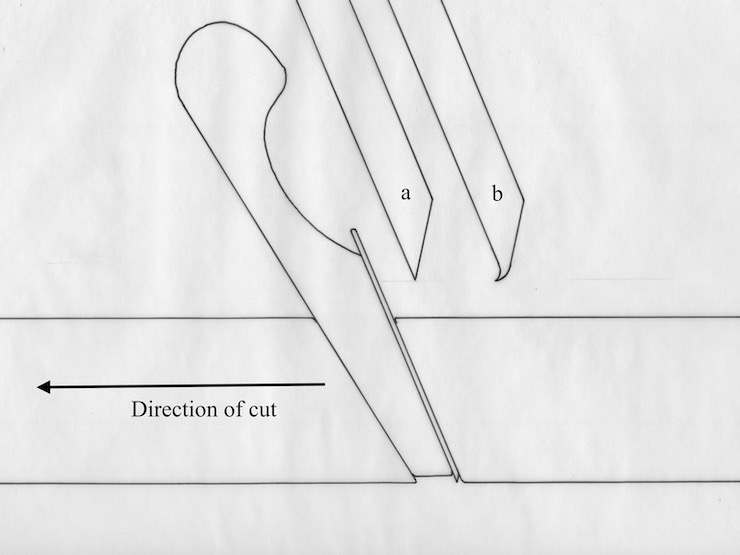
A cross-section drawing of the scraper plane and enlarged views of the blade. The burr at ‘b’ is much exaggerated and the blade shown wedged in the plane would normally be set a little lower.

The long wooden body of the plane rides on top of the long sides of the mould frame. The blade is advanced by small increments for as many passes as it takes to completely level all of the ribs.
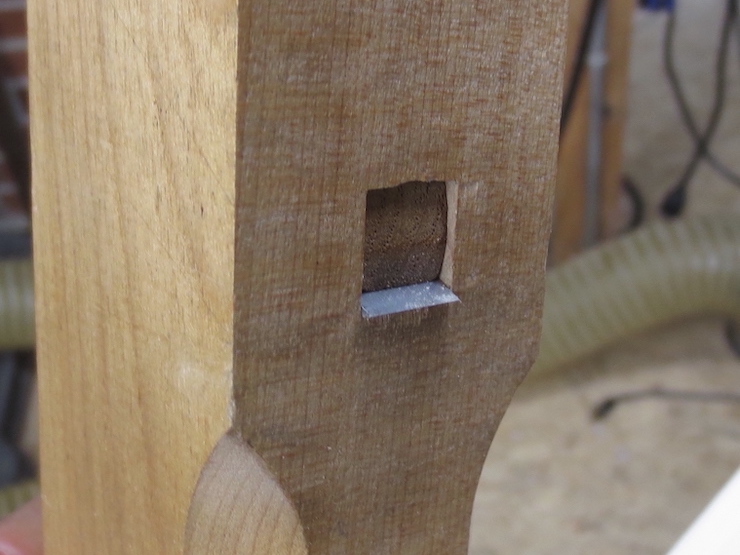
The scraper blade needs to stick out quite a lot to reach the ribs that are recessed below the top of the mould frame.
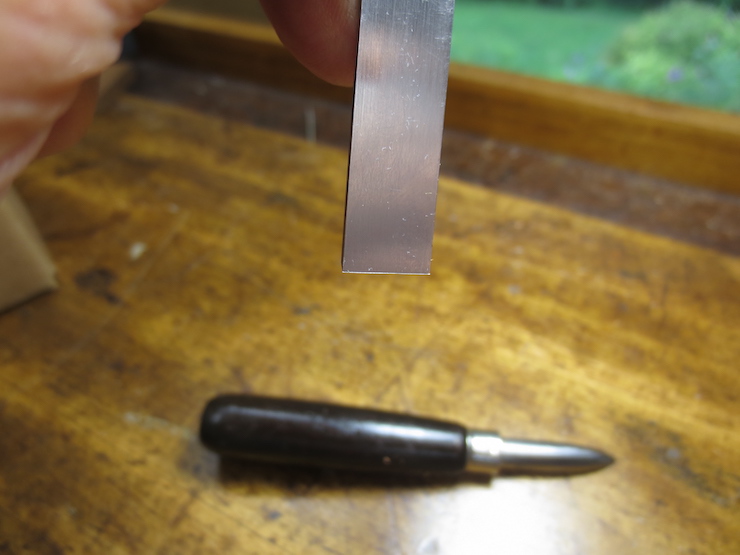
The scraper is ground and honed at about 45 degrees. Then a ‘burr’ or ‘hook’ is turned on the sharp edge with a burnisher. You can see the burr in this photo. This allows a scraping action which is safer than the cutting action of a normal plane.
The iron or blade of a woodworking plane protrudes from a narrow mouth in the sole, the flat bottom surface of the tool. The sole normally rests on the wood right next to the blade and keeps slivers of wood from rising up when caught by the sharp edge, particularly when the grain runs the wrong way. Since ribs must be recessed below the sides of a mould it is not possible for the sole of the plane to serve this function. A cabinet scraper is slower and less efficient but a safer cutting device. I have found that a narrow piece of one mounted in a wooden plane body makes a workable tool for leveling mould ribs. The sharp burr on the scraper blade turns and breaks the shavings as it cuts so fibers can’t rise up and splinter off.
The total amount of wood that is scraped off the tops of the ribs is very small; about .010″-.015″ (.25mm-.4mm) around the edges and less toward the middle of the mould.
A block of graphite has been rubbed on the top edges of the ribs to make the leveling process more visible in the photos.
Working from the center outward, one rib at a time is scraped with a couple strokes of the plane. After finishing the ribs on one side (each rib having been be scraped for half of its length) one must walk around to scrape them from the other side. Then the cutter is advanced with a light tap and the process repeated. This is done a number of times until the tops of all the ribs have been reached by the blade and scraped to the same level. When the proper level is reached the ribs are given a few extra strokes each (without changing the blade setting) to leave them extra smooth and level.
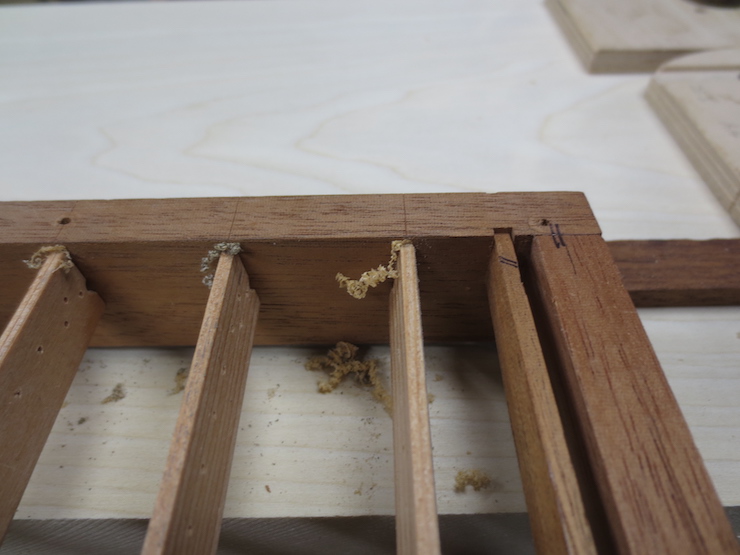
The shavings left at the ends of the ribs look like this.

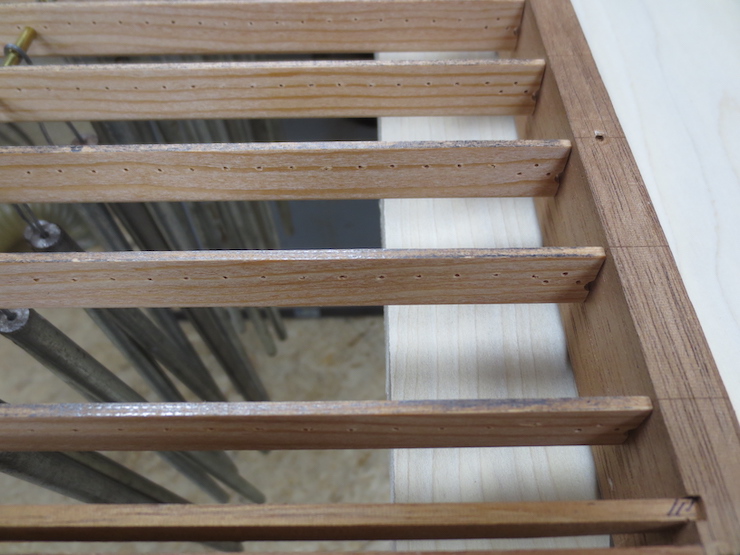
The first areas that the blade reaches are along the ends and edges; the brighter parts show where the graphite has been scraped away. The weights cause the middle to sag so it will be the last part to be reached by the blade.
A smaller unleveled area remains here.
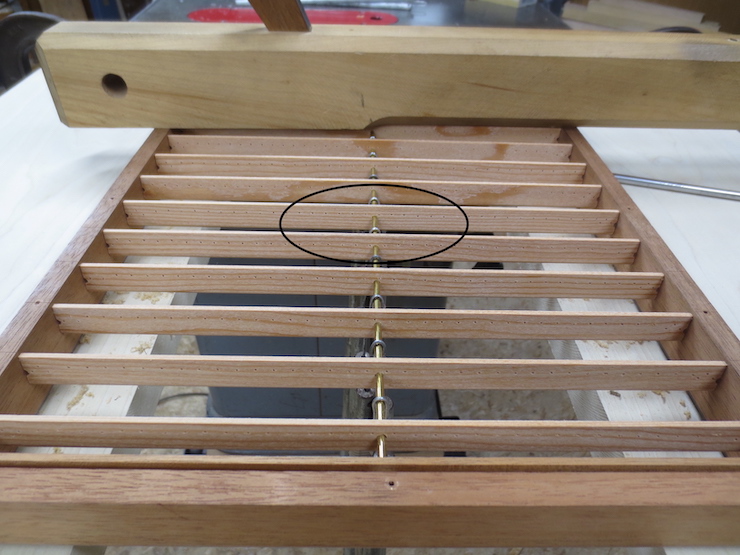
The last unleveled bits are circled.
When no unscraped areas remain the ribs are checked to see if they are low enough. The top layer of laid wires should end up with at least 2/3 of their diameter sunk into the frame so that they can be trapped against a ledge at each end to prevent them from working out at the ends of the mould. The depth that the ribs need to be recessed depends on the type of mould; wove, single-faced laid, or double-faced laid each being a little different.
After the ribs have been scraped clean and level the weights are removed and the mould structure will relax and lift, creating a slight camber.
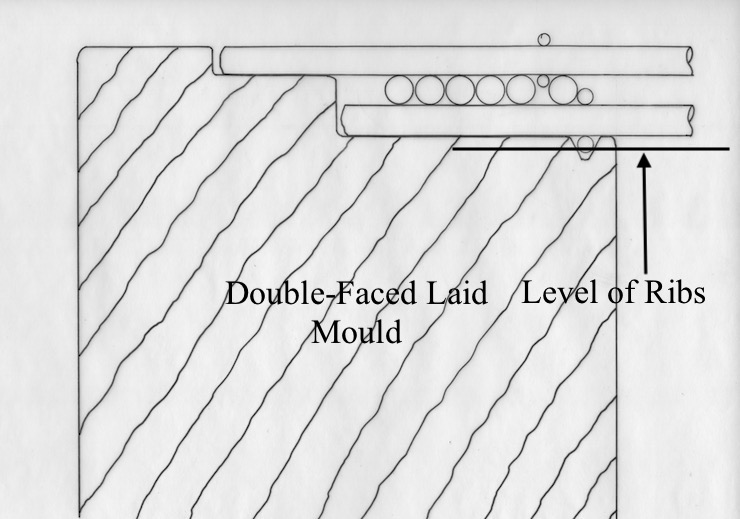
This drawing illustrates the relationship between the top of the ribs and the upper surface of the mould frame. The ribs are recessed by the combined dimensions of the wires that will rest on them. This topic will be covered more fully in the next post.
Adjusting the scraper plane
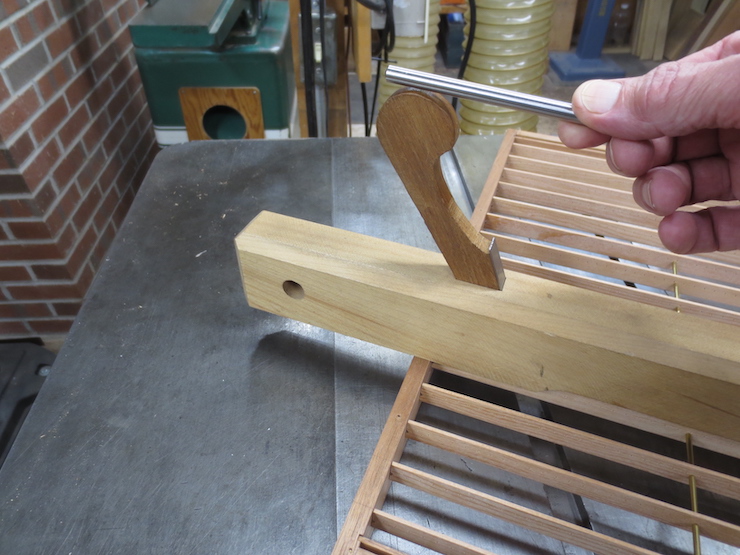
The wedge is given a tap now and then with a drill rod to keep the blade tight. This mould is not actually being leveled; these photos just show the method of adjusting the cutter.

The cutter is advanced by small taps with the same drill rod.

If you press a fingertip into the place where wood and steel come together while tapping you can feel the cutter’s advance even though it may be by only one or two thousandths of an inch.
