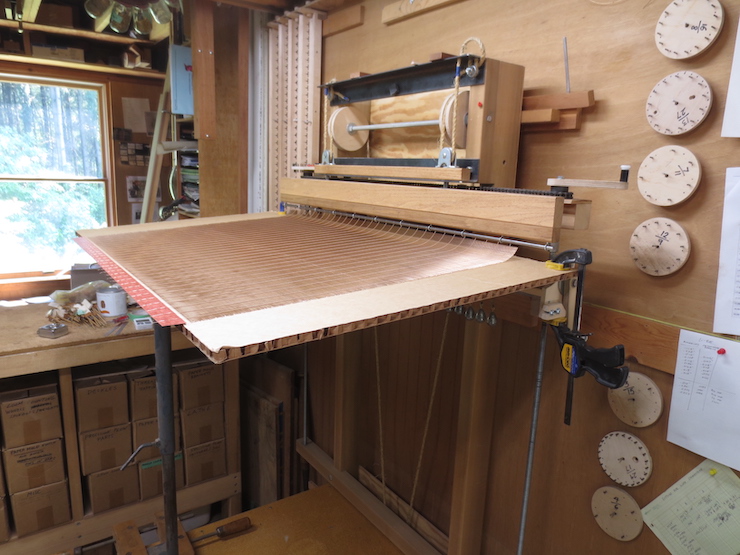
The largest laid facing I’ve made measured 30″ x 40″ but that was more than twenty years ago. Until now I hadn’t hadn’t made a very large facing on my new loom. There was no reason to think that it wouldn’t work but I was pleased to get a positive result.
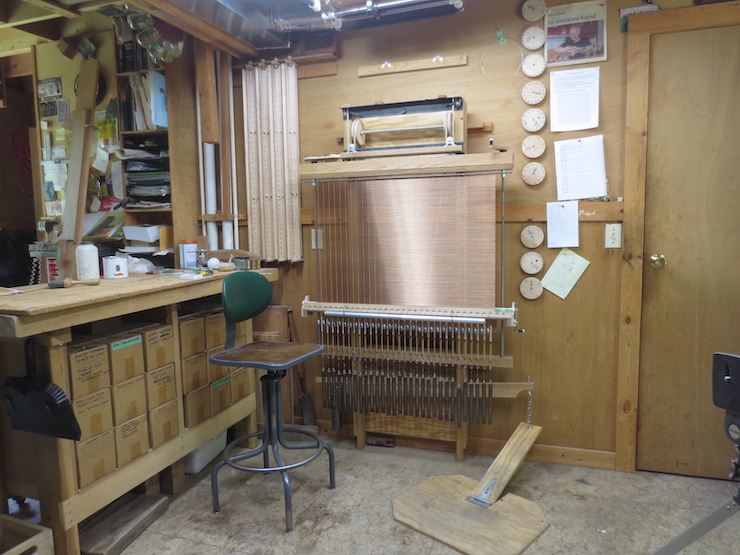
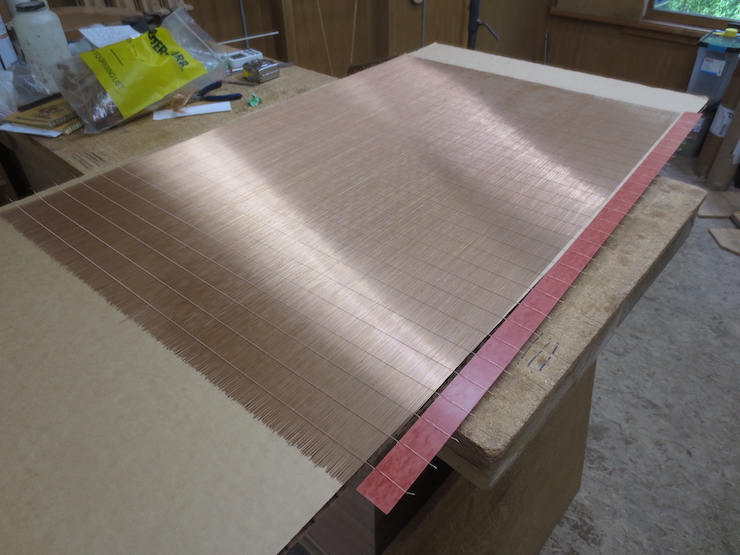
This mould maker’s loom is designed to make laid facings as large as 29-1/2″ x 40″ (approx. .75 meter by 1 meter). The completed facing above measures 24″ x 36″.
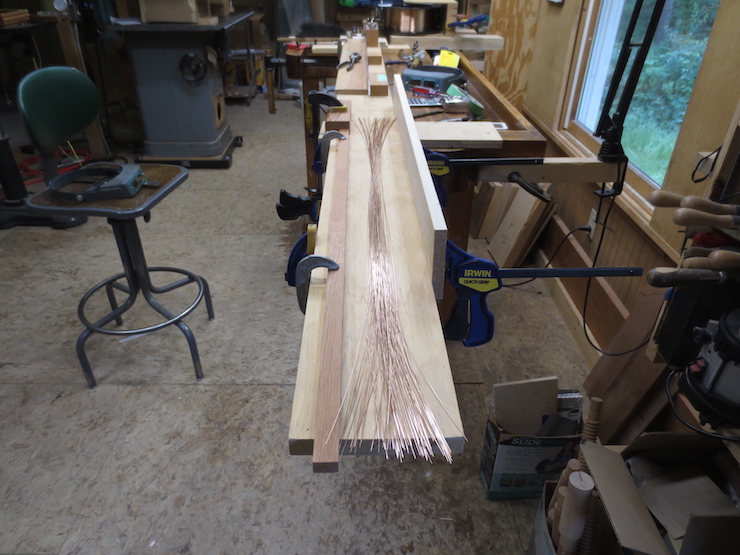
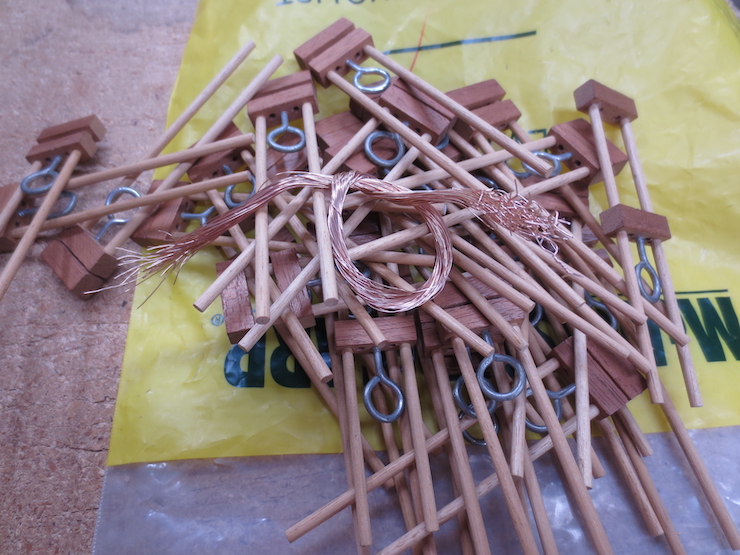
The facing required about 530 laid wires, each 36″ long. Pulling the wires off the spool and through the straightener took about 2 hours.
I ended up using only the first set of rollers. I wasn’t able to get significantly better results by adding the second set. I think this was because the ‘helix’ of this wire was so slight. This was the first time I had straightened this size wire.
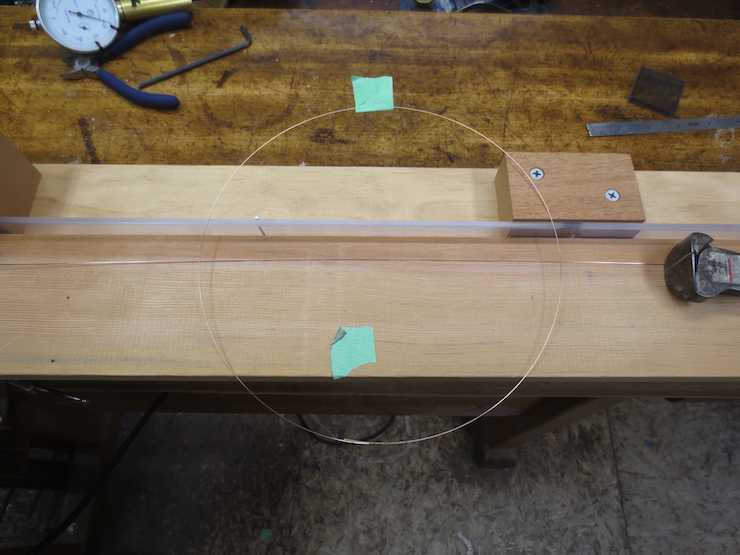
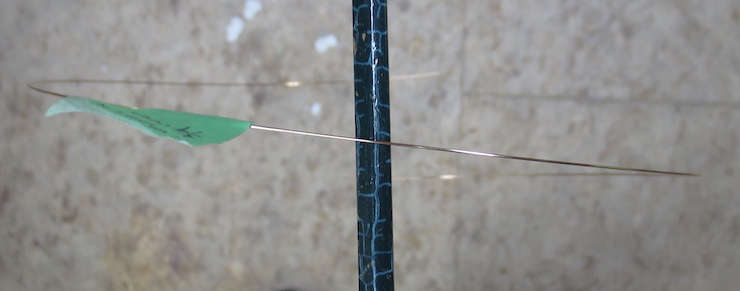
A complete circle cut from the spool shows a ‘cast’ of 8″ diameter. This ring of wire lies flat by its own weight; the ‘helix’ is minimal. It would be impossible to use this tightly curved wire for laid wires but just below it you can see a usable wire (from the same stock) which has been pulled through the straightener. This wire is .020″ diameter phosphor bronze with a 3/4 hard temper. It will be used along with annealed .011″ diameter wire (as chain wire) to make a facing with 22 laid wires per inch.
The diameter of the loop is the cast; this photo shows the helix. If it was possible to remove the cast alone a slight curve would still remain from the helix. This is what was done (sort of) with the single bank of rollers that were used. But the wire cannot be controlled precisely enough when passing through the rollers to completely isolate the cast from the helix so the resulting wires vary in their straightness.
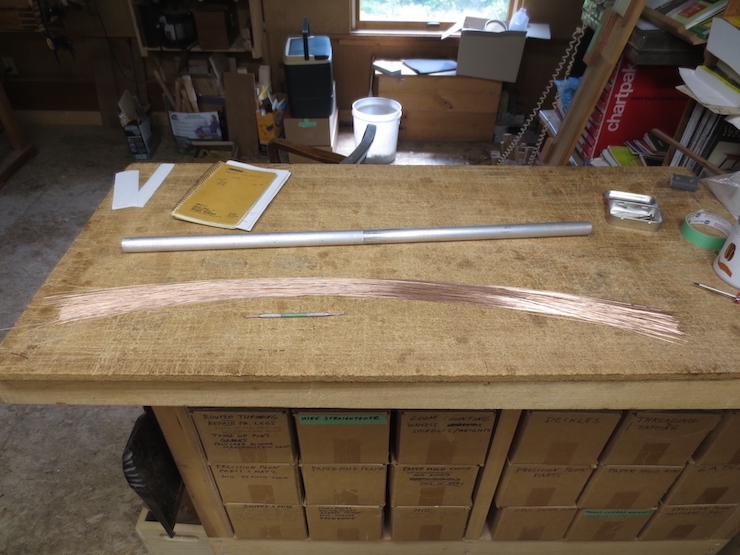
This is the completed batch of laid wires. When bundled together they appear to have the same curvature but if examined separately all are different. Many of these wires lie nearly straight, a few are truly wild and the rest fall somewhere between.
Putting the Wires Together
This loom is very dependable. I’ve made improvements over the years to reduce the chance of error while making up facings, but a certain level of concentration must be maintained and it’s still possible to goof up. Large facings are a little stressful since making a mistake often means starting completely over. Set-up for this facing took 3-1/2 hours. This involved swapping out the twisting mechanism already on the loom for another of the correct spacing, adding the spindles and hooking up drive weights, measuring out, stringing up and weighting chain wires, and putting all the foam board spacers in place. (Many of these steps are illustrated in other posts). This facing was completed without incident but the actual ‘weaving’ took 4-1/2 more hours.
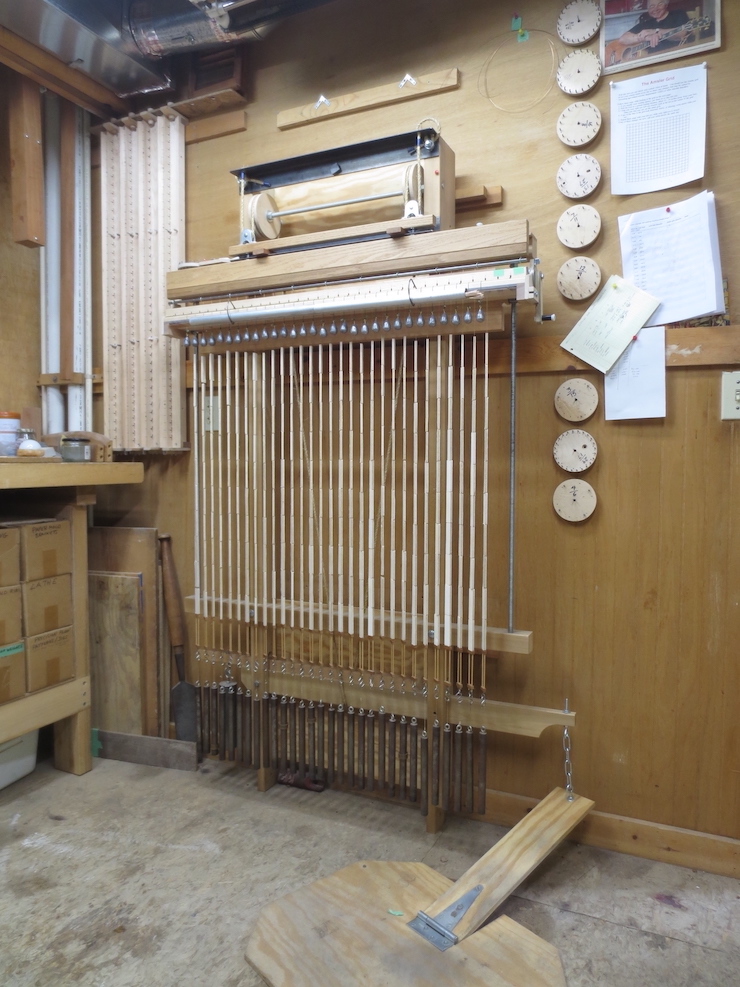
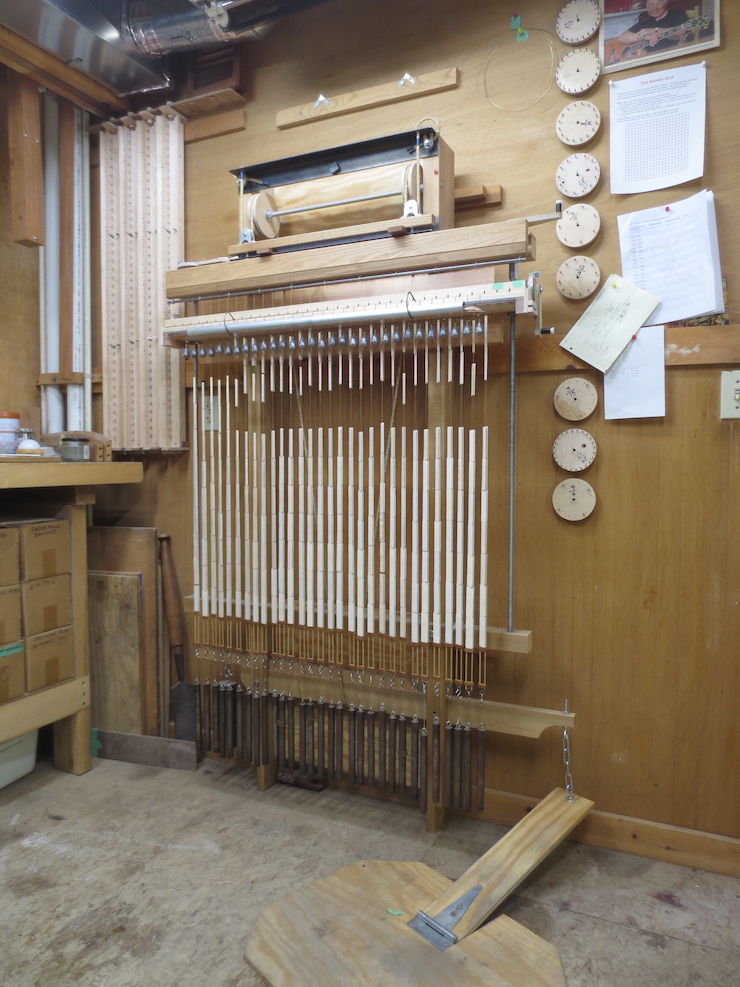
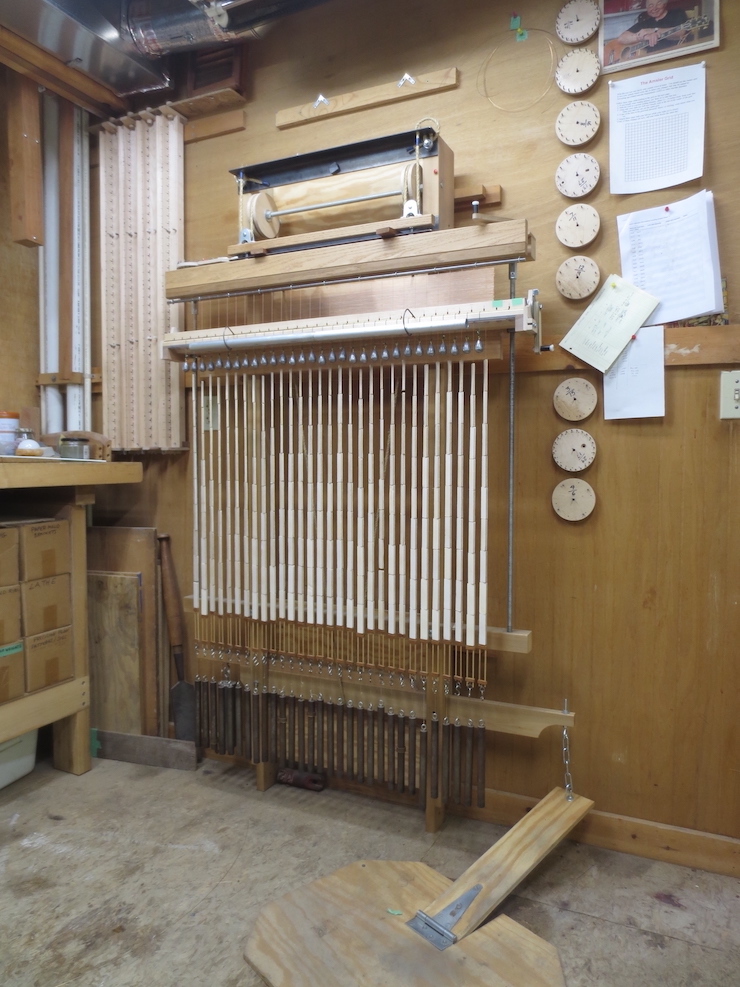
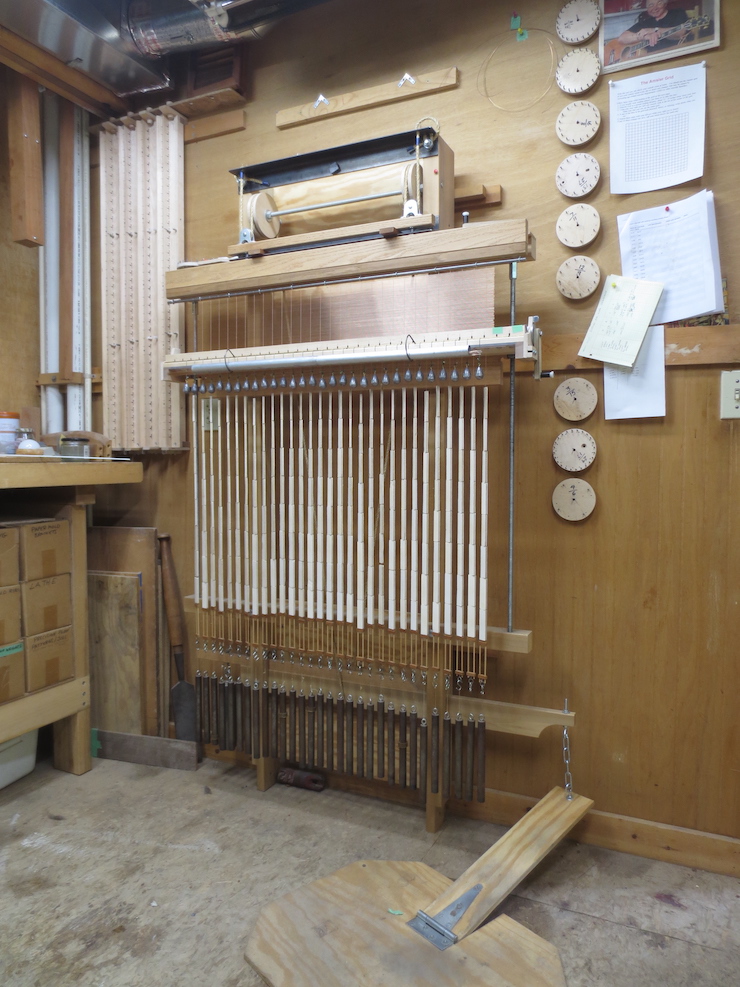
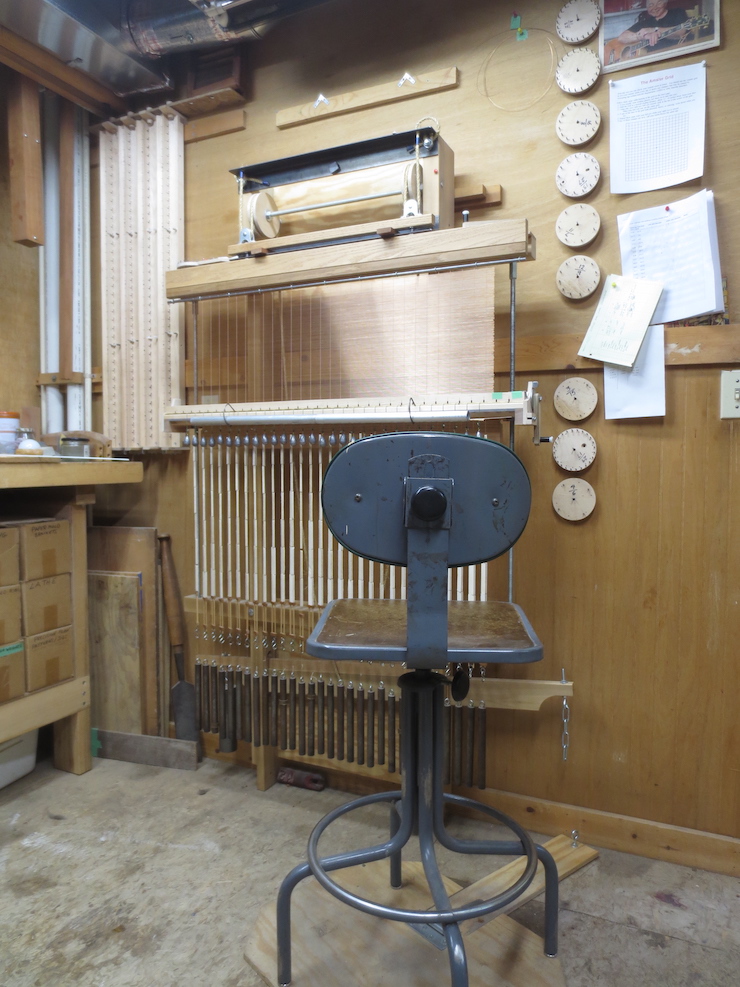
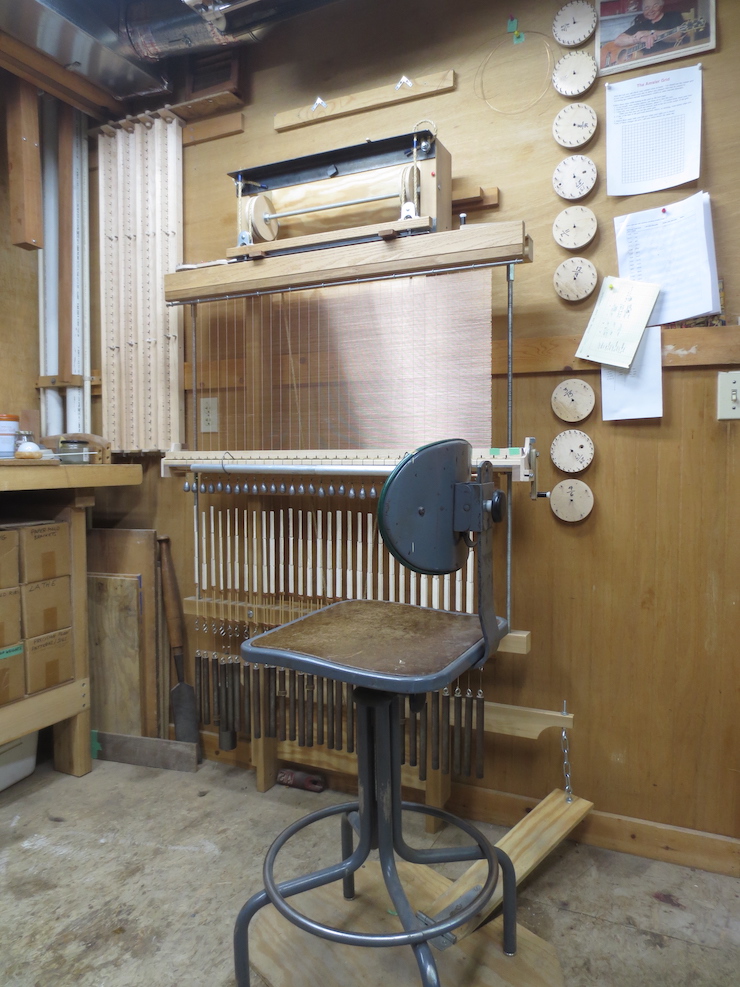
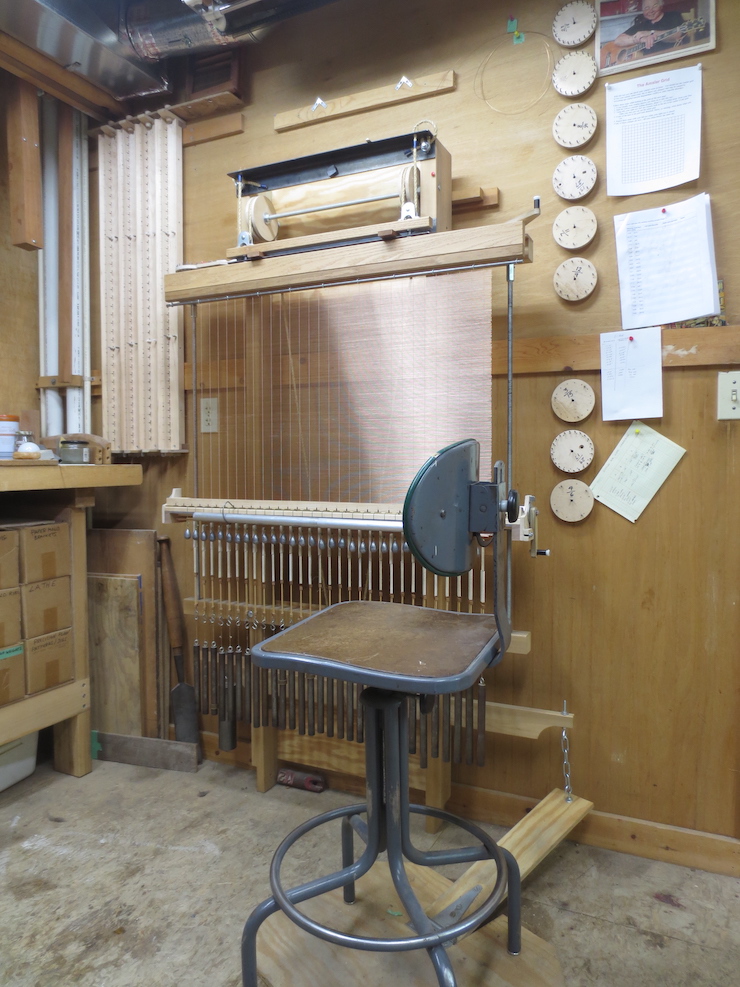
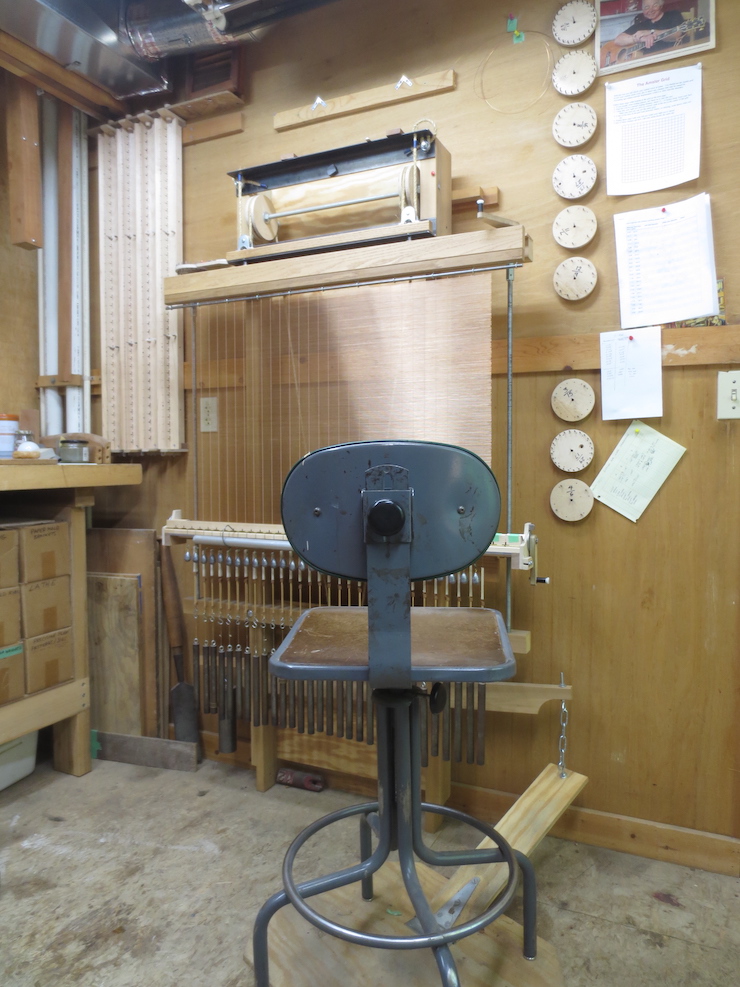
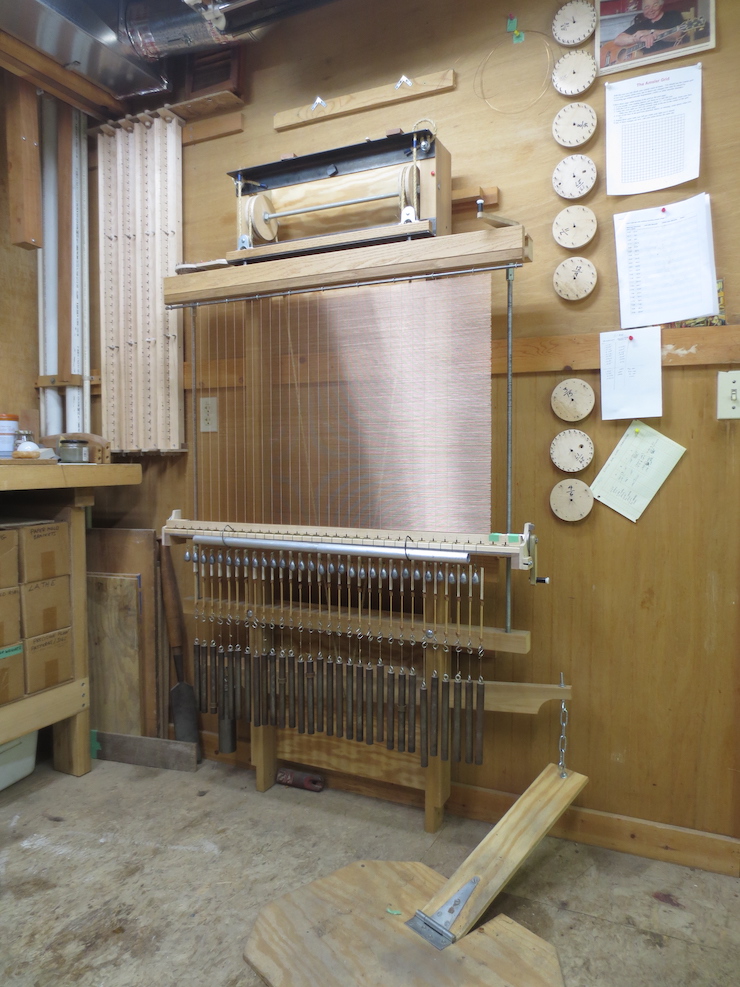
Above are shown some steps in creating the facing. At the beginning the loom has been strung up with 30 chain wire sets, each formed of a single soft phosphor bronze wire draped over the steel rod at the top, threaded through spindles and weighted at the bottom. Wire spacers made of foam board (300 in all!) are important to keep the wire from twisting up at the bottom as the spindles add twists at the top. As the facing grows larger and the twisting head descends, these wire spacers are removed, a row at a time. The last photo shows the completed facing. At first it is best to work standing but later when the wires must be inserted lower it becomes easier to sit (thus the stool).
When finished most facings can be cut off of the loom by simply holding the free edge in one hand while snipping off the attached edge with the other. But larger facings are harder to hold onto and more likely to be damaged while being cut away from the loom. To help support this large facing I added a strip of stiff cardboard at the bottom. But it still seemed risky and I tried something new. After the weights were removed and the bottom edge of the facing cut free I cranked the twisting mechanism back up to its starting position. As shown above it passed behind the completed wire facing as it moved up.
I found this piece of honeycombed cardboard among my packing supplies. It is rigid and light weight; perfect for this purpose. After it was inserted vertically behind the facing the fully raised twisting mechanism provided a ledge to support the back of the cardboard as it was raised, carrying the facing with it. The front end was propped to hold the whole thing horizontal and the back was lightly clamped so it wouldn’t slip off.

The chain wire twists could now be safely snipped off. The facing weighs about two pounds. If it’s not well supported as the chain wires are cut the weight of the wire could stretch some of the chain wires and damage the facing.
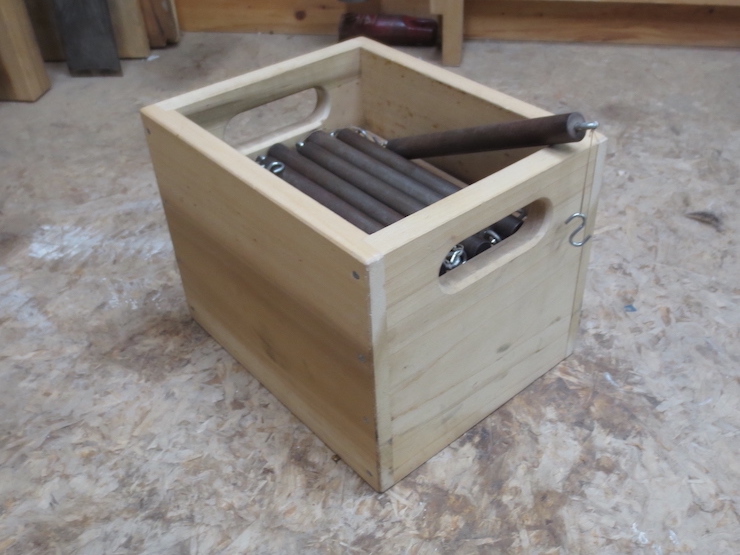
When not in use the weights are returned to this wooden crate. The box with a complete set of weights weighs 48 lbs.
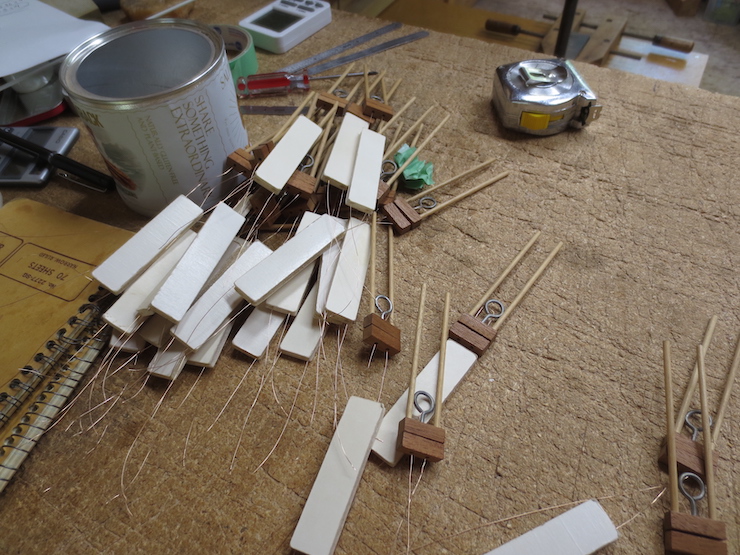
The wire slides and remaining wire spacers are separated.
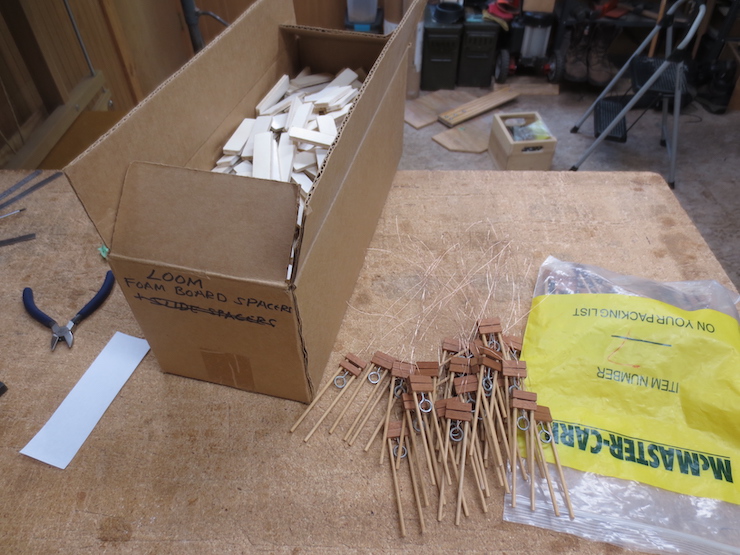
This box stores enough spacers to make the largest possible facing.
The scrap wire will be added to the scrap box for recycling and the slides are returned to their bag.
About this Facing
This facing has 22 laid wires per inch. It took me quite a while (years in fact) to realize that this loom can easily make laid facings with an even number of wires per inch. At first I used a limited number of counting wheels and the spacings were all odd fractions (except for 26 wires per inch, easily made by giving the crank 1/2 turn).
My most used laid facing had 18.57 wires per inch (10 pins x 7 clicks). Others included 20.8 (8 pins x 5 clicks), 21.67 (5 pins x 3 clicks), 7.8 which I use for wove backing (3 pins x 5 clicks), and 5.77 (4 pins x 9 clicks) for laid backing.
When provided with a large set of counting wheels the loom is capable of a vast number of intervals, most of which will never be used. Of course there’s no reason that the spacing of laid wires SHOULD come out even but it was interesting to be able to compare my facings to standard Amies facings. As near as I can tell the loom that was used there since 1889 (now used by Serge Pirard) was designed to make ‘even-inch’ facings.
All that is needed for the wires to come out even is a counting wheel with the same number of pins as the desired number of laid wires per inch. Since the twin lead screws have 13 threads per inch simply counting 13 ‘clicks’ will lower the twisting head the precise amount to make the that ‘even number’ spacing. This must be done over and over; once before each laid wire is inserted in the wire trough. But it’s easy to count to thirteen (almost without thinking) if you break the number into smaller units. Very soon you get used to hearing the pattern of clicks even if it’s fairly rapid:
“onetwothreefourfive”….”onetwothreefourfive”…”onetwothree”. Or:
! ! ! ! ! ……… ! ! ! ! ! ……… ! ! !
Together these three easily recognizable audible patterns add up to 13. It would take much more concentration (and more time, with a greater chance of error) to count the clicks one at a time.

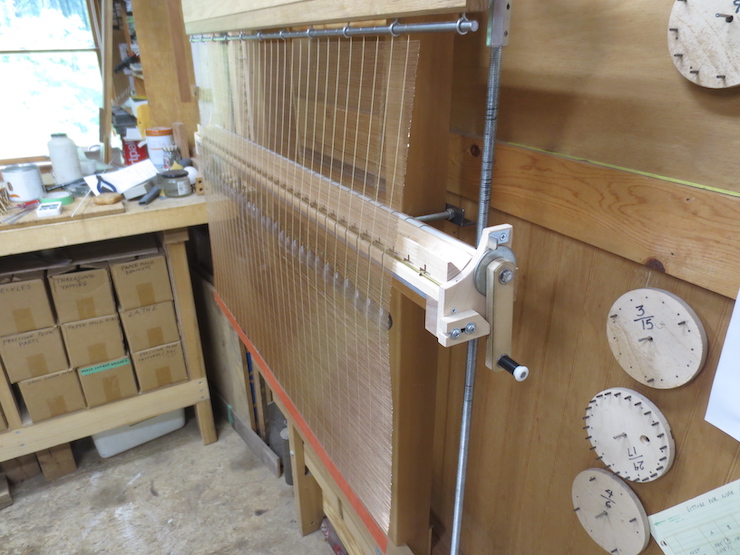
Above, the 22 pin counting wheel in place on the loom. As the disc rotates the pawl slips off of the pins creating audible clicks that can be counted to produce a desired laid wire spacing.
See Post #20 “Making Laid Facings” and Post #21 “Making a Laid Backing on the Loom” for more details.
