A deckle serves as a ‘fence’ to ‘corral’ a rectangle of pulp as it is deposited on the wires of a mould. In order for the edges of the paper to have neat ‘deckle edges’ the inner rim of the deckle is given a special shape, composed of very subtle convex curves on the two long sides and equally subtle concave curves on the short sides. This subtle shaping allows the deckle to ‘bite evenly’ against the wire surface of the mould when the deckle is pressed against the mould while dipping sheets.
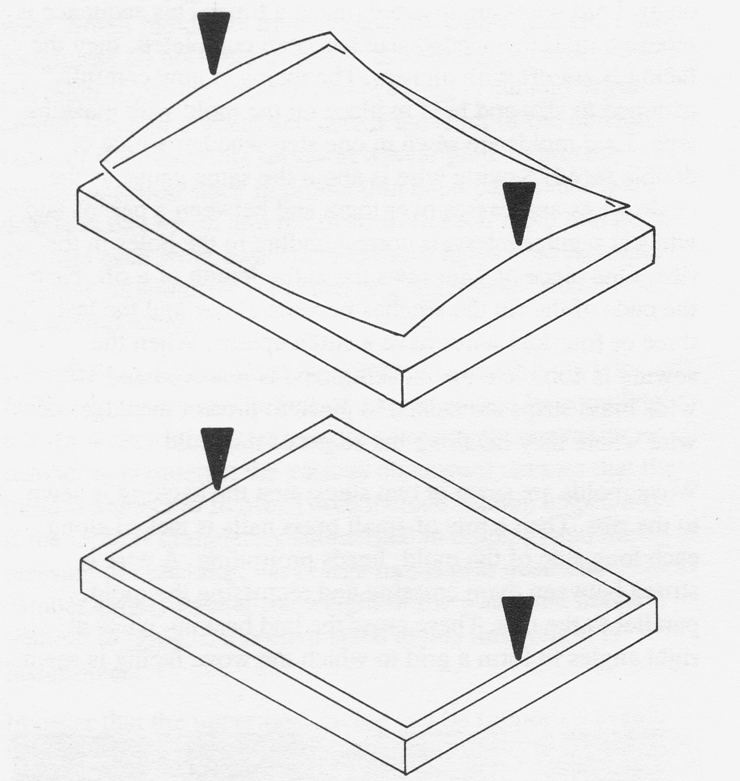
In the drawings these curves are much exaggerated and the inner edge of the deckle is represented as simple lines. The ‘arrows’ in both drawings indicate the areas where pressure is applied by the vat person’s hands while sheets are being formed.
When the deckle is placed loosely upon the surface of the mould it will contact the flat wire surface along the midpoints of the two long sides as shown at the top. As the short sides of the deckle are gripped to the mould the wooden deckle will be forced to distort slightly and the curves will flatten, supplying a little extra pressure at the places where it is most needed; farthest from the hands. This is especially important for large moulds. If the edges of the rim were instead made straight the deckle would be more likely to ‘leak’ pulp in some areas, causing wild deckle edges.
This effect of these curves is very subtle, hard to see and impossible to photograph.
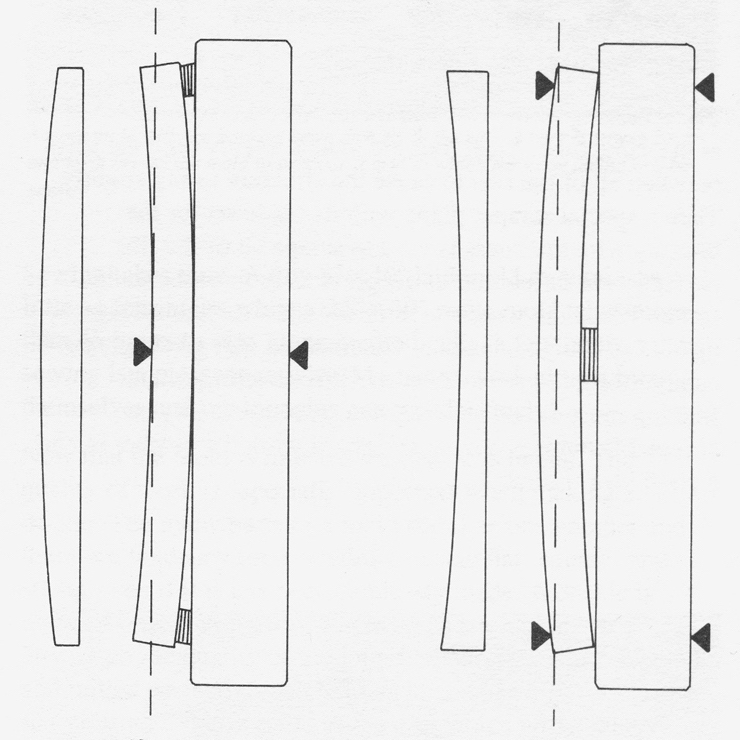
To create these very slight curves the deckle pieces are sawed, one at a time, while being bent and held against a straight beam. After the saw cut has been completed and the part released it will spring back to its original straight condition except for the inner rim which will have been given a convex or concave shape. This depends on which of the two ways (shown above) the piece was shimmed and clamped. The drawings simplify and exaggerate the shapes for clarity. The dashed lines represent the saw cuts. The arrows show where clamping pressure is applied.
On the left the part has been shimmed at both ends and pressure applied in the middle making it (temporarily) concave. When sawed straight (the beam is stout enough to stay straight) more is removed from the ends than the middle. When the part is removed from the beam it springs back to the shape shown at the far left, leaving a convex curve.
On the right the part has been shimmed at the middle and it is clamped against the fence at both ends. This reverses all of the effects to create the opposite result; a concave curve.
I hope the photos make this process clearer!
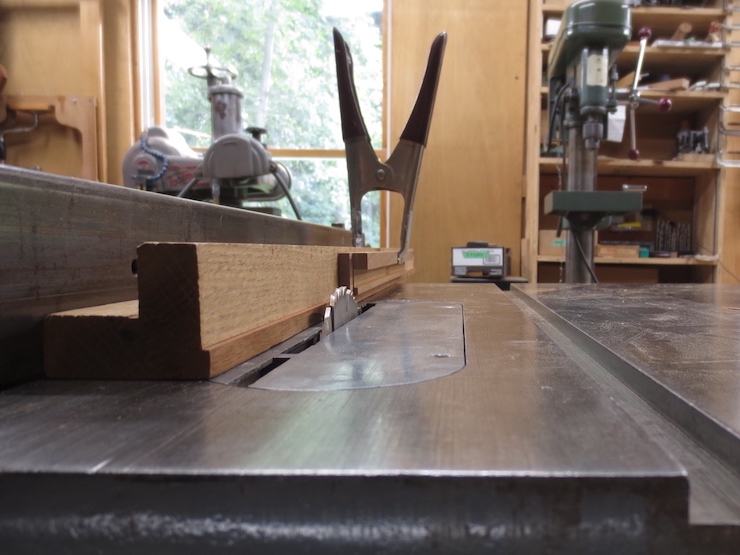
The beam is L shaped so that one edge can ride against the fence of the table saw while leaving room for the clamp (so it won’t hit the fence). The inner edge of the deckle rests on a ledge to help hold it in place. The smooth cutting hollow ground saw is tilted inward at 3 degrees.

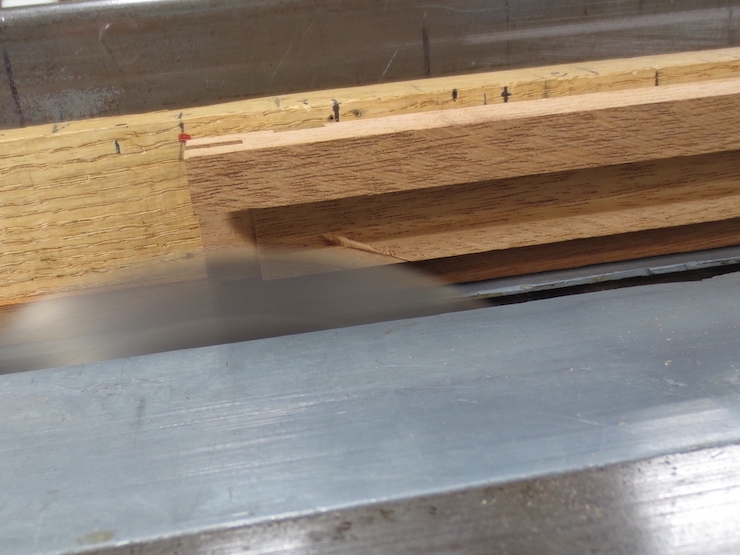
One of the long sides of a deckle being sawn to create a concave shape along its rim.
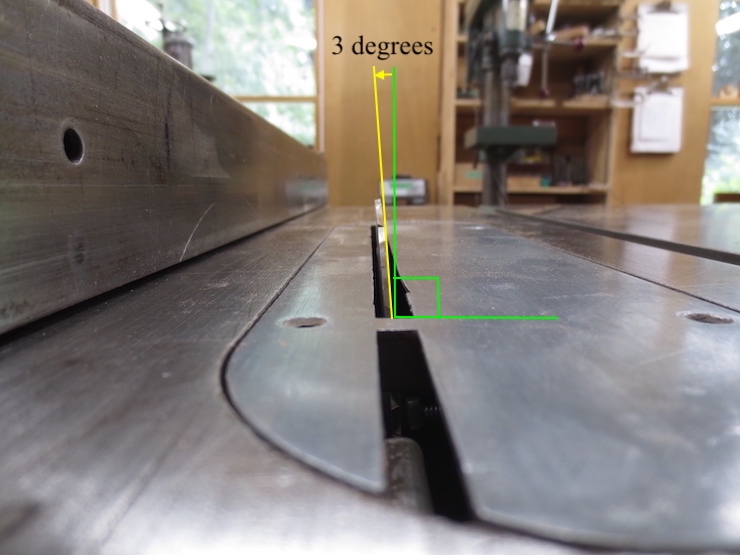
The saw is tilted toward the fence by 3 degrees.
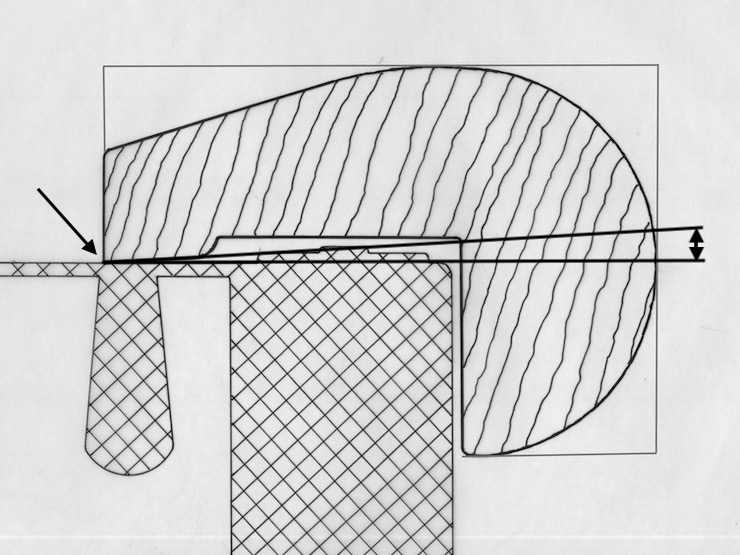
The effect of the 3 degree angle is shown here. Since the rim is cut back at an angle it touches the mould wires only along its very edge (where the arrow points), concentrating the pressure there.
Making a Convex Curve on the Front and Back
The long sides are cut first. Here’s the process:
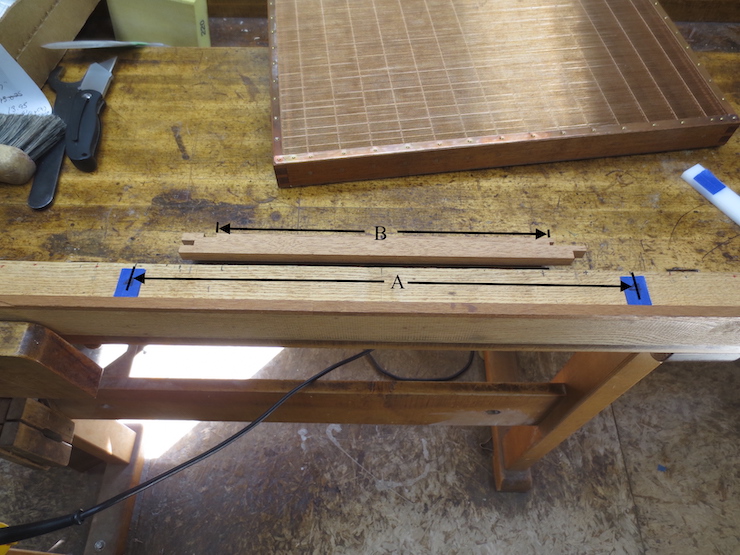
Unfortunately I didn’t take the photo I should have so this one will have to suffice. Part “B” is actually one of the short sides of the deckle; imagine for now that it is 6 inches longer to fit the masking tape shims placed on the beam. “A” is the ‘functional length’ of the long (near and far) sides of the deckle that we are actually working on for this first step.
The shims are layers of masking tape. There are currently 4 layers in place for this 12″ x 18″ deckle. A smaller deckle would use fewer shims; a larger deckle more. The shims are centered about 1-1/4″ from each end of the deckle part.
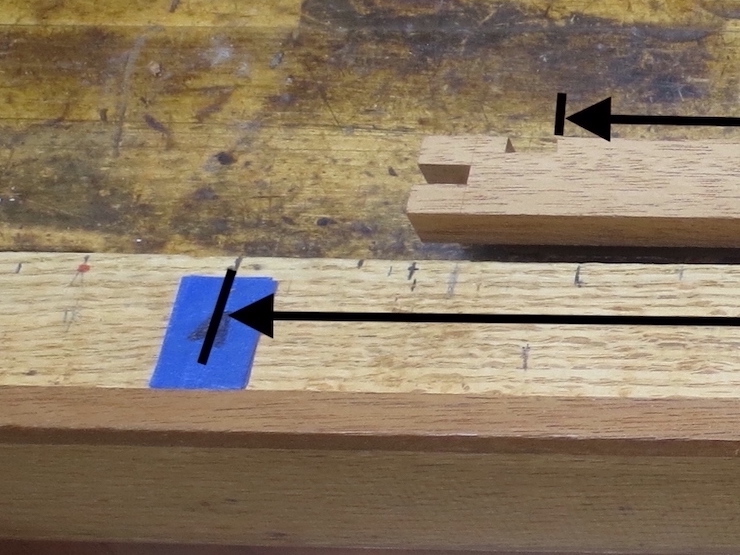
The same at the other end.
After the part has been placed on the beam and clamped a test cut is made. Here you can see a very light cut being started. I’ll finish the cut and then take the part off the beam to check to see if the curve is ‘strong enough’. Another layer of masking tape can be added to accentuate the curve or a layer removed to reduce the curve.
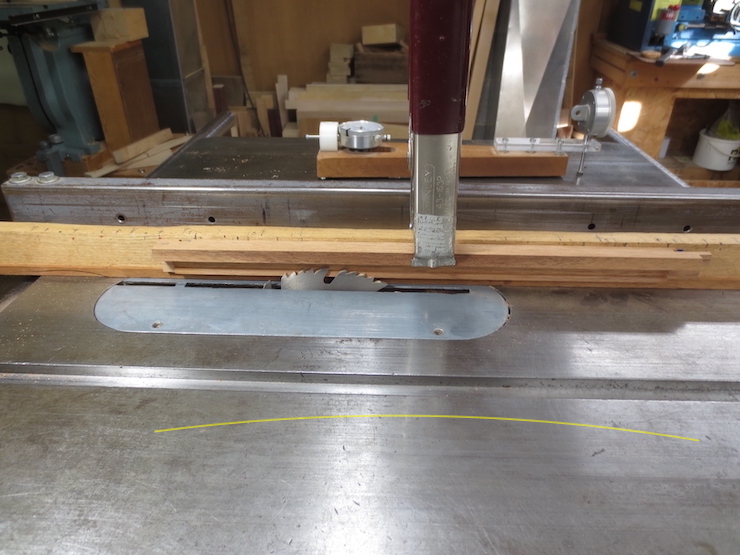
The exaggerated yellow line shows which way the part is being bent against the beam during the saw cut.
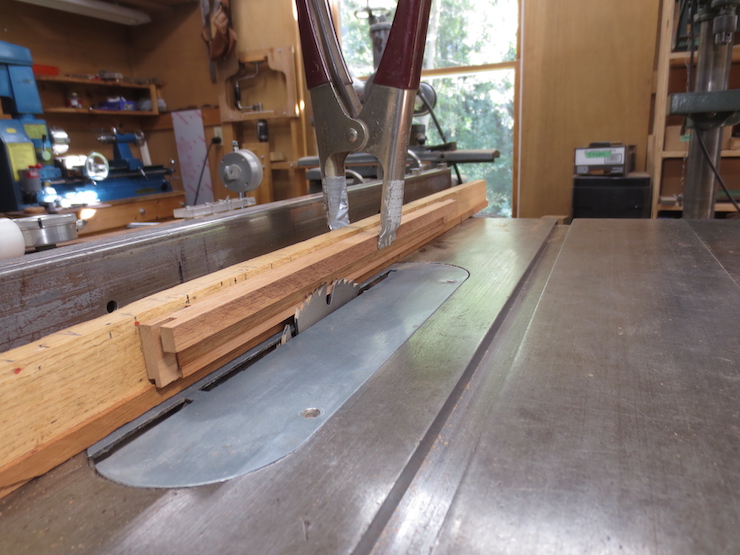
One more view.
Creating Concave Curves on the Short Sides
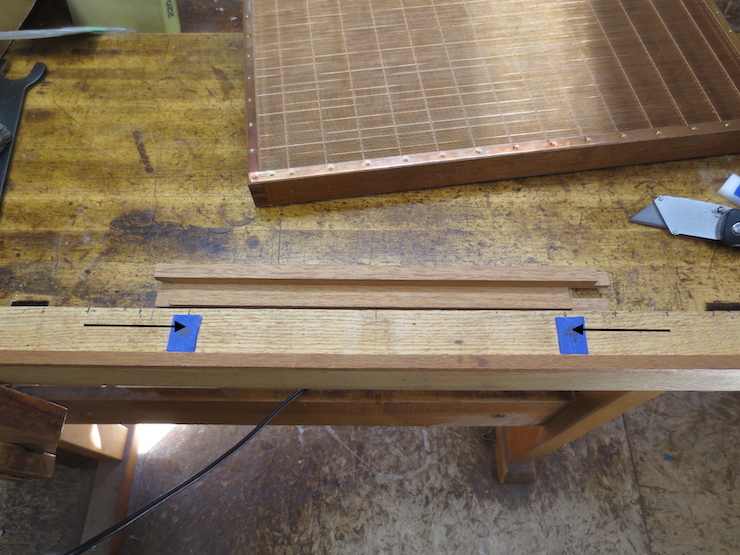
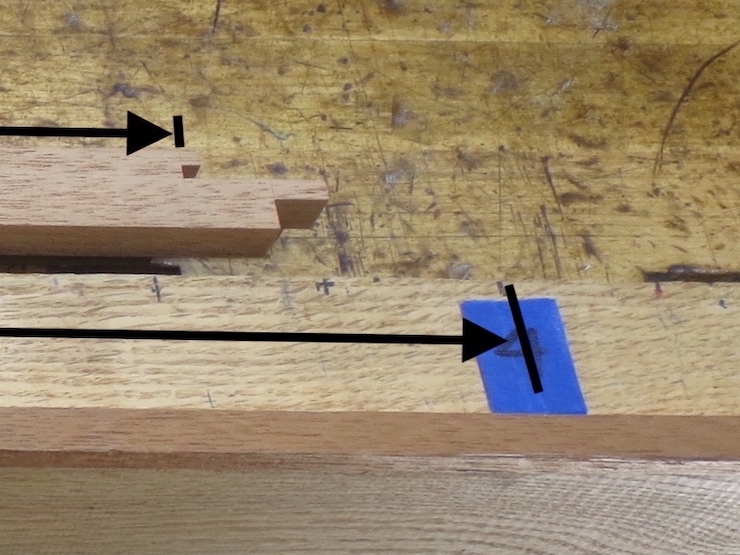
After the long sides have been finished the first step towards cutting the concave curves along the short sides is moving the shims. The same ‘stacks’ of shims are used again but they must be peeled off and moved inward to accommodate the shorter length of these deckle parts. Using the same shims at the ends means you don’t have to reset the table saw fence to make the parts align where they meet at the corners. The arrows show how the stacks have been moved.

Shims are now added to the center to create a ‘hump’ to bend the part over. Remember that this part needs to be bent the opposite way.
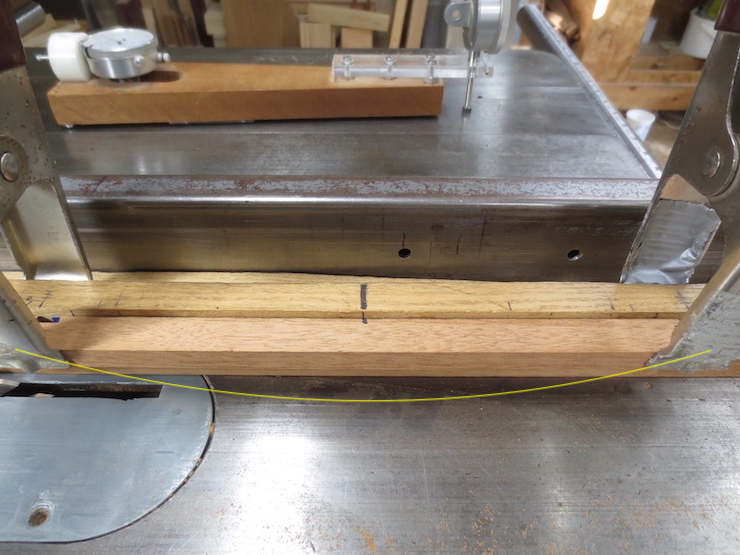
The part is clamped at both ends to bend it over the ‘hump’ in the middle. Once again the exaggerated yellow line indicates the curve that the part is given while it is sawn.

I started out with 6 layers of tape in the middle. After deciding that the curve needed a little more ‘oomph’ I added one more layer, making 7 total. Since there are 4 layers at each end the net ‘displacement’ in the middle is 3 layers of shims (about .012-.015″). About 1/64″
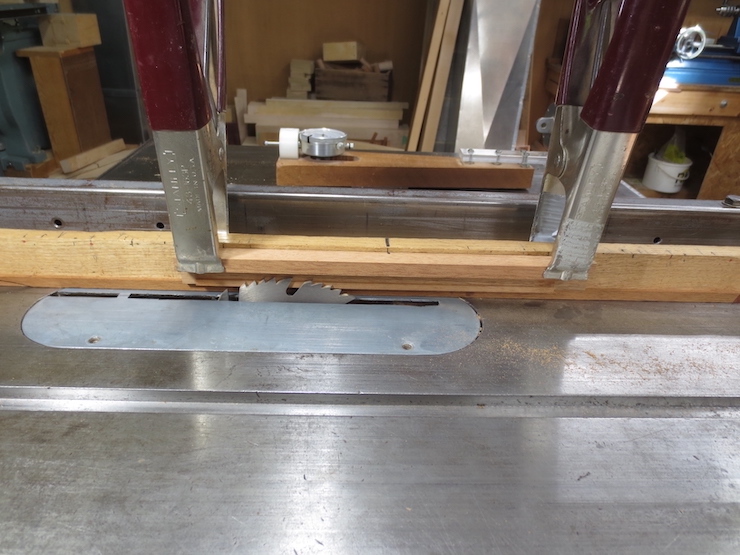
Just another view of how the part is trimmed on the table saw.
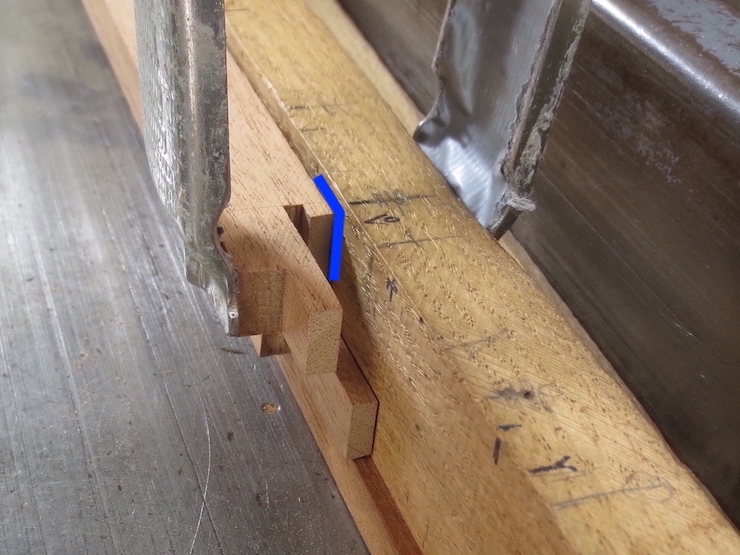
The tape shims were visible in this photo but just barely. I’ve accentuated the color to show how they are placed. The stack of shims actually extends all the way down to the ledge to support the entire width of the deckle part, though it doesn’t appear that way in the ‘doctored’ photo.
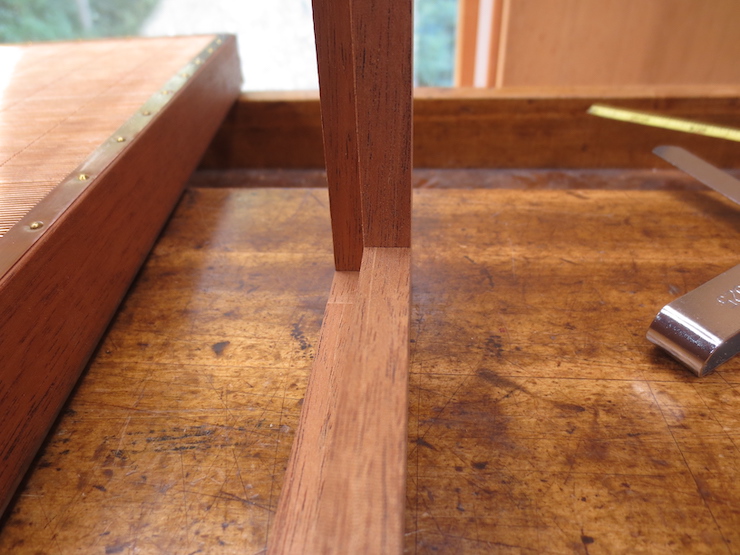
When the parts are assembled the convex and concave edges should meet perfectly at the inner corners of the deckle.
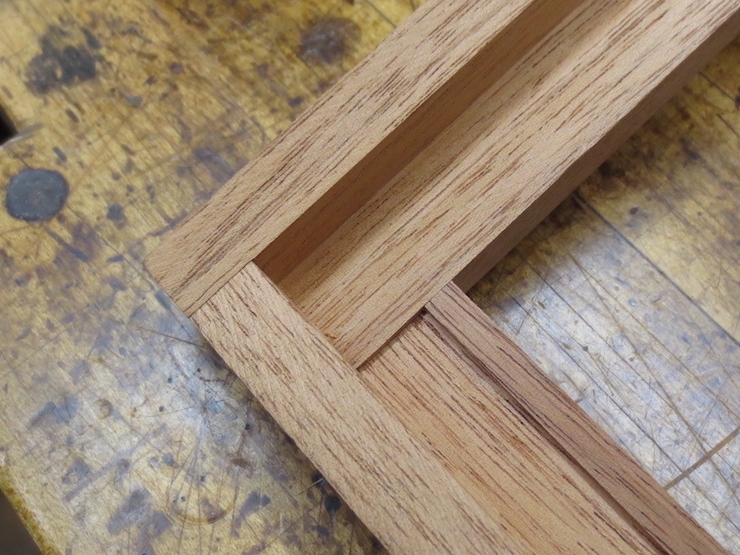
Now the deckle is ready for the joints to be glued.

Considering the subtleties of dry fabrication I am waiting for the process of water curing. This topic, water curing, gets extensive attention in paper conservation.
LikeLike