Way back when (in the 1980s) when I started working to make a mould maker’s loom I made a total of 45 one pound steel weights. This determined the maximum number of chain wires that the loom was capable of and I’ve stuck with that number since. This would make a very large mould! For this test I distributed 45 of the new adjustable spindle units on the loom in order to see whether the loom could handle this (heavy) job. It also provided another test for the new spindle units which have performed very well on smaller wire facings.
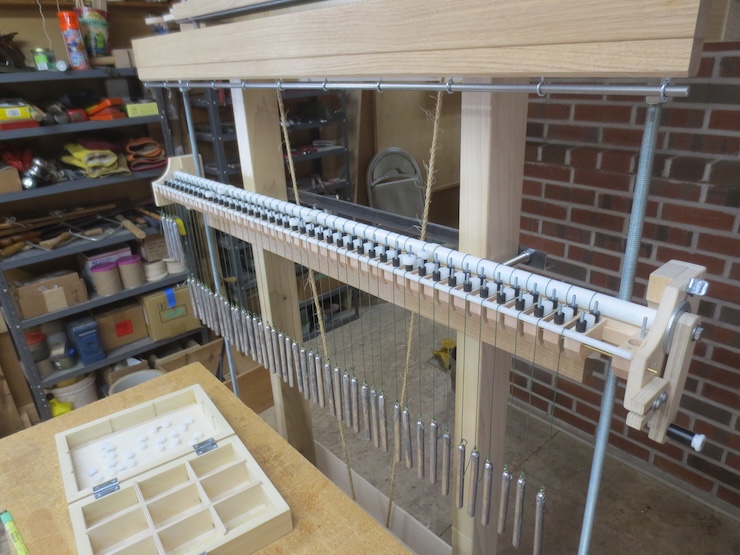
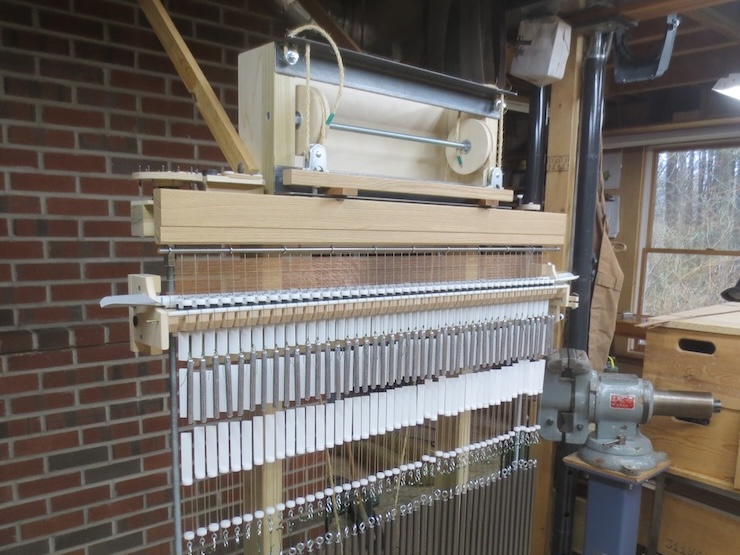
Here I have positioned the spindle units evenly along their rack and added all of the drive weights to the cord reel. In my wire supplies I found about a hundred and fifty .020″ diameter wires which were 40-1/2″ long. This was about right for running this test though only enough wires to make about 6 inches of width. The drive weights used here are a different shape and weigh slightly more than the old tear drop shaped ones which are no longer made. These “pencil sinkers” aren’t as attractive but seem easier to use so far.
The forty-five 2-1/2 ounce drive weights pulled pretty hard on the cord reel. I temporarily placed three of the wire support assemblies (one shown here near the middle) along the length of the traveling beam. A short plastic bushing rides against each of these and holds the reel up so the drive cords don’t rub. These bushings are a new discovery and work very well. The wire supports aren’t usually put on until after the cords are wrapped around the spindles.
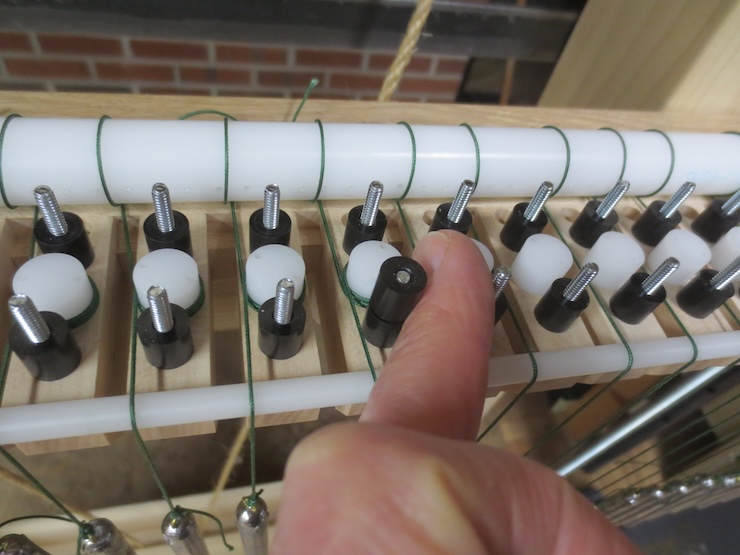
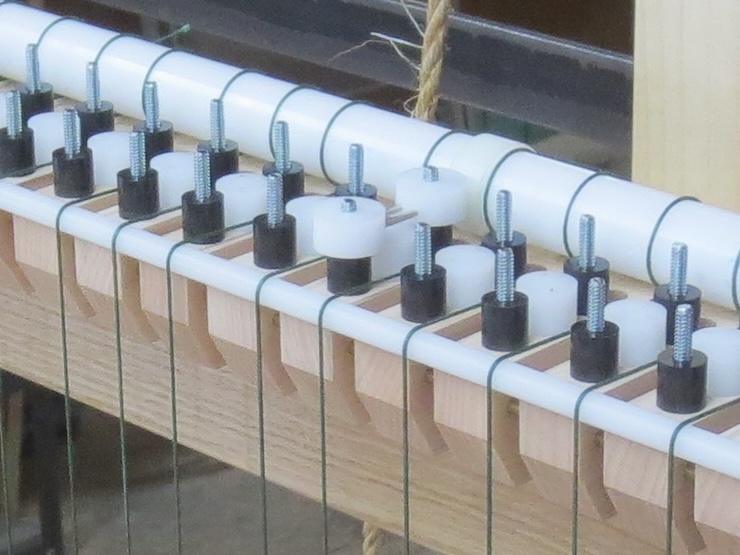
Wrapping the drive cords requires some fancy finger work. The steel studs threatened to abrade the back of my finger and I found that adding an extra black plastic spacer created a much more comfortable situation. You just move the little tube along as you move from spindle to spindle.
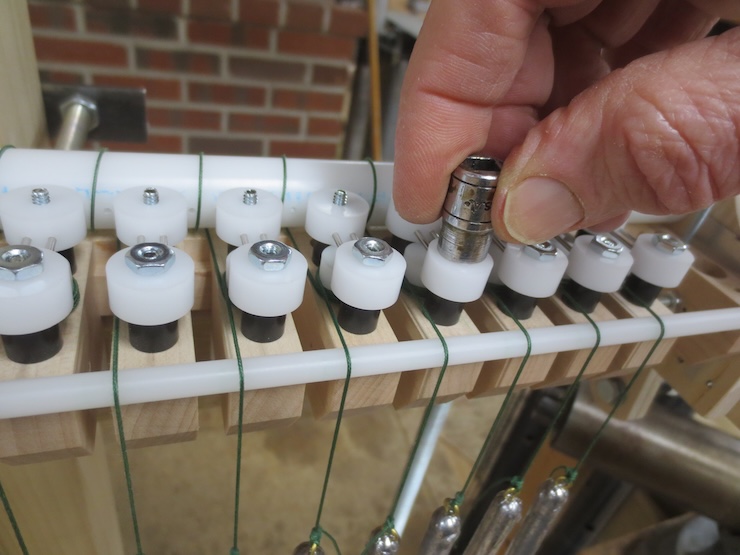
A socket wrench makes it easy to lightly snug up the nuts to secure the wire supports.
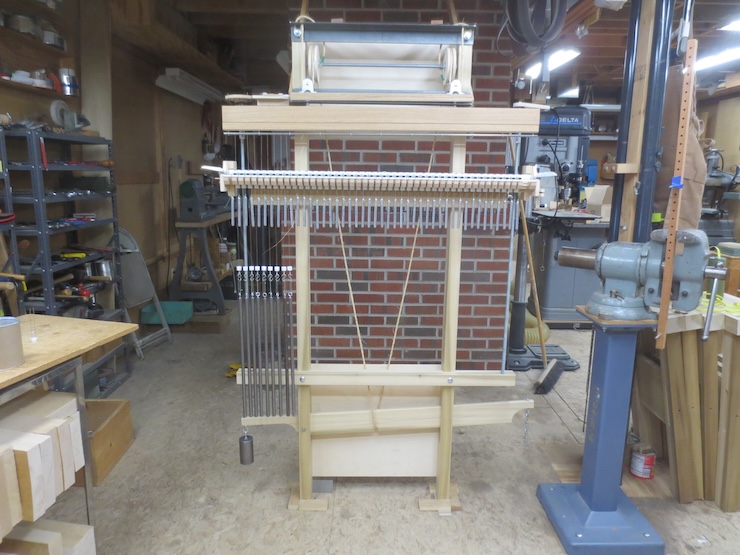
Now the chain wires are being strung and wire weights added. These new ‘skinny’ wire weights are 1/2″ diameter and 18″ long. They weigh the same as the older 3/4″ x 8″ ones. The two shapes have advantages and disadvantages. The thinner, longer weights are easier to use with closely spaced chain wires but put a smaller limit on the width of the facing (unless I cut a slot in the floor so they can hang down lower). I think the maximum width may be reduced to about 20″ . The loom frame is designed for a maximum width of about 29 inches. It’s not likely that I’ll be making a mould that wide. (Keep in mind that the width of the facing is measured vertically when it’s being made on the loom.)
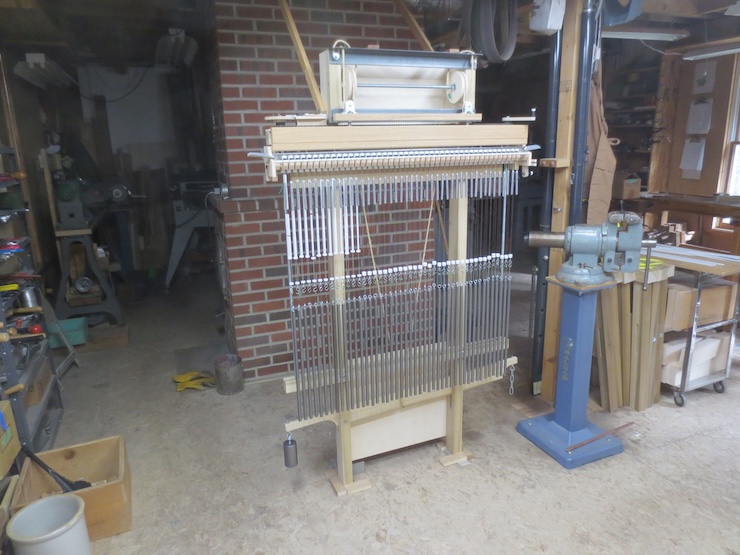
After all the weights are added the foam board spacers are added.

The loom is ready to go. I found that the 45 lbs. could in fact be raised by the foot treadle without any problem. I did have to adjust the lift rope a little tighter and of course the lifting action felt different.
All the wire twisting weights add up to a little over 7 lbs. so turning the crank felt different too. But it worked fine.
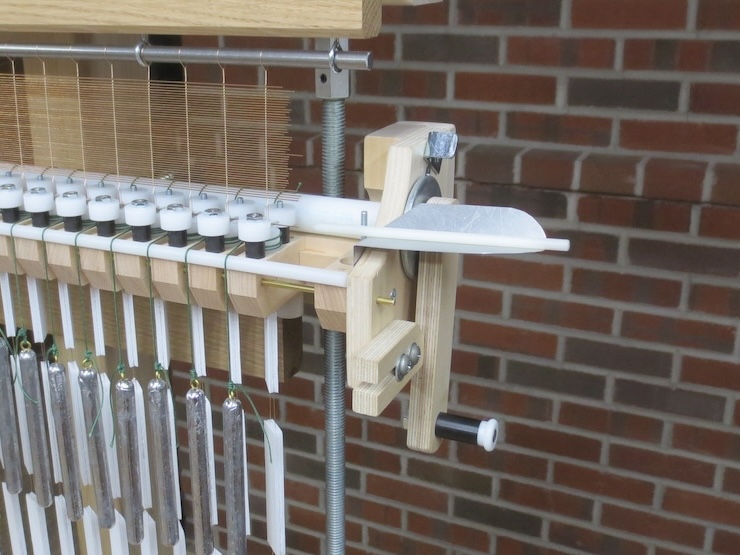
I had to make little sheet metal extensions to hold the shuttle at each end. You start the tip of the shuttle between the wires before inserting a laid wire into the hole in its end.

This one catches the shuttle so it doesn’t just fall on the floor each time it comes to the end.

A view from the back which I hadn’t yet photographed. (This loom isn’t fastened to the wall so you can walk behind it. )The loom has worked very well at its’ maximum capacity. I used up all of the pre-cut laid wires and then added more laid wires of a different diameter to use up the full length of the chain wires.
Here’s a little bit of video which may give a better idea of the process.
Here are the steps I am going through:
(1) The foot treadle is depressed to raise the web of wire enough for the shuttle to pass beneath. A new laid wire is inserted with the help of the shuttle. You can see it passing from right to left. After it’s through I pick up the shuttle leaving the wire in place.
(2) The foot treadle is released to lower the wire web to its resting position. This lowers the upside down “Y”s of the chain wires to hang very close to (but not actually touching) the newly ‘laid’ wire.
(3) The crank at the right end is turned counter-clockwise as far as it goes (and held) to give the chain wire twists 1/2 turn. This action ‘picks up’ and incorporates the new laid wire into the web.
(4) The wire web must be raised with the treadle BEFORE the right hand crank is released (clockwise). Having the web thus raised ‘traps’ the multiple splayed (upside-down “Y”s) between the pairs of rods that the laid wire rests on. The trapped chain wires can’t turn much so when the crank is released the spindle drive cords simply slip on the spindles’ surfaces. (When the crank reels in the weighted cords in they are pulled at one end and weighted at the other. Thus the cords are pulled from both ends and tighten around the spindles to drive them. When the crank is released the pressure comes from only one end (the weighted end) so all the cords just slip on the spindles. This simple mechanism allows the spindles to be driven in only one direction)
Three complete sequences are shown.
At the end of the video I insert two identical blocks of wood to hold the wire web up. This mainly keeps track of what step I’m at so I can start again without making a mistake.
This all sounds very complicated but is actually about as simple as possible in order to get the job done. If some of these steps don’t make sense you can probably find your answer in previous posts but it may take some looking.
Near the middle you can see me fussing around and poking at the shuttle with my finger to get it back in position to receive the laid wire. When the laid wire slips out of the shuttle it brings things to a halt. This error doesn’t happen too often but we left it in. This is an unusually wide test facing. Smaller facings go quite a bit faster.

previous post vanished…query of metallic drawn distinction between laid and chain wires.
LikeLike
Posts # 19, 55 and 56 may have the information you’re referring to. No posts have been deleted and all the information is still there but it may be hard to find. Trying the tags and categories might help. Apologies for the lack of organization. Thanks!
LikeLike
haywire…when will the book appear?
LikeLike