Backing and facing wires have been fitted to this mould; the next step is to sew them to the ribs. A soft (annealed phosphor bronze, in this case .010″ diameter) sewing wire follows a spiral path for the length of each rib to bind the wires to it. The ribs have been drilled at regular intervals to put a stitch in every sixth space (over the chain wire between pairs of laid wires) except at the ends where the stitches are closer.

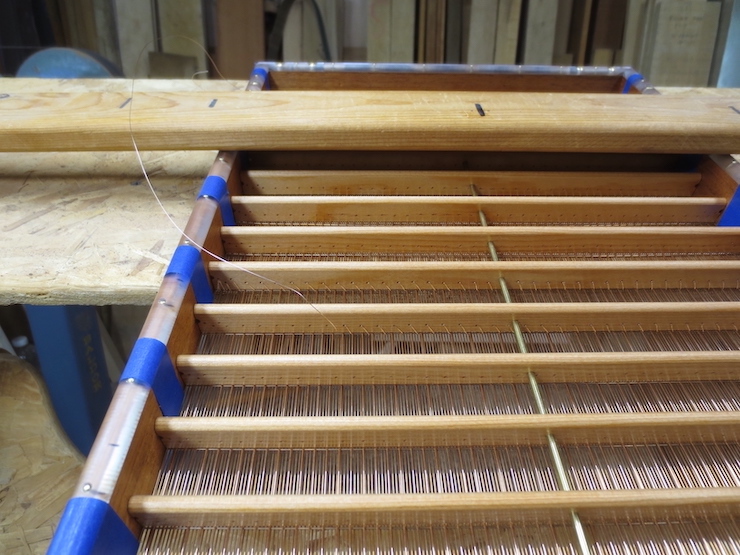
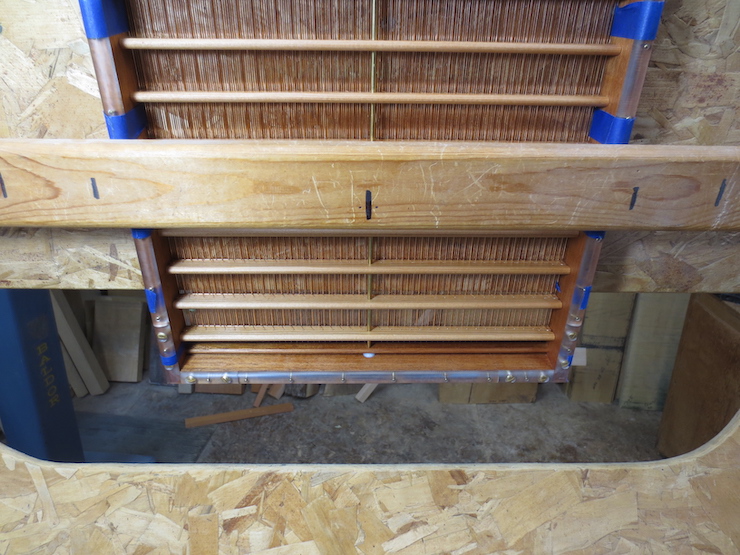
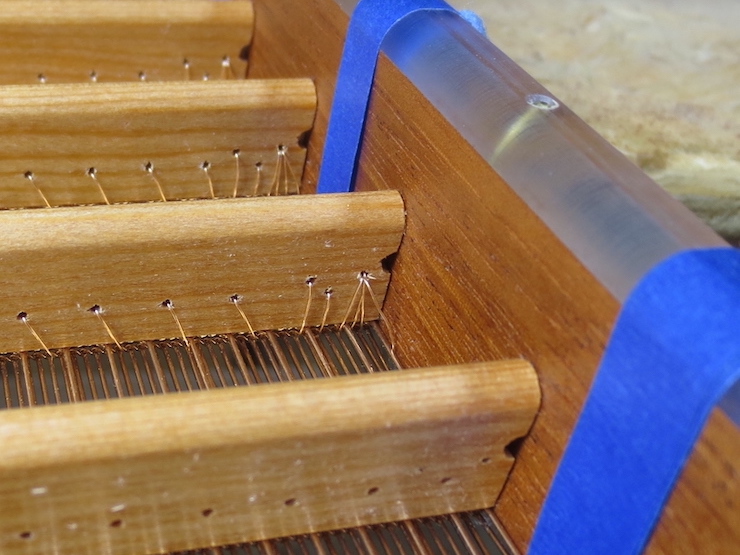
This ‘sewing frame’ (for lack of a better name) holds the mould leaving both hands free to handle the sewing wire. The height can be adjusted for sewing laid or wove moulds. The angle of the mould can be changed easily by loosening the two wooden handles at the ends. When not in use the frame can be folded flat (or taken to pieces) for storage.

Before sewing a rib the upper chain wire directly above it must be straightened and aligned with the scribed marks at either end.
Then the lower chain wire (of the backing) is pulled over to rest directly below the upper chain wire. The straight bridge wire is pushed up against these two chain wires from one side. All line up directly above the narrow flat top of the rib. The wire stitches will hold this cluster of wires in place.

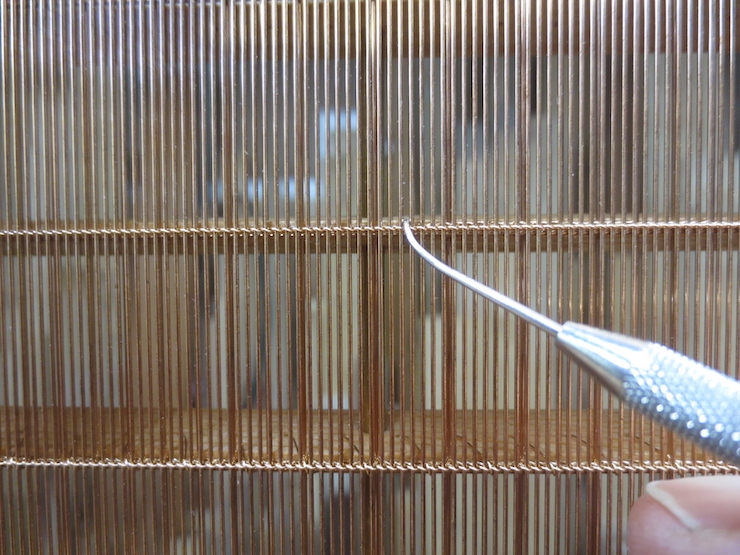
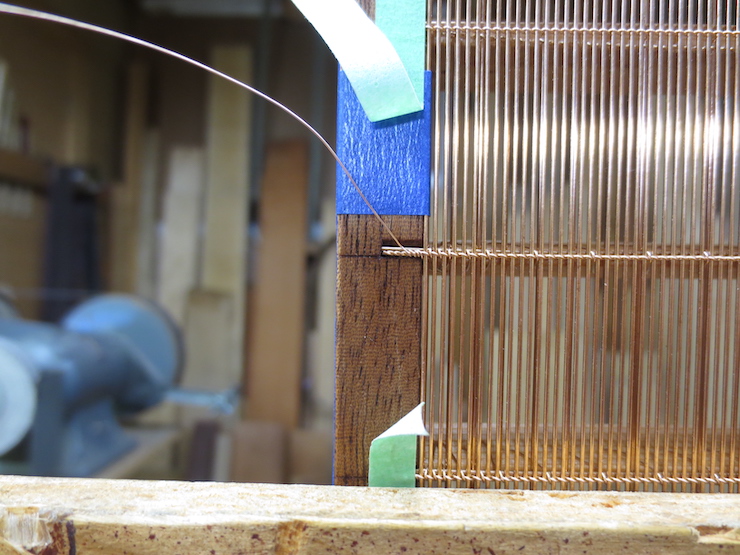
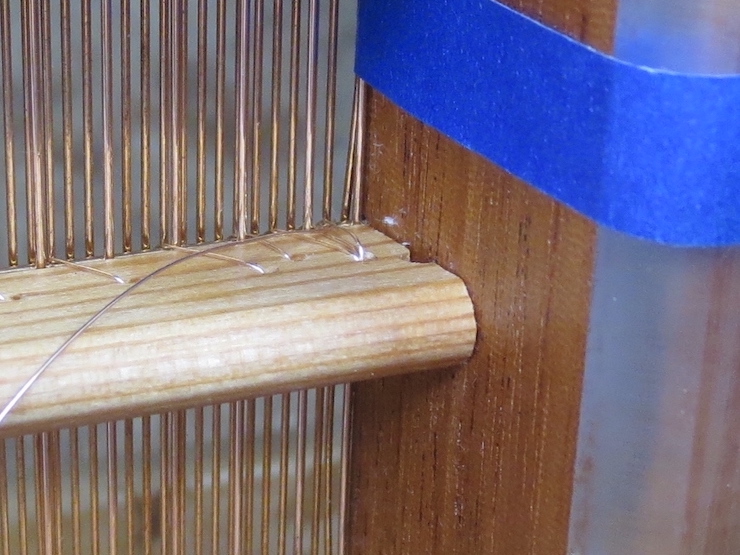
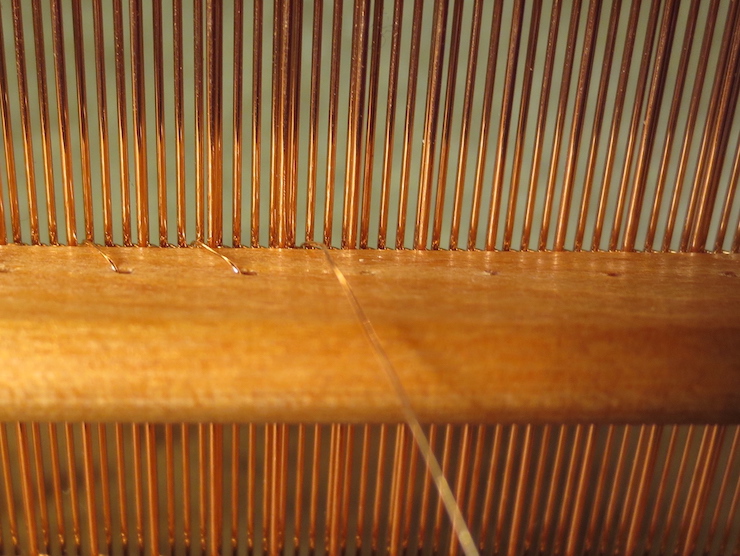
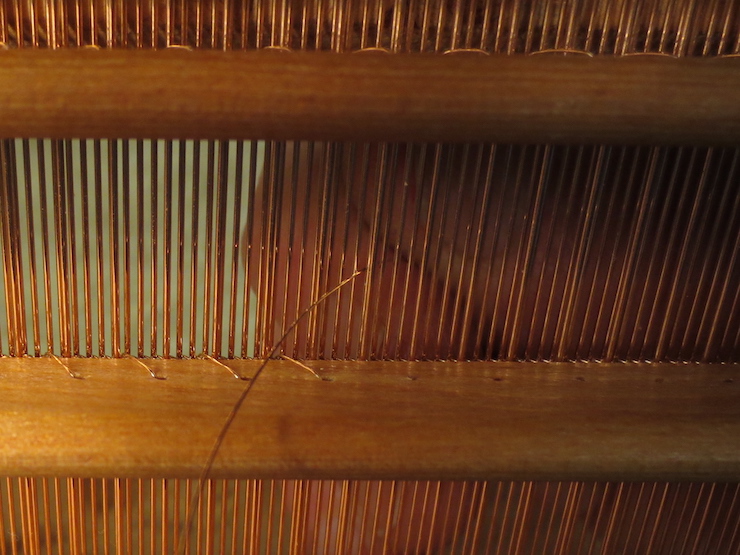
This first rib of this laid mould is ready for sewing. It is one of the middle ribs, the seventh from the bottom. The mould is angled down to allow the holes in the rib to be seen from above so the sewing wire can be fed through them from that direction. Sewing commences from the middle of the rib towards the right hand end. After the right hand side is completed the mould will be tilted up so that the holes can be seen on the other (lower) side of the rib. This is necessary because now the sewing is done from right to left and the wire must enter the holes from the opposite direction.
The sewing wire makes a clockwise spiral looking from near to far. Like the thread on a standard screw. (The chain wires are twisted the same way; I wonder if anyone knows what proportion of moulds in history have right-hand twists. ) A sewing wire passes over the chain wire at regular intervals, between laid wires and through the holes in the ribs to stitch the wire parts to the mould frame. The sewing wire should never cross a laid wire; that stitch would ‘stick up’ and leave a light (thin) spot there in every sheet of paper formed.
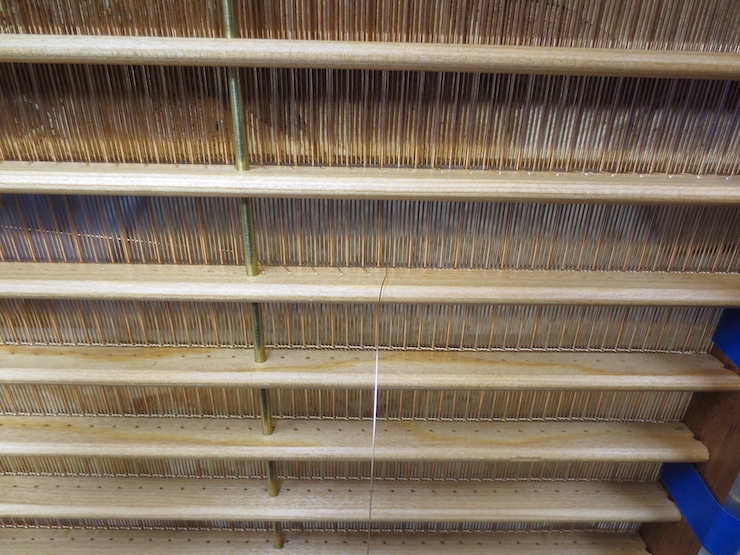
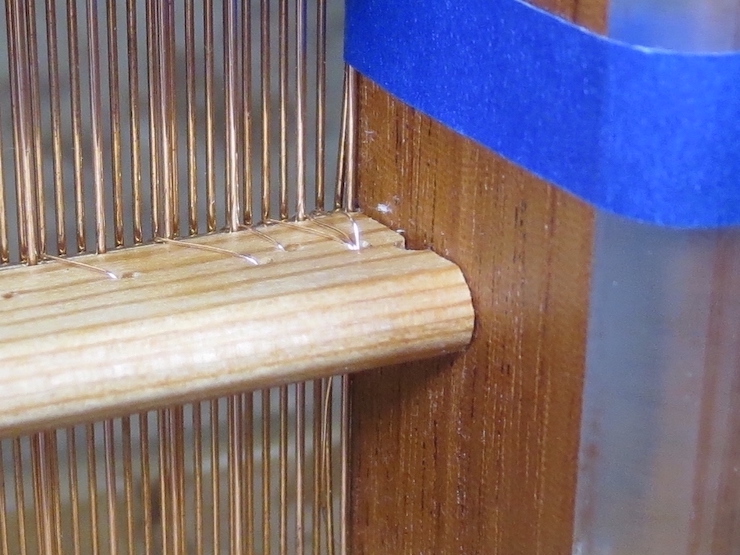
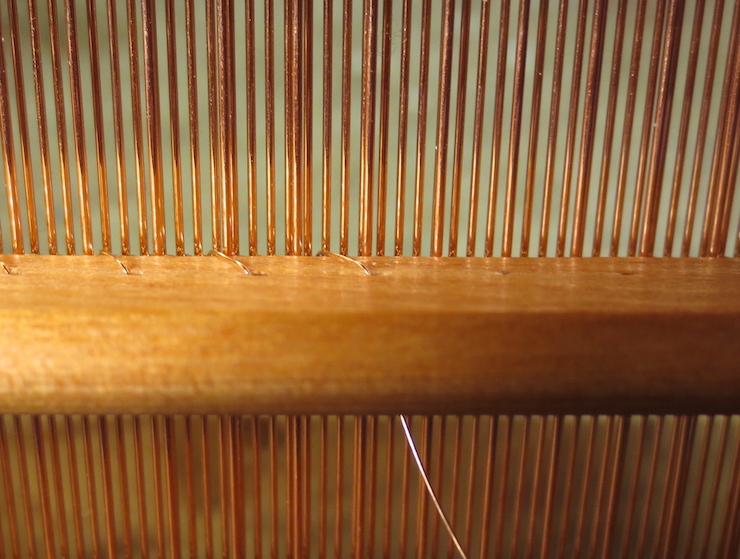
As mentioned each rib is sewn from the center outward. (I am hoping that repetition makes things clearer.) This is the view I have while sewing from left to right. The mould is tilted down so the holes can be seen from above in order to poke the sewing wire through them, one stitch at a time.
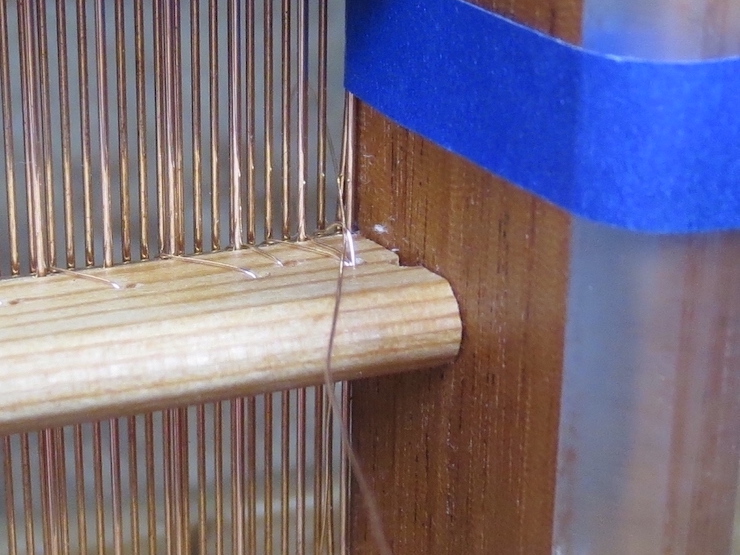
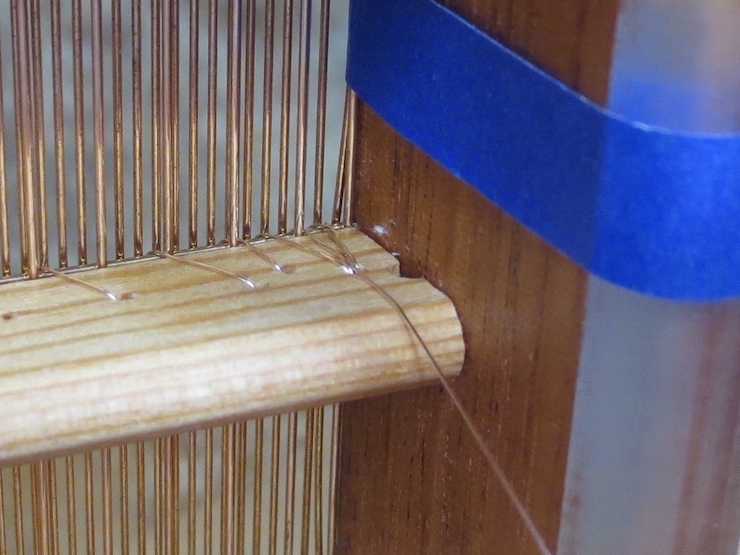
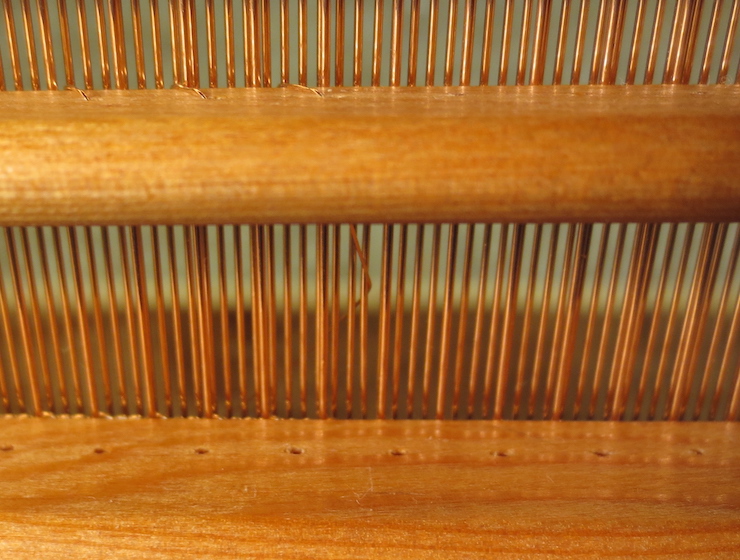
Now the mould is tilted up so that the holes on the lower side of the rib can be seen. The other end of the wire is picked up to finish the rib, this time sewing from right to left.
Every stitch is made in several small steps; it isn’t good to drag wire around a corner to accomplish two steps at once. This would flex the wire and ‘working’ it this way will gradually make it harder and more likely to break. (A broken sewing wire must be cut out and re-done.) Instead the wire is handled in such a way that it stays as ‘fresh’ as possible. Kinks must be avoided as they too will stress and weaken the wire if they are allowed to form. If a loop starts to form it can be gently straightened out before it tightens to become a kink. This becomes second nature with time.
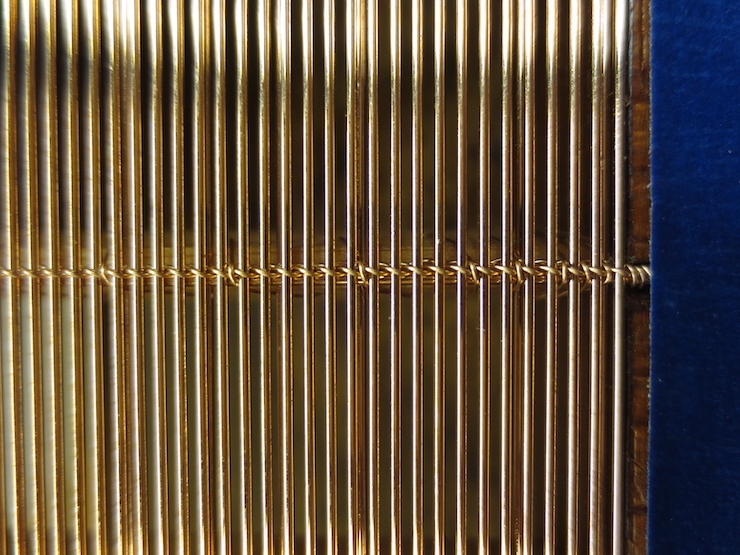
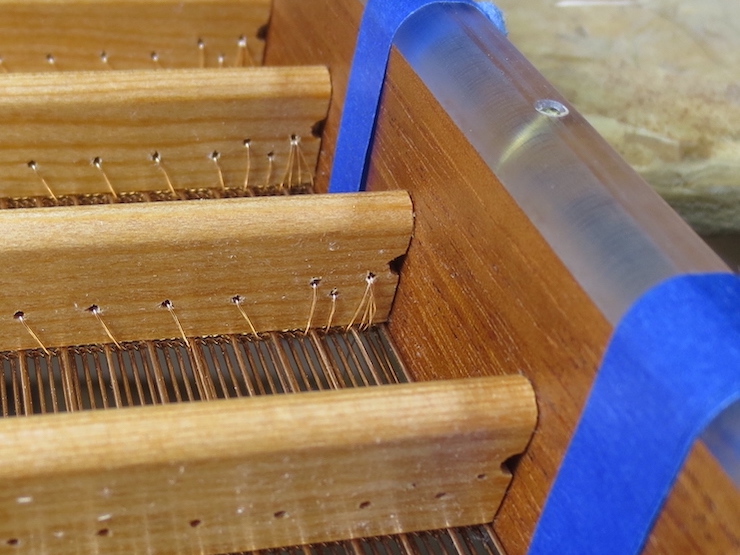
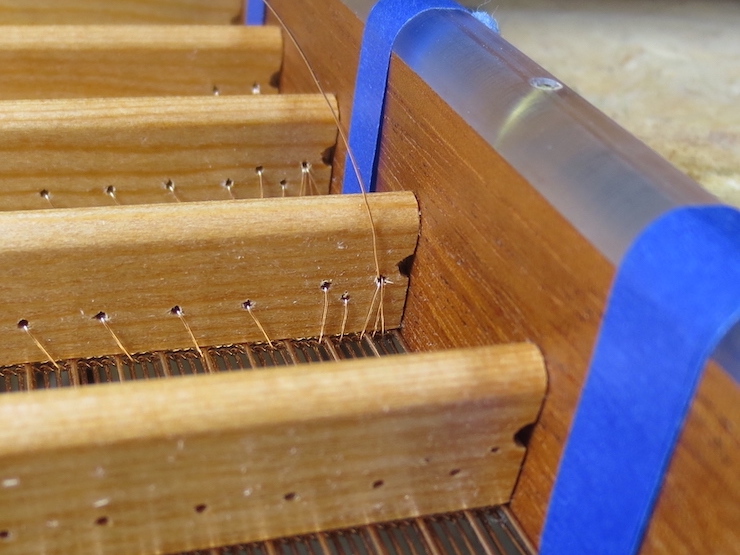
At the end of a rib the stitches are placed in a specific pattern with the last three stitches right next to each other. This pattern is identical for both ends of all the ribs of a mould in order to create a uniform surface for the deckle to press against. A sort of knot is formed (not actually a knot but a way of twisting the wire around itself to hold it in place) and the end of the wire is wrapped two or three times around the twist as seen above. The twist/knot is described in detail below.
The last rib has been sewn, finishing the first half of this mould. Next the mould will be turned 180 degrees in the frame so the other half can be sewn.

When sewing is completed the tape is removed. To finish the mould copper edge strips will be applied to protect the edges of the wire facing.
The ‘Knot’
These two sequences attempt to illustrate the steps of forming the twists that secure the sewing wire at the end of a rib. Above, the first stages of the twist/knot.
The sequence below shows the steps that take place after the sewing wire passes through the hole to the other side of the rib. Passing the sewing wire under the last stitch and then pulling it tight puts in one more twist (which ends up hidden inside the hole).
The Knot Explained in Stages
After passing over the chain wire the sewing wire is passed through the last hole in the rib in preparation for making the very last stitch. The wire is purposefully left a little loose on this (second to the last) stitch.
The wire has passed over the chain wire to form the last stitch and is poked up through the loose space that was left.
The sewing wire is pulled a little but not too tight; notice that there is still space left under the previous stitch.

The wire has been passed out through the long narrow space between the last two laid wires. This was just so the wire could be aimed up through the aforementioned ‘loose space’ to begin the twist around the previous stitch. (The sewing wire must pass back between these same two laid wires so it doesn’t ‘catch’ one of them.)

The loop is pulled out of the wire. You can see that the wire now twists around the previous stitch. Everything is left a little loose for a purpose….
When the sewing wire is pulled tight both parts of the twist are able to distort so they twine more or less equally around each other. This holds the wire in place so it won’t slip back and loosen. (This desireable result is what all the previous fuss was about.) The sewing wire is now fed through the hole one more time and the mould tilted to reveal the other side of the rib. (Next photo.)

Now the wire is passed down between the last stitch and the side of the rib.
Again, it is passed down between laid wires but not pulled too tight.

Now it is passed up between the same two laid wires and up.
When it is pulled tight it puts one more twist around the stitched wire.
Then the excess wire is fed through the space between the last laid wire and the wooden frame so it can be wound three times around a twist on the top of the mould.
Stages of the Stitches
As mentioned the sewing is done in steps to avoid stressing and weakening the sewing wire. The four photos below show a single stitch being made.
(1) The wire is pulled snug after crossing the chain wire. It is always best when pulling the sewing wire tight to grip it near where the stitch is being formed. Pulling far out on the wire invites kinks and stresses the same parts of the wire over and over.
In the early stages a lot of wire must be pulled through every hole in the rib. As sewing progresses the length of the wire diminishes. Even for this small mould there are about 25 holes that the wire must pass through (on each side). If the wire isn’t handled ‘gingerly’ it can be pretty beat up (and weakened) by the time the last stitches need to be made.
(2) The wire is poked into the next hole in the rib and carefully pulled down. After it is in its proper place the wire is gripped near the rib and given a tug to ‘seat’ the wire; compressing the wood around the hole (a little) and locking the stitch in place by forming it around the previous features, the chain wire and the edge of the hole.
(3) Now the wire is poked between a pair of laid wires (below the rib) halfway to the next hole in the rib. The wire is pulled straight out and tugged to ‘seat’ it again. With each step the wire is first gently guided into place and then tugged with a measured amount of force (holding it near the rib) to ‘set’ or ‘seat’ the stitch.
(4) The wire is passed back between the same pair of laid wires above the rib. This way it will cross the chain wire but will not cross a laid wire. Returning to step (1) it will now be pulled straight in (toward the person sewing), gripped near the rib, and given the aforementioned tug to set the stitch. Repeat.
In the photos you can see ‘clumps’ where the backing laid wires interact (visually) with the upper laid wires. This helps you identify the right space to thread the wire through (the same above and below the rib) to avoid crossing a laid wire. Another trick is pulling the sewing wire gently to one side to flex the laid wire sideways to visually indicate the space the sewing wire should pass through on the other side of the rib. It is a good habit while sewing to touch the top of each stitch after it is made (where it crosses the chain wire) to make sure it ‘feels right’ and hasn’t left a ‘bump’ from crossing over a laid wire.
Sewing should not be too tight. In particular a single faced laid mould should not be sewn tightly as the stitches will force the chain wires into the top of the rib (the wood is fairly soft) and the laid facing will bulge noticeably between stitches. The problem will be compounded when the ribs become wet and swell a little.
The main function of sewing is simply to hold the wires securely in place. Each stitch secures a very small area of facing wires; not much force is needed for that. That said, there shouldn’t be too much slack in the sewing wire either. A laid mould MUST be sewn. The chain wires are relatively fragile (and there aren’t many of them) compared to the hundreds of laid wires. They aren’t strong enough to hold the facing together without help from the wire stitches, which evenly distribute the forces that the facing must withstand in use. If the mould were left unsewn, the chain wires would stretch from the weight of all the laid wires, especially during couching (the larger the mould, the worse this would be). A laid wire facing is not strong enough to be attached to the mould only at the edges. It would pull out from under the copper strip and wires would soon begin to bend and break. (On a sewn mould the edges of the wire aren’t really attached along the upper rim of the mould. The twists and laid wire ends are only held in place and protected by the strips of copper but are not themselves fixed to the wood.)
