
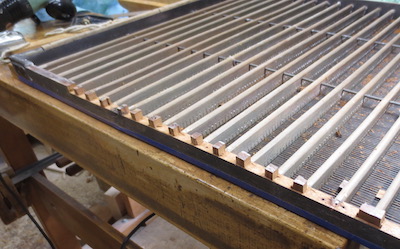
A lot of gorgeous paper was made on this mould before it broke. I undertook to return it to a useable condition and learned a few things in the process.
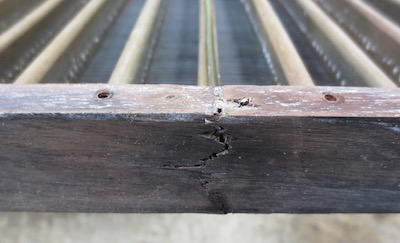


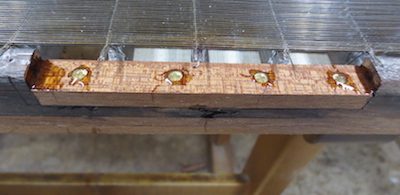
The mould had problems with sides that warped outwards. Braces had been added to restrain this but weakened the mould frame, resulting in a break which made the mould unusable. I decided to repair the mould by replacing parts of the mould frame with staggered strips of new wood which would be screwed down and glued with epoxy. The first step was to rough out a long area on each side to prepare a space to add the first layer.
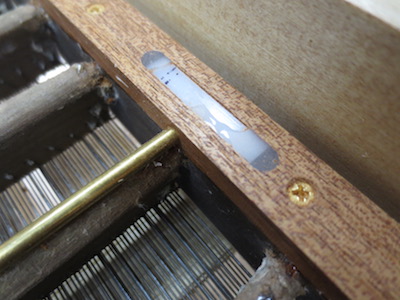
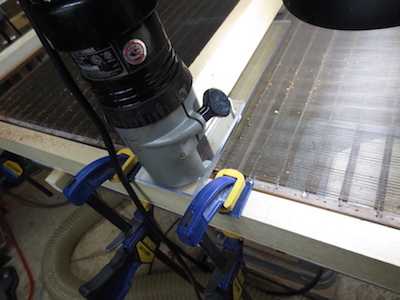
The mould was then clamped into a specially made temporary frame. This provided a reference surface to enable a router to machine a true surface for glueing the new wood strips to.
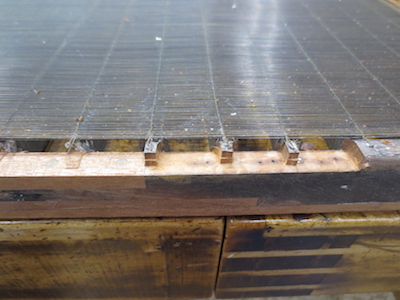
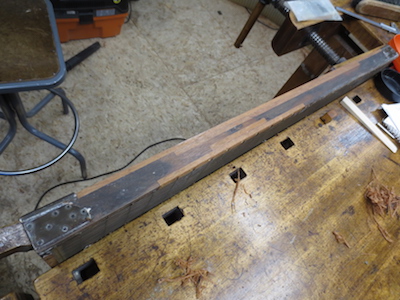
New braces were installed along with the first layer. These are of a different design and should be much stronger than the ones they replaced.
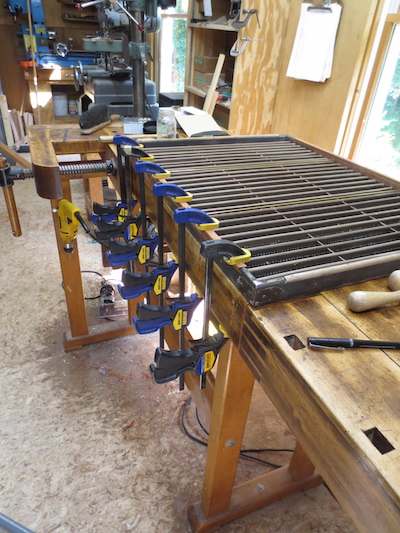
After two layers of wood were added to the bottom, the second longer than the first, the mould was flipped over and clamped in the frame with the wire side up to repeat the same process of cutting away old wood and adding new strips but working from the top of the mould.
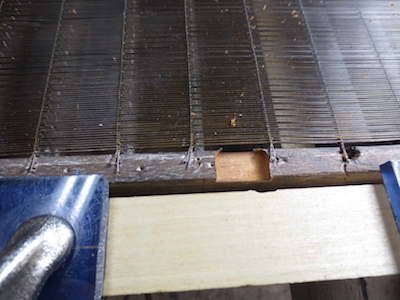
Great care was taken not to let the router bit contact the laid or chain wires. The remaining parts were carefully chiseled way to leave a good surface for gluing the next strip in.
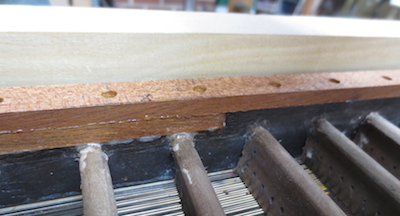
A final layer was then added to bring the patch flush with the top of the mould. The copper edging was tacked back into place, finishing the top repair.
One more layer of wood was added to the bottom and given a rounded shape to match the remaining original parts of the mould frame.
What I learned.
The sight of the ‘like new’ wood that was exposed during the repairs reinforced my suspicions that any kind of finish which attempts to protect a paper mould from water is most likely pointless. I think if the wood is allowed to dry thoroughly between uses the mould will be fine. I think wet wood (wood is hydrophilic or ‘water loving’) allows water to flow better (along the surfaces of the mould while sheet forming) than wood that has been covered with a water resistant (‘hydrophobic’) coating.
Preparing and testing wood before using it is important to prevent the mould from distorting when wet. Unproven wood can lead to multiple problems due to warping; deckles that don’t fit well, difficulty couching, and uneven stresses on parts of the mould which can shorten its life.
Questions
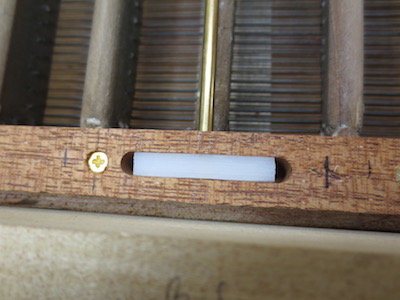
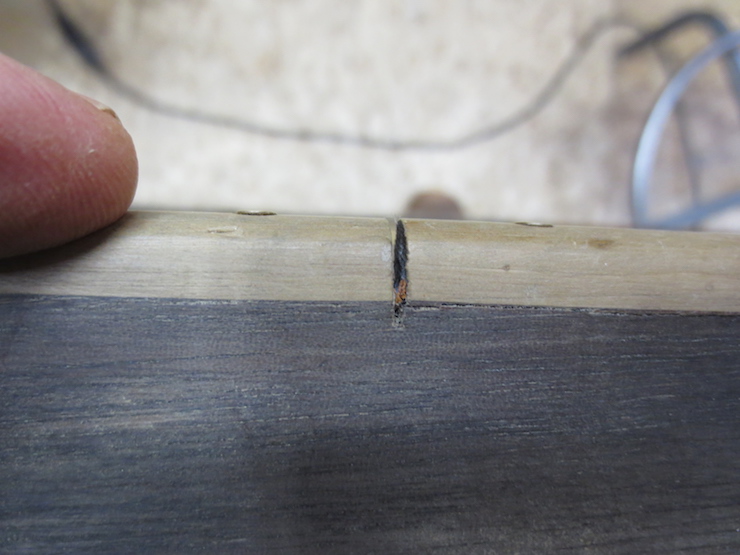
Rub strips made of boxwood or hornbeam (I can’t tell the difference) are nailed to the bottom edges to protect the mould from wear. On this mould (and others I’ve seen) these are attached in short sections that have gaps between them. The gaps seem intentional and it’s hard to see what purpose they serve. You can see here that a single piece of wood was nailed in place (the grain is continuous) and THEN sawn in two! The saw cut goes down into the mahogany frame. Was this to keep the strong, hard, possibly ‘ornery’ boxwood from distorting the frame? There may be another reason but I can’t think what it would be. The nails used to attach it are ring shank nails; possibly bronze boat nails.
Note
This my very first blog post. The choice may seem arbitrary and, in fact, it was! I hope to share a lot of stuff I’ve learned over the years but the order of topics will likely follow no discernible pattern. I hope some of these posts will be interesting to you.

more introduction to the project…age and size…agenda for repair…i.e. reconstruction or restoration. Did the repaired mold go back into use?
LikeLike
Hi Tim!
To quickly answer your question on the boxwood…
The first reason why boxwood is added on the bottom of the mould is to protect the mahogany. Large moulds are heavier, and when handling those around the vat, they are more prompt to be damaged. Mahogany is very good for moulds, but it doesn’t take shocks very good. Having a strip of hard wood on the base will offer a good protection against everyday handling.
As you know, large moulds are slightly curved to compensate the weight when pulling them out of the slurry in the vat. The mould will bend, in the opposite direction, and be flat during the process.
In order to allow the mould to bend, and be “flexible”, the boxwood is cut, most of the time only once in the middle of the long side. If the boxwood isn’t cut, it will actually rigidify the mould en prevent it from bending. This simple cut in the middle makes it possible. I have seen some very large moulds with more then one cut.
One single piece of boxwood is first glued to the mahogany, before assembling the mould. Each end of the boxwood is nailed to the frame with a bronze “grip fast” nail (boat type you are right). This is to prevent it from falling down if the glue is failing with time. The cut is made once the mould frame is assembled. The cut should only be through the boxwood, and stopped before reaching the mahogany.
I will make some pictures next time I will do it, to show you the process in details!
Best,
Serge
PS 1: Great website!
PS 2: Good job on fixing the mould!
PS 3: You are right about the need of adding a finish. When I asked Ron Mcdonald wish type of finish he was using, he told me boiled linseed oil, but just to make them look good. No protection needed.
LikeLiked by 1 person
Hi
LikeLike